Thursday, November 30, 2006

dulces de membrillo

Solon of ancient times is said to have decided that Cydonian apples should be presented to newlyweds. Since they are pleasant to the taste and the digestion, their delicious charm stays in the mouth, so that the breath is made sweet by them.
from alciato's book of emblems

Cydonia oblonga

Coines, Coing, Cydonian apple, Pineapple quince, Quince, Quitte

did you know that the original marmelade was not from citrus but from quince,
derived from the portuguese word for it, called 'marmela'?


i used to think my parents came to canada smuggling quince fruit deep in their suitcases. that's how much i remember seeing this odd, inedible raw fruit [obviously, looking back as an adult it was around only during its season but it did figure a lot in our diet]. i say odd because i was intrigued as a child that it tasted like absolutely nothing, was hard as a rock but smelled of perfume and seemed almost exotic.

well, it tasted like nothing until it was cooked.

related to both the apple and pear, quince is a common mediterranean and european fruit. it has a very rich history and a quite fascinating one. historic foods.com has an exceptional article all about it with beautiful pictures of the delicacies and elaborate designs confectioners would make with the paste. do check it out. it is one of my favourite sites when it comes to food history and information. the splendid table has a short radiocast about the quince you can listen to telling you all about the fruit giving you a bit of its history, how to buy one and how it's prepared.

the quince starts off as a beautiful pink flower growing on gnarled trees. both my parents had quince trees in their yards and remember when they came to bloom. my mother told me ladies would stop to look at the flowers much like one is struck when seeing a magnolia tree in full bloom. [i never thought the quince blooms were anywhere as dramatic though and could compare].

photo: wikipedia, quince

when mature and harvested, it is usually medium sized to as big as a fist and naturally covered in a downy coating however more during its immature state. this is washed/cleaned off when it comes to market and home. the ones i bought still had tell-tale signs of this coating. i tried to show it in the crevices of the photo below.

i grew up with knowing this called a few different ways — ayva, coing and membrillo/bimbriyo. none of my childhood friends at the time really knew what in the world this was if i mentioned it. it was foreign to them. quince has historically been a significant fruit in sephardic circles. in spanish it is called membrillo and is commonly jellied and served with manchego cheese in spain. in the ladino language it is called bimbriyo [the m is pronounced as a b], and is cooked the same way, used in jellies, jams and sweets. it is sometimes used in stews with meats and used as one of the fruits blessed at rosh hashana.

the quince is high in pectin so it gels very easily. this is why it was a favourite for making jellied sweets and various jams and marmelades. as noted earlier, it was the original marmelade. in this post, i am showing you a very, very old [sephardic] sweet called dulses de bimbriyo or in castillian spanish, dulces de membrillo. these are usually made at passover and the new year. this confection is actually in a class of its own called, of course, dulses. they can be made from different fruit and sometimes vegetables, like squash. here is a link for some recipes similar to this one.

it takes a little time to prepare this confection as it must sit over night and then later the sweets need to cure for a few days to firm up properly and form a skin — otherwise they are just sticky and not easily handled. the preparation is quite straightforward and simple. nothing complicated, at all.

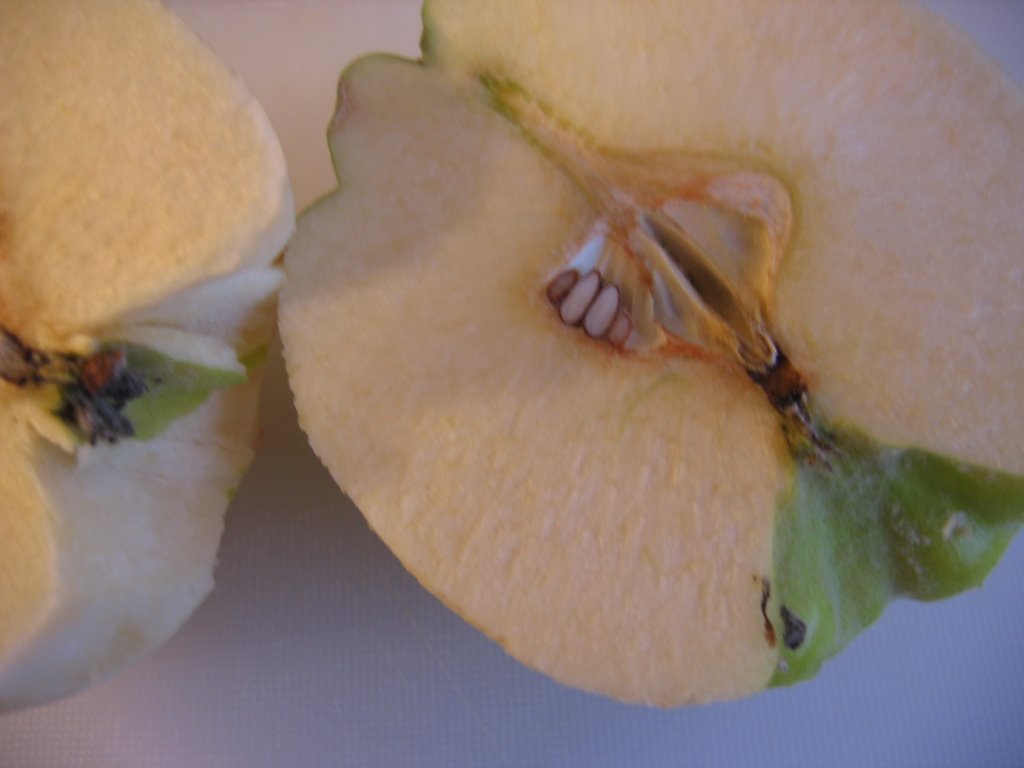
when cut, the quince really does look like a cross
between a grannysmith apple and a pear


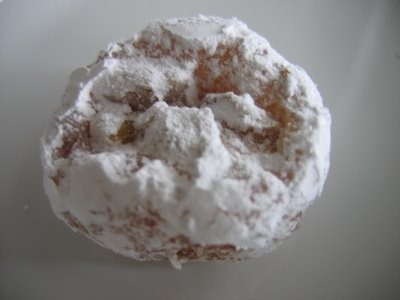
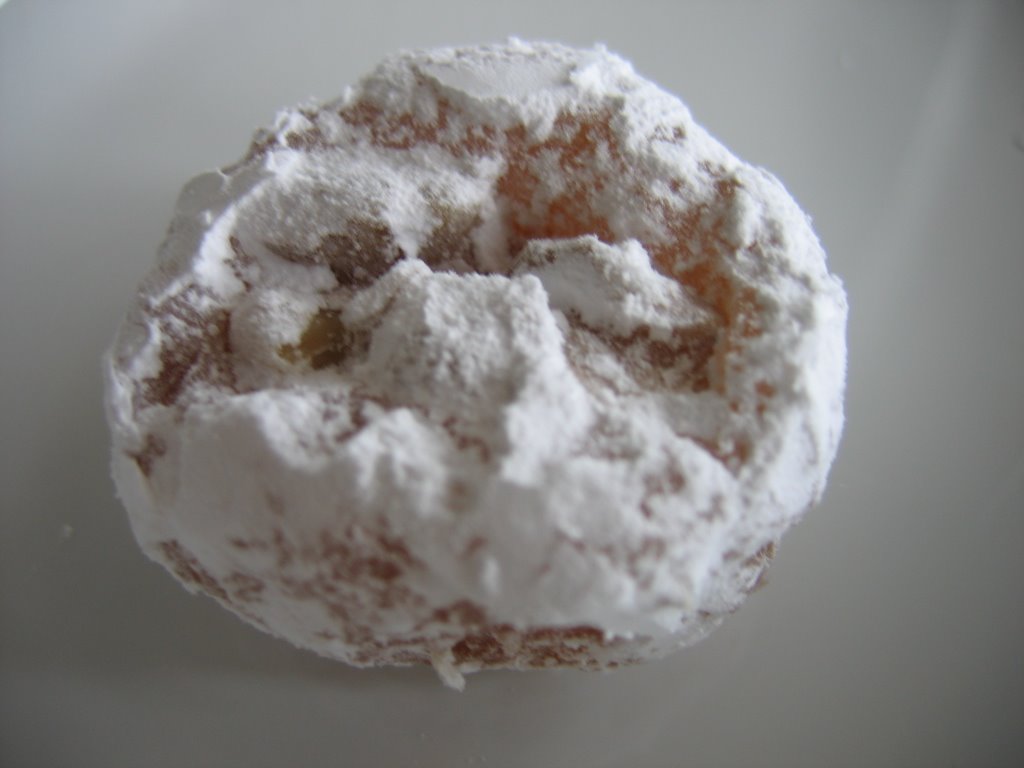
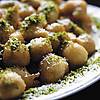
jellied quince sweets
dulses de bimbriyo (dulces de membrillo)

makes approx. 20 to 24 sweets


ingredients:

2 quite large quince
white sugar [equals amount of mashed quince]
lemon juice, from half a small lemon
whole walnut halves or blanched almonds
icing sugar

bowl of water or a few tablespoons orange flower water

method:

peel the quince, cut in half and core them. cut the fruit into equal sized chunks.


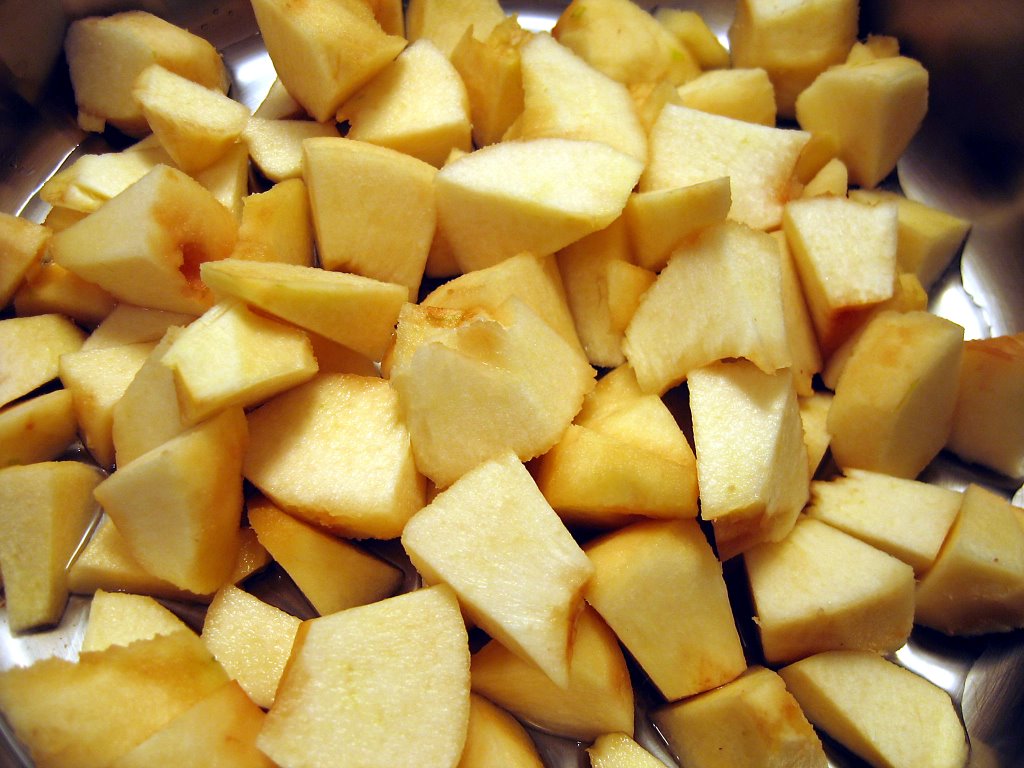
place the quince in a pan with about 3/4 cup of water. bring to a boil and then lower heat to simmer.


cook the quince, covered, for about a 1/2 hour until they are soft. check them every 10 minutes.

mash the fruit very well. you don't want chunks. alternatively, you may pass them through a food mill. do not use a blender or food processor.

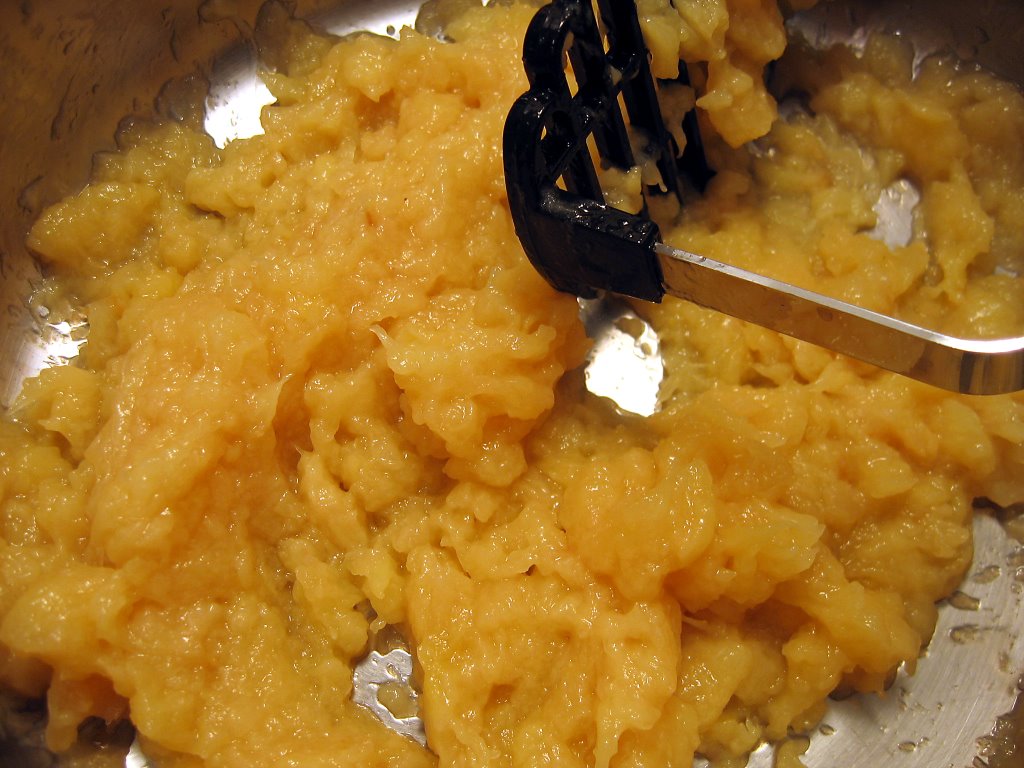
measure out the quince purée and place in a medium sized bowl. remember how much it was and measure out the same amount of white sugar.

add the sugar to the purée and mix well. it will be exactly like applesauce but very thick.

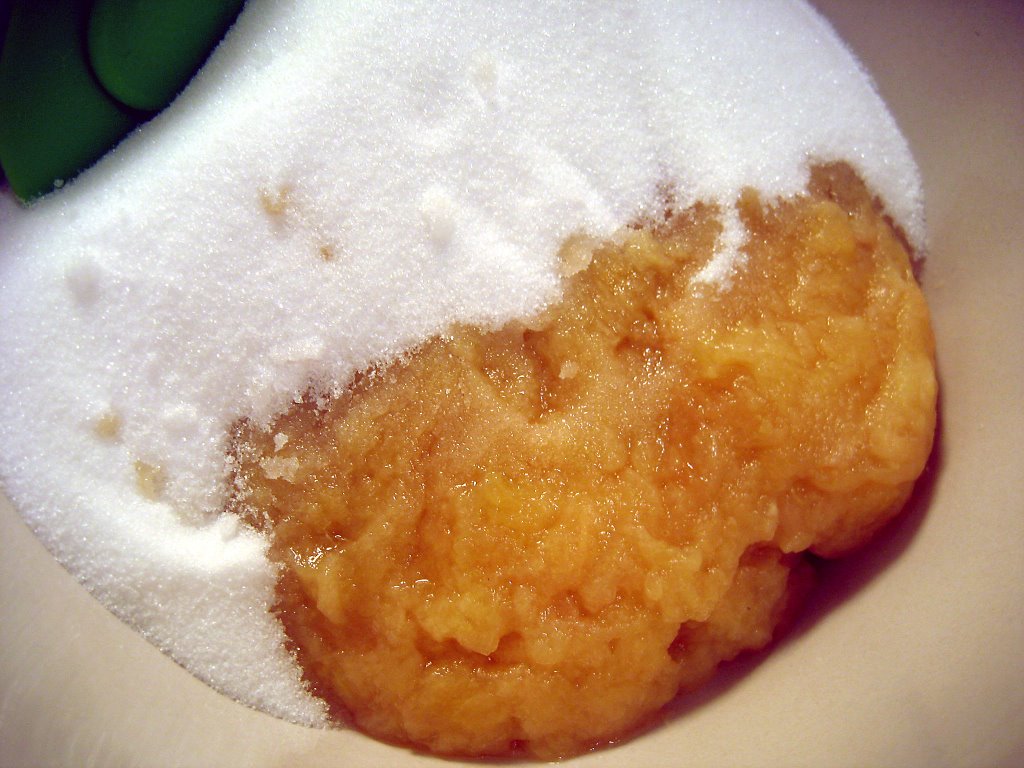
let the quince pulp and sugar sit overnight. cover the bowl with plastic wrap.

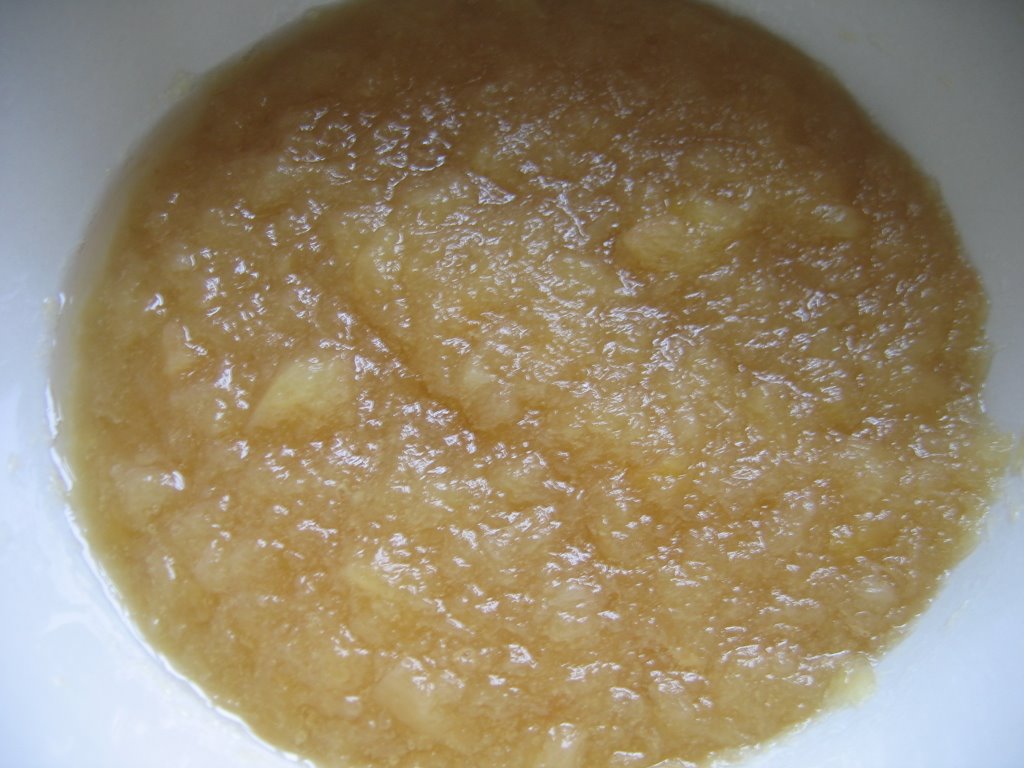
the next day you will notice that it has thickened and gelled up somewhat. place this back in a pan which is wide. add the juice of half a lemon. sometimes we added 1/8 - 1/4 tsp of cinammon.

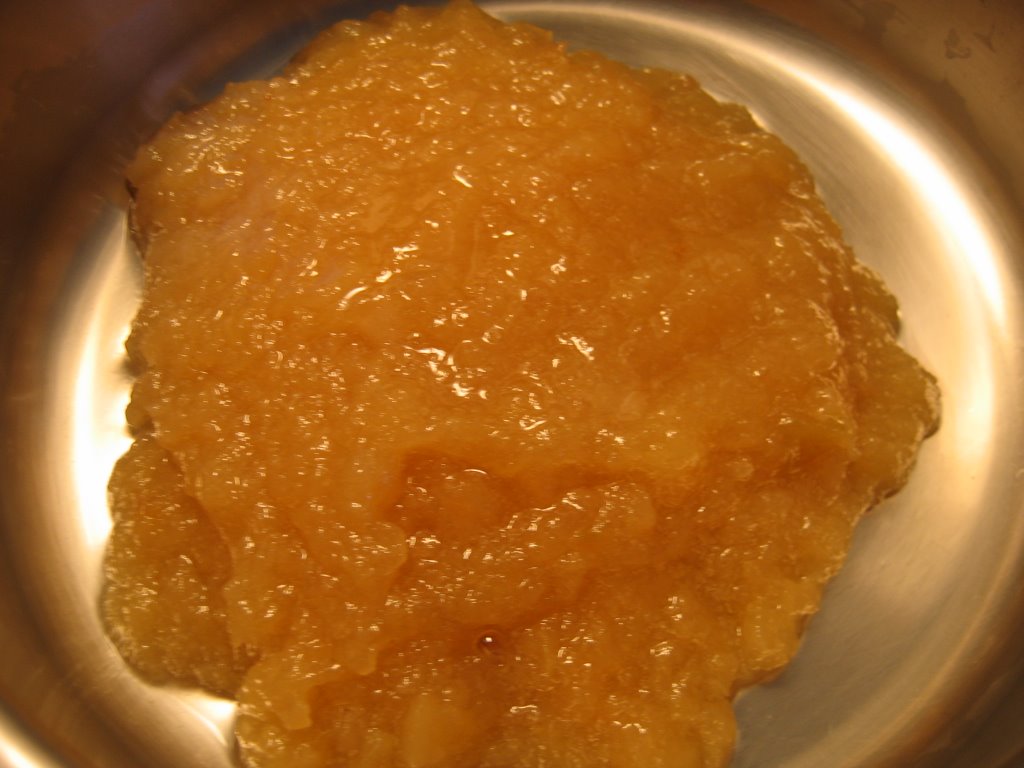
over medium heat, cook the quince sugar mixture, stirring all the time with a spatula. the idea is to cook it down to reduce the moisture content and to bind the sugar with the fruit. the pectin in the quince with help it hold together further.

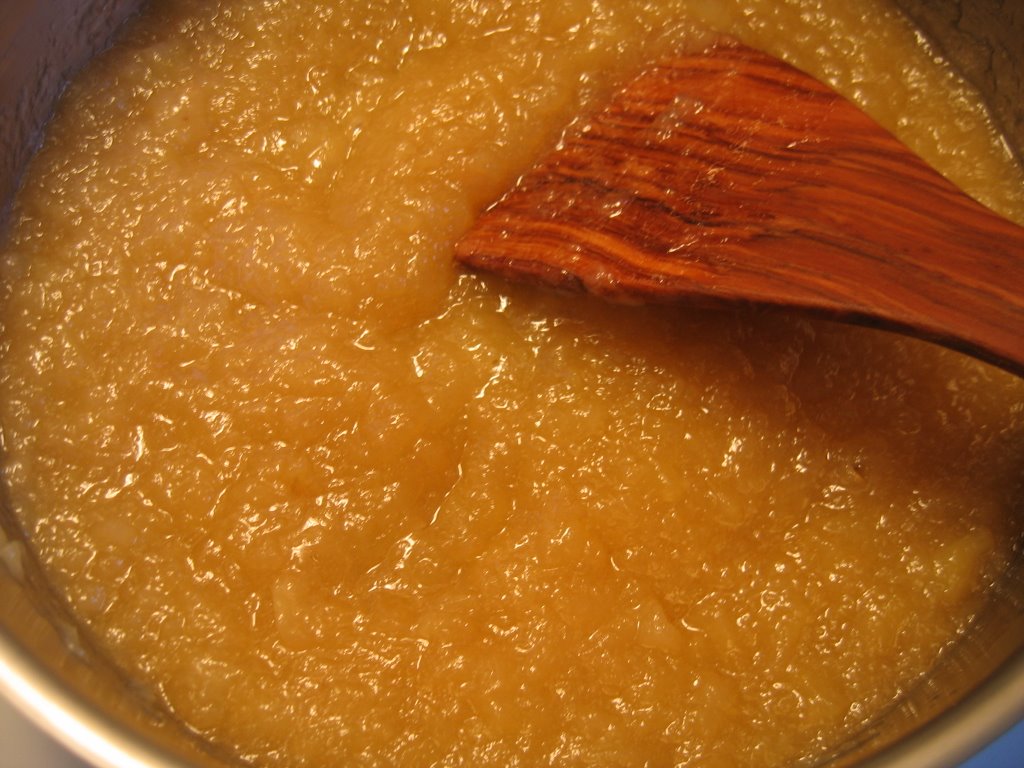
do not leave during the cooking process. it can burn and be ruined. keep stirring the mixture and turn it on top of itself. a good sign is that it will start to clear away from the sides of the pan. keep cooking it. eventually it will become more solid and putty like. it takes about 30 to 40 minutes in total, depending on your heat. do not cook it so much as to dry it out.

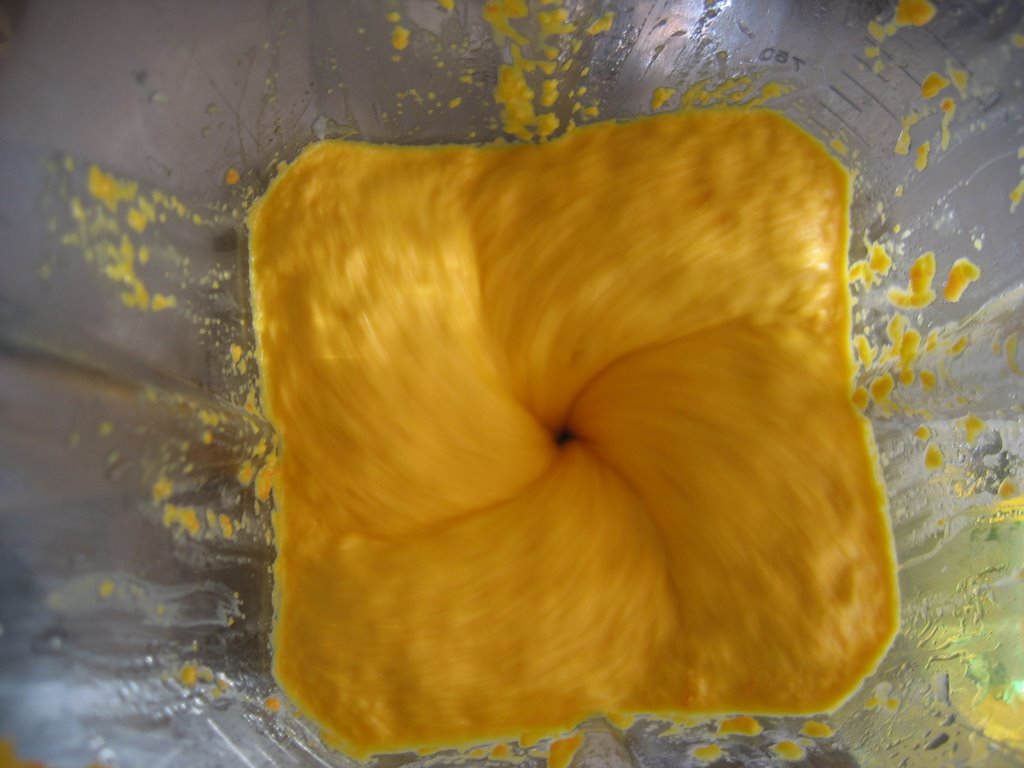
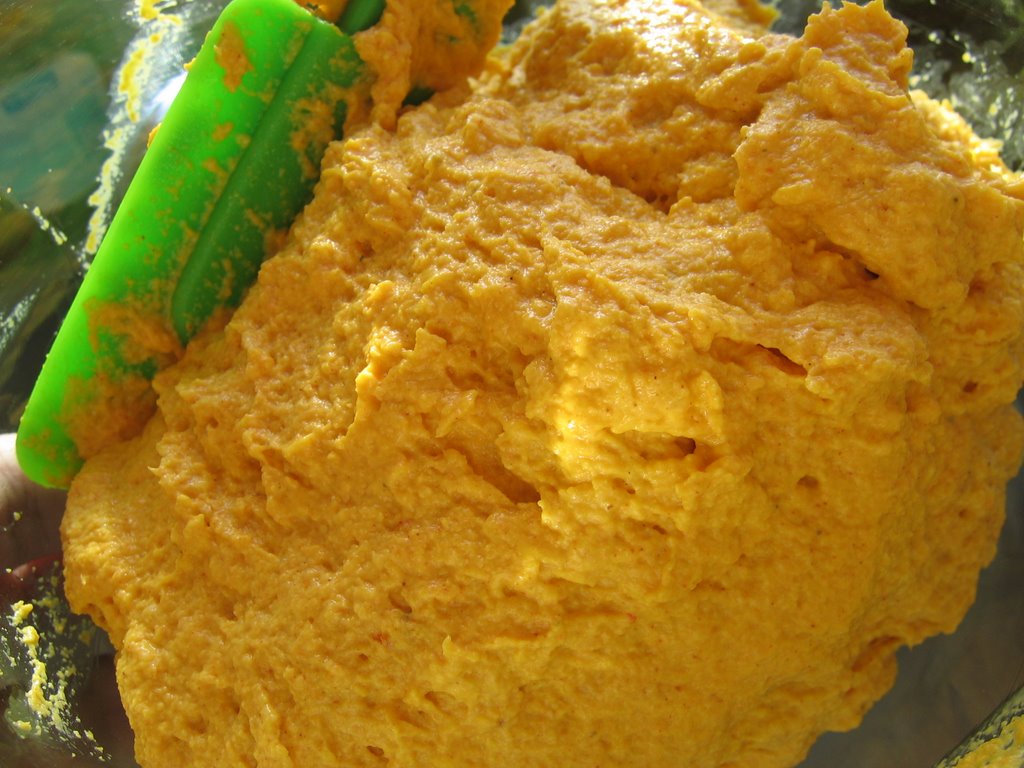
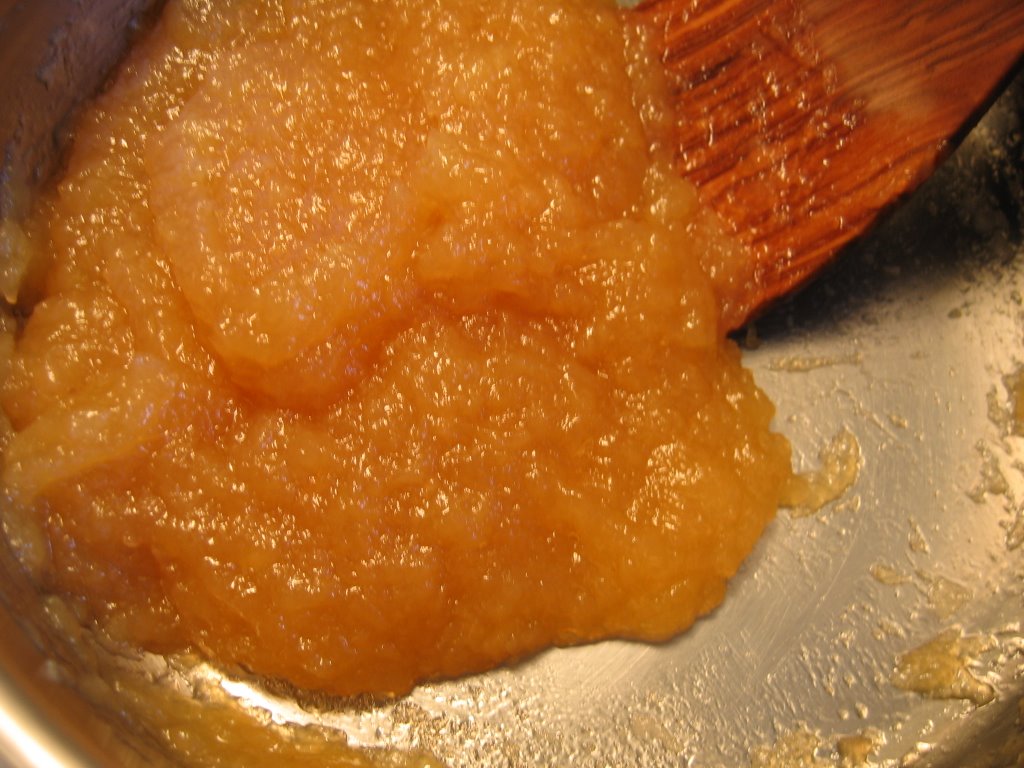
take this off the heat source and let it rest covered for about 10- 15 minutes. it should be warm and not hot. mash it with a potato masher. you don't want any lumps in it. do it for about a minute or so.

this is a picture of how it will look. do not let it cool too much or you will have problems with the following steps. if it does become too cool to work, reheat it a bit and mash it again.

take a spoon and make small one and a half inch [approximately] balls. when you roll the balls, you will need to have hands moistened with water, not dripping wet. put a bowl of water next to you when you work or you can you can also use a bit of orange flower water. put a 1/2 teaspoon in your palm and "wash your hands" by rubbing them together and repeat as needed. place these balls on a piece of parchement or foil on a cookie sheet. parchment is better. you should get from 20 - 24 approximately depending on how much quince paste you used. i started with 1 1/2 c of mashed quince.

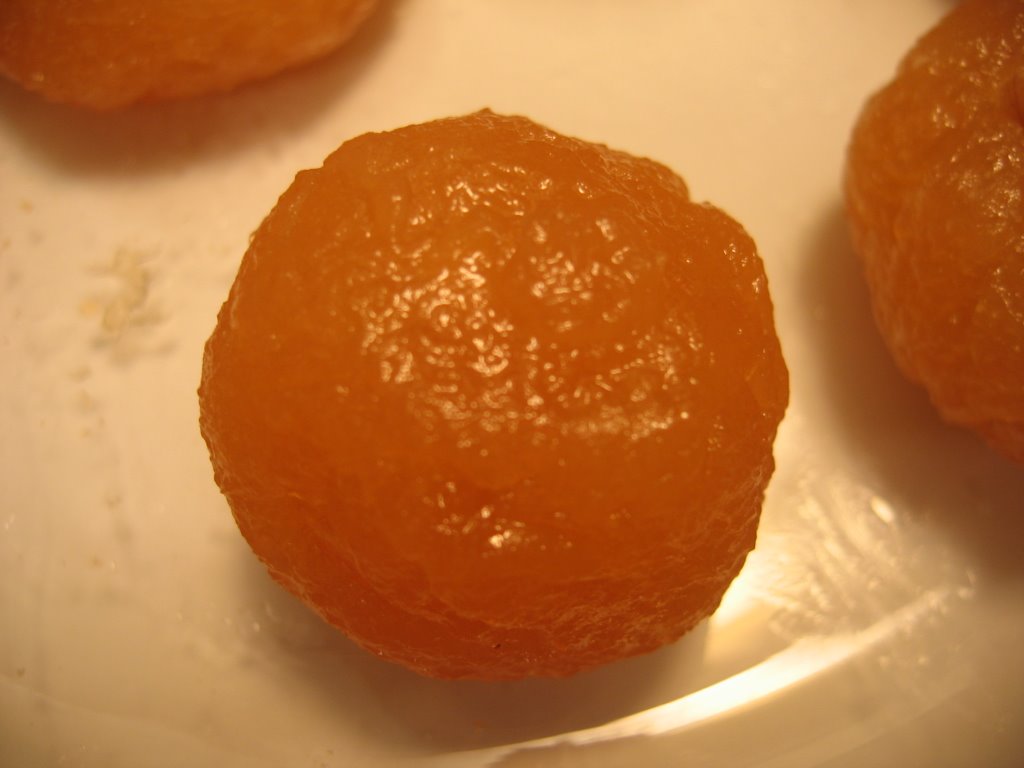
take a walnut and place it in the center. push it in and flatten it slightly. it should be approximately an inch thick.

now let the dulses cure for 24 hours on one side. turn them over the next day and let the other side dry. this is all done uncovered. make sure it's in a dry place.

after they have cured, put icing sugar in a medium bowl or ziploc. place one or two candies in the sugar and roll to cover completely. these can be stored in a tin for a very long time. they actually taste better with age.

enjoy!

Wednesday, November 29, 2006

"the best" ever!

i sometimes laugh to myself when i read or see recipes that are called the best or ultimate and any other such names to that describe one's formula for some preparation. i have to admit however that i am [or have been] also guilty of it at times.

taste is a very personal thing, after all. what one person finds delicious and out of this world may not be another person's idea of perfection. i am sure this is a common finding amongst many a cook or foodblogger.

this also crosses over cultural lines. ashkenazi jews, for example love sweet things. i remember so many times when sephardi friends/family would be put off by some of the things they tried or exclaimed, "what is this?!! this isn't the way it's supposed to taste!" the same experience was often met the other way with anything from, "what's with all these spices?!" to "wow, this is so different and exotic."

in the end, we never know until we try something though many a time a good cook can "tell" by looking at ingredients, measures and instructions. sometimes though we don't take the time to read through a recipe or look at the instructions first. this recently happened to a friend of mine who emailed me for help. after making a batch of cookies which flopped and had to be thrown out, and this person KNOWS how to cook & bake, it was discovered that whoever who put out the recipe, screwed things up. i found the same recipe elsewhere and we figured out what was wrong.

so, getting back to my original intention for this post .... "the best ever," i am going to put in my submission, tongue in cheek, for THE BEST EVER chocolate chip cookies. yes, yes, not original at all. but they are just complete goodness.

these truly are, believe me, 'died-and-gone-to-heaven type cookies' [for me they are, at the very least]. i also say this more because for a cookie with no dairy products such as butter in it, you can't find better. you may though beg to differ, should you try them. beware, they are made with that, oooooh so terrible transfat called crisco™. these ones use the butter-flavoured version. i have used crisco, slash shortening, in small amounts my whole life. i still am alive and breathing. i wouldn't suggest using it as an everyday item but once in a while, in my eyes, is okay. i'm sure we've all eaten a lot worse.

this recipe is actually from the back of the box. a good friend of mine called me one day about a year ago and said, 'YOU HAVE TO TRY THESE!!'. since i trust this person's taste, i made them the next day. wow, they really are that good.

i like to use chocolate chunks instead of chips. the best, of course, are chunks of that silky smooth valrohna milk chocolate that you've broken up yourself and desperately tried not to gobble up in the process.

these cookies are not overly floury or chewy. in fact, they are kind of gooey. they are at their best when cooked for the exact time or maybe even a bit less depending on how well-calibrated your oven is. i end up making balls and freezing most of them on a cookiesheet and then put them in a ziploc to be taken out in various amounts. this helps me not to eat them all at one time! they also have no dairy products in them so depending on the type of chocolate you use.

as an endnote, it's not that there is anything earthshatteringly different in the ingredients. i think it's just the balance of what goes into them that makes them marvelously good.

so without further ado, here it is:

photo: not mine but this is how they look
with chunks of chocolate!
(check out jeff & drew's cookies from link!)

chocolate chip cookies
sans comparaison


ingredients:

3/4 c golden crisco shortening
1 1/4 c lightly packed brown sugar
1 egg
2 tbsp milk (or soy milk or water)
2 tsp vanilla
1 1/2 c AP flour
1 tsp salt
3/4 tsp baking soda
1 c chocolate chips or chunks*

1 c coarsely *chopped pecans [i don't use them]

note: *the recipe says you can omit the pecans and add 1/2 c more chocolate chips. i just keep it at one cup.

method:

preheat oven to 375 F.

cream crisco and brown sugar in large bowl for 2 minutes or until light.

add egg, milk [or soy milk or water], and vanilla and beat one more minute.

in another bowl combine the flour salt and baking soda. add this in 3 additions and blend well.

stir in, by hand, the chocolate chips.

either make balls and squash them a little or drop by tablespoons on a cookie sheet [ungreased] with 2 to 3 inches of spaces in between. they will expand as they cook.

bake for 8 to 10 minutes. i suggest trying 8 first.

remove cookies from oven and let them cool for 2 minutes away from heat [like on top of the oven] before removing to cool further.

make these & tell me these aren't the best!
enjoy!!

Tuesday, November 28, 2006

local flavour goes sour

photo: mccord museum, parc lafontaine, c 1910

something smells sour in my city today.

for the past while a battle has been going on in montreal to save the name of one of the names of our streets which is rich in history and a landmark of the immigrant experience. a street where everything and anything could be found. this is Park Avenue, or as it called here Avenue du Parc. many a jewish family, amongst the other numerous different immigrant groups, grew up either on, or around, this street. this is where they got their start, had their businesses and made a life for future generations.

photo: parc & pine avenue; bilan.usherbrooke.ca

it has been announced today that the battle to save the name of this historic street was lost. i cannot help but say, i am really pissed about this — as are many others.

it's new name? robert bourassa avenue after the now deceased premier of the province of quebec.

whatever.

while it may sound trivial to some, it is a big deal to many montrealers. it is a loss of history and yet another political move of the 101 plan.

i doubt it's over, monsieur mayor tremblay. unfortunately, you didn't listen to all the voices.

to see photos of this great street, take a look at this site.

cholent 101

this traditional sabbath dish is always eaten on saturday afternoons most typically upon return from synagogue sometime around the noon hour. it is a centuries old tradition with great history and lore around it. for those who have never had it, cholents are, in essence, long and slowly cooked stews. they fall into a group of dishes known as hamim/hamin; loosely translated it means hot & long cooked. it is cousins with other dishes such as the moroccan [a]dafina, greek & turkish hamin & iraqi t'beet.

all of these are started on thursday night and prepared early friday afternoon before the sabbath begins to be later set in an oven or on a blech or plata to cook at very low heat. this will cook from just before sunset and will be taken out some time on saturday, depending on the family's tradition. many times eggs are added, cooked all night and eaten at breakfast. these are called huevos haminados [eggs roasted in the hamin]; they become nutty brown inside and are really delicious in spite of what you may think of cooking an egg for all those hours. in modern times, people also cook cholent in the crockpot set on low.

what goes into cholents is entirely up to the cook. the main stars of the show however in an ashkenazi type cholent could not be humbler — some type of meat which will stand up to long hours of cooking [usually tougher pieces of meat], potatoes, beans & lentils of all sorts, seasonings as simple as salt & pepper and spices. all this is topped off with water.

there are as many variations as there are cooks. this may also be made the vegetarian way, omitting all meat. many families have their own special cholent handed down and changed here and there over the generations — families boasting theirs "is the one" to eat.

cholent, plain & simple askhenazi style

note: this can be made vegetarian by replacing the meat with seitan and/or tofu or just using the beans and vegetables. if adding more vegetables, use ones that will stand up to long hours of cooking and will not degrade in flavour or become bitter such as regular or sweet potatoes and carrots [basically, root vegetables].

ingredients
:

1/3 c. beans [mixture of navy/pea beans, kidney & pinto]
1/4 c. lentils [small brown ones]
1/4 c. pearl barley
2 tbsp baby lima beans

4 - 6 small potatoes, reds (ones which won't fall apart)

2 onions, chopped
4 cloves garlic, chopped

1 - 2 lbs flanken/short ribs
3 - 4 marrow bones

1 tbsp salt
2 1/2 tbsp sugar
1/2 tsp pepper
1 tsp paprika
1 tsp onion powder
1 tsp garlic powder

water to cover

method:

soak beans overnight [i wouldn't use/trust quick soak method here]. overnight is best.

measure out and arrange your mise en place for all ingredients.


as with all jewish recipes, fry your onions and garlic in a little oil until lightly browned. do not overcook these. set aside on a plate. i push mine aside but it takes experience and you may end up burning them so on a plate is best.

add the meat and brown it along with the marrow bones.

i also use extra firm tofu, so add these in whichever cut you wish and brown it also. sounds strange but it acts as an extra protein.

re-add the onions and garlic to the meat and then add the rinsed and drained beans, the potatoes [peeled and quartered], the lentils and spices.

add enough water to almost come to the top. do not add to much. cook this for 1 1/2 to 2 hrs on minimum temperature on top of the stove or in a medium-low oven at 300 F.

after 2 hours, add more water as necessary if it has evaporated or been completely absorbed. it should be fine. this is how it will look:


while this is cooking for the two hours, make your vegetable kishka. do this before you will put the cholent in the oven. you may prebake it for about a 1/2 hour to set it if you can't do it right beforehand.

vegetarian kishke — קישקע
recipe from spice & spirit cookbook

kishka is another old world ashkenazi item that is added to cholents as an added starch and way of extending the meal. kishka is basically {gulp} stuffed derma or intestine. well, folks, no intestines used here. only tin foil. the stuffing is composed of flour, oil, a few ground vegetables and a few spices & seasonings. it is usually served with a gravy. there is a version called hel(t)zel, where the skin of necks of chickens are sew together to make a pocket of sorts and stuffed with a similar flour mixture. sometimes the stuffing is enclosed and tied in a cheesecloth/gauze; the mixture then absorbs the flavours and sauces from the cholent during its long and slow cooking.

ingredients:

1/2 c oil
2 stalks celery, cut in 2" pieces
2 medium carrots, cut in 2" pieces
1 medium large onion, quartered
1 1/2 c AP flour
1 1/2 tsp salt
1 tsp paprika
pepper, to taste

tin foil, to wrap kishke
food processor or blender

method:


cut up the vegetables and measure out spices and flour.

in a large bowl, place the flour and spices and mix well to blend.

in the blender or processor, add the vegetables and oil and process until you have a paste.

transfer the paste to the flour mixture and mix well with a spatula until well blended.


measure out a piece of tin foil about the length of your fingertips to your elbow. do this twice.

put one piece of tinfoil on a counter making sure you are looking at it from a widthwise perspective and not a lengthwise one. about 4 inches up from the long edge, place the mixture and form a fat sausage type shape. make sure it's even. tuck in the sides and roll up. do this again to make sure it is well enclosed. i usually place it seam side down when doing the second rolling and use a heavy duty bbq type foil.


add the kisha on top and return this to the oven right before the beginning of the sabbath and cook until the next day at 200 F. depending upon the time of the year when this is made, it may cook for up to well past 12 hours. don't frett, it will be fine. the temperature is low. the custom however, for religious reasons concerning the laws of cooking [or should i say, not cooking] on the sabbath, is NOT to stir or add anything to it, save a cup of already hot water should it be drying out. this is poured on top and not stirred or agitated. the kishke roll can also be cooked alone with the cholent in the oven at 350F for 1 to 1 1/2 hrs. i usually go for the longer time.

by the end of the cooking time, it will have thickened. depending on your tastes, some people like it soupy and some like a thick mass. i prefer mine more soupy and take this into account when adding water. this has long been a matter of contention amongst cholent eaters!

here are two photos of what it will look like at different stages of cooking [i made this on a wedn/thurs to show you].

this is served when families return from synagogue saturday, around noon/1 pm. when made properly, it really is very, very good in spite of it's bad rap from those who either don't like it or have had bad ones.

it can also be made in a slow cooker as is often done however much less water is used due to the way a slow cooker works. i had disasters in the beginning by adding to much water and ended up with soup! it also dilutes the taste.

this is best made and eaten during the colder autumn and winter months. my favourite part of all is extracting the delicious marrow.

remember, the cholent can be made totally vegetarian too by using only seitan and/or tofu. the taste will obviously be different yet still very good.

here, again, is the finished dish with the marrow & kishke:

enjoy!

note: this post is still in the works. i will be adding extra information about this dish and links to interesting information, history and lore regarding it.

Monday, November 27, 2006

festive food fair

anna of morsels & musings downunder in australia has kindly invited me to participate in this year's festive food fair — a celebration of food from around the world for the upcoming holiday season. if you want to participate, click on her link and get your submission in by dec 1st!

thanks for all your hard work, anna.


here are my submissions:

traditionally, most goodies for hannukah are cooked in oil to commemorate the holiday. potato latkes are traditional ashkenazi fare whereas sweetened pieces of dough, deep fried and then either bathed in syrup or stuffed with a filling are the sephardic tradition.

also known in greek as loukoumades, lokma are addictive .... we eat platefuls of these at hanukkah and other holidays like purim.

deep-fried deliciousness!


lokma (bimuelos)

makes a lot. i suggest cutting the recipe in half if it is just for a few people or a small family. they can be made a few hours ahead and are meant to be served at room temperature. do not cover with plastic wrap or they will stick to it! use tin foil. they will be good the next day, too .... if there are any left!

see my post called, lokma lessons, and read it before starting this to get a visual idea of what you will be doing. this version does not use eggs or honey and is suitable for vegans.

ingredients:

2 to 2 1/4 c AP flour
1 1/2 tsp dry yeast [like fleischmann's reg or *rapidrise]
2 tsp sugar
3/4 tsp salt
1 1/4 c (up to 2 c) water [warm]
1 tbsp margarine melted
1 tsp lemon juice
1 - 2 tsp orange flower or rose water [optional]
orange or lemon zest [optional - add to dough]

3 c sugar
1 1/2 c water
2 tbsp lemon juice
1 -2 tbsp orange flower or rose water [optional]

finely ground or chopped pistachios
lemon or orange zest

method:

dissolve the yeast in 1/2 c water with 1 tsp sugar. when proved, add the rest [3/4 c] of the water, salt and sugar to the yeast and then the lemon juice and the flour and melted margarine. start with 2 c of flour. if it is too thin you may add the rest of the flour. mix well to make a thickish batter. add enough water to make a thick pancake like batter. let this rise for about an hour to an hour and a half. it needs to double.

*if you're using the rapid rise yeast, put all the dry ingredients together and add the wet ones. then continue recipe.

while that doubles, make the syrup. add sugar, water and lemon juice to a pot. put on medium heat and stir until all is dissolved. bring to a small boil and let syrup cooking WITHOUT STIRRING for about 10 to 15 minutes. if you stir you may seed/crystallize the sugar and ruin it. test after 10 minutes if it is thick enough. it should be a thin syrup but not too thin. sort of like maple syrup. add the orange or rose waters at the end, if using. keep aside as you make the lokma.

after the batter doubles, heat oil for deep frying. be careful!

put some oil in a small cup about a 1/4 c. with a tablespoon. coat the spoon with oil and dip into the batter and carefully add to the oil. we make small — think quail egg size — balls. re-dip the spoon every few times. fry the balls until golden about 3 minutes or so. turn them in the oil to make sure both sides brown. place them on a paper towel to absorb the oil. make sure that the oil is at the correct temperature — too low and they fry too long, absorb a lot of oil and become very hard and too hot, they will fry too quickly, taste raw and burn.

when they are all fried, rewarm the syrup and dip the pastries in it. the rule of thumb is always hot pastry to cold syrup or cold pastry to hot syrup to aid in absorption.

place on a platter and serve extra syrup to drizzle.

garnish with the lemon or orange zest and pistachios.

you may want to halve the recipe to try it out or if you are not serving many people.

enjoy!

* * * * *

biscuits bretons
butter cookies from brittany

picture to come soon!

ingredients:

1 1/2 c (3 sticks or 12 oz) unsalted butter, @ room temperature
1 1/4 c sugar
3/4 tsp salt
1 extra large egg
1 tsp vanilla extract
3 c cake flour

3 tbsps whole milk, for "wash"

method:

with an electric mixer on slow speed, cream the butter, sugar and salt together.

slowly add the egg and vanilla, continuing to beat on slow speed.

add the flour all at once and mix, scraping down the sides and bottom of the bowl once.

turn the dough out onto a piece of plastic wrap and pat into a 1/2-inch rectangle.

cover completely with the wrap and place in the refrigerator for about 1 hour, or until firm.

preheat oven to 35o°F. line cookie sheets with parchment paper.

on a lightly floured surface, roll out the dough until 1/4-inch thick.

with a 2-inch diameter, fluted round cookie cutter, cut out the cookies and place one inch apart on prepared sheets.

gather the scraps and refrigerate until firm enough to roll out again.

take a skewer or with the back of a knife score a tic-tac-toe design on the cookies. brush them with milk and bake for 10-15 minutes until a light golden color.

cool on a wire rack.

makes approximately 40 cookies. store in an airtight container.

whichever festival or tradition you celebrate,
happy holidays!


what good thing have you done today?

several times in my life — for one reason or another and whether by design or fluke — good things have happened to me which at the time seem to lessen and/or counteract the big, bad and the ugly.

it is probably at those times, i often question if it is divine intervention or just plain luck or simply things meant to be. usually however, i just thank my lucky stars, look up, and utter a small thank you and a ברוך השם. and as they say: what goes around, eventually comes around.


Your Luck Quotient: 64%


You have a high luck quotient.

More often than not, you've felt very lucky in your life.

You may be randomly lucky, but it's probably more than that.

Optimistic and open minded, you take advantage of all the luck that comes your way.


[64% !?!? — sheesh! that doesn't sound great! so 6.4 times out of 10; no wonder i never win the lottery! :-] ]

i have truly come to believe this {what goes around, comes around}. do good & good shall come to you is another thing i remember hearing often.

so why am i talking about all this? just because, i guess the answer would be. part of it though also has to do with the constant barrage of death and destruction going on whenever i turn on the tv or radio or open up a newspaper. like many people, i try to tune it out.

recently i came across something i found interesting:


no, it has nothing to do with anything spiritual or oprah-esque [no comment], it's just a nice site to read about the good things people have done or that have happened to them. it happens every monday.

what nice thing are you going to do today?

my nice thing is going to be to share founder debbie tenzer's site with you.

it's a good read. check it out {not just the homepage!}.

Sunday, November 26, 2006

lemon squares & my first cookbook

i sometimes wonder if people remember what their first cookbook was. i know almost everyone either bought or was given one at some point in his/her life. i also wonder if it was even kept, perhaps tucked away somewhere to be dusted off at some point in the future or sitting on the shelf with the rest of the cookbooks.

being a reformed confirmed packrat, i kept mine.

and, eventhough it's bent up and yellowed, it still brings back good memories of time long gone.

carbon dated prenigellian artifact

no, there are no fancy pictures or 70 dollar price tag attached. in fact, it only cost a whopping 60 cents when i was in grade 3. i have to tell you, this book was the book to have when you were in the third grade at that time. not only did you get the schulz cartoons to go with it, you also got to have fun in the kitchen and eat your experiments.

now, i often groan when it comes to the daily grind of figuring out what to cook and actually having to do it. oh no, not back then. i couldn't wait to try another recipe, probably driving my mother crazy and making a mess of the clean kitchen. who could resist with recipes such as carrots everyone likes, frieda's french toast, and everybody's chocolate soda? i admit, i passed up making peppermint patty's prunewhip [blech! c'mon what kid do you know would WANT to eat that?? what were you thinking, peppermint patty!?!].

i will leave you with one of the best recipes from the book. these have been my all-time favourite. all these years later, i am still making them. but add more lemon juice if like them sour!

i'll let you know .... while they are easy to make, they aren't too difficult to finish off the day you make them either! baker beware.


follow the instructions and you will be well-rewarded with these —


here is the simple step by step:

* i would suggest only adding the powdered sugar when you serve these squares as the moisture from the topping tends to be absorbed by the icing sugar over time.

* these can also be made non-dairy by using parve margarine. of course, butter is better as they always say but when you can't, margarine is the next best.

* if you like your lemon squares very lemony, increase the amount of lemon juice.

now put your nickel in lucy's jar and have a lemon square.

Saturday, November 25, 2006

el pan de shabat

the term, breaking bread literally holds special significance in judaism because challah — the ceremonial sabbath breath — should be torn into pieces and not cut. of course, people do cut it, usually in a special way on friday night and saturday so as not to break the rules and/or tradition. two loaves are needed and are said to represent the double portion of manna that sustained the ancient israelites given to them every friday while in the wilderness — a "bread" of sustenance it truly is.

the egg-rich challah is in reality an ashkenazi invention. the original recipe and form of this ceremonial bread was undoubtedly just yeast, flour and water and made into the shape of what we call "pita". over time, different recipes and forms of sabbath breads evolved. this is an iberian sephardic way, or example, of forming the challah. it is made from seven balls of dough, each representing one of the days of the week. note, however, that sephardic challot are often only made with flour, yeast, salt and water.

it is also formed this way in that it allows for 7 portions which are neatly separated. these portions can be further torn into smaller pieces. it is easier and faster than braiding. the challah is baked in a larger than normal pan which measures 10 1/2" x 3 1/2" x 2 1/4". the baking pan i use is european and comes from my parents, so ..... if you can find this size, it works perfectly. otherwise, i would suggest using two smaller ones and making it with 14 balls of dough (7 in each).

this recipe for this challah is a great all purpose one, not overly sweet but just enough. it always disappears quickly. the recipe for the dough is from second helpings, please [see my previous post here], a cookbook which is much used here in these parts. the recipe itself was written up as "award winning". the difference is that in this version there is aniseed added, which is typically how it is made and liked in sephardic tradition. you may omit it or add more. you may also add a 1/2 tsp of mahlep (mahlep powder). the other difference, as noted above, is in the way it is shaped.

el pan de shabat
[jalá] — challah bread

will make one large challah.
double it for sabbath purposes.

ingredients:

2 tsp yeast, *instant or active dry (1 tbsp packed fresh yeast)
1 tsp sugar
1/2 c warm water

1/2 c warm water
2 eggs
1/2 c vegetable oil
1/4 - 1/3 c sugar
2 tsp salt
1/4 - 1 tsp anise seeds crushed, optional
1/2 tsp mahlep powder, optional

4 - 4 1/2 c AP or bread flour
(or more as needed to make a non-sticky dough)

1 egg yolk
sesame seeds
1/2 tsp kosher salt


2 cucharaditas de levadura "instant o active dry"
(se puede hacer con la levadura fresca: 1 cuchara llena)
1 cucharadita de azucar
1/2 taza agua tibia

1/2 taza agua tibia
2 huevos
1/2 taza aceite
1/4 - 1/3 taza azucar
2 cucharaditas de sal "kosher" o fino
1/4 - 1 cucharadita de granos de anis
1/2 cucharadita de mahlep

4 - 4 1/2 tazas de harina para hacer pan (mas o menos)

1 yemon de huevo
granos de sesame
1/2 cucharadita de sal kosher

method:

place the yeast in the bowl with the teaspoon of sugar. add the warm water and stir. wait until it is proved. if you are using *instant yeast, you can skip waiting and proceed. the advantage of using the instant yeast here is that you can eliminate and extra rise which makes preparing this bread much faster.

once it has proved, add the next set of ingredients, and mix well.

add the flour and mix well to make a non-sticky dough. add extra flour as required to make a slightly tacky dough. knead the dough for a good 10 to 15 minutes. if not kneaded enough, it will result in a texture which is cake-like and not bread-like.

cover the dough and let rise in a warm place until doubled. if using regular yeast, punch down and let rise again and extra 45 minutes or until doubled again and then follow the proceeding directions to form the loaf. the second rising is important if using active dry type yeast as it lets the yeast multiply to its maximum; instant or rapid rise does not need a second rise (though it can be done) since it is a different strain of yeast.

if using instant yeast, punch down and separate into 7 balls.

grease your bread loaf tins very well with margarine or oil. place the balls in the loaf pan zigzag shape. they will all fit; adjust them if needed.


cover and let this rise again until almost doubled, about 1/2 hour.

preheat your oven to 350 F while the dough is in its last rise.

once the dough has risen, make your egg wash with one egg yolk and 1 tbsp of water. brush this all over the loaf making sure it is all covered with the wash.

sprinkle the salt over the loaf evenly and then sesame seeds. let bake for about 40 minutes, until golden brown. the internal temperature for bread should be 200 F.

before baking:

after baking:

enjoy!


if you understand spanish, here are a few extra jewish recipes. si usted quiere saber que significa "kosher", escuche aqui. otras recetas de cocina judia.

Friday, November 24, 2006

not just a regular brown cat — WCB #77

Weekend Cat Blogging — no. 77

this post is two parts. the first is a bit about the burmese breed and the second, a short story about my cat and how he came to me.

the burmese is a cat with a rich history which goes back to burma [myanmar] and thailand. it was originally a temple cat looked after, and doted upon, by monks and one owned and cherised by nobility. it has a personality and character like no other.

in the 1930s, the first burmese was brought over to san francisco. it has since been bred and developed and today is categorized into two distinct classes: the american burmese and the european burmese. they differ in their coat colours and certain physical characteristics. see the links for more information.


map of burma, now called myanmar

photo: graphicmaps.com


wong mau, the first burmese to come to america
her face reminds me of a cartoon character


a very interesting article about the evolution of this breed by cats and kittens magazine.

if it interests you, more information about the specific breed is available here and here.

now for the story of my kitten, or should i say, my cat tale:

several months ago i went to the airport to pick up a very special package which would bring much happiness into my life. waiting nervously — not to mention a long time (damned security and immigration!) — the courrier ... or should i say carrier ... finally arrived. i felt like an expectant parent.

it was love at first sight.

when i opened up the little black sherpa carrier, out popped the cutest little head, letting out a set of mee-yews & mee-yows that made heads spin at the arrivals section of the airport. it was my golden-eyed, sable burmese kitten, a little brown baby of 4 months. soft as silk and purring loudly while "talking" at the same time, he immediately let me know what a bad flight it had been. thank goodness he was able to fly in cabin and not some dark, scary cargohold.

he immediately climbed out inspecting the scene from a quiet corner where i had taken him for the big reveal. after taking a good look at me, he then climbed up me and started licking my face. this was my first introduction to my "loverboy" of a cat who doubles as a dog in a cat's suit. the burmese really is a cat like no other.

from esquire magazine:

THE BURMESE CAT (Michael Walker, Esquire magazine-August 2002) Every so often a cat goes missing in an airliner cargo hold and we're treated to video on the local Fox affiliate of baggage handlers making simpering entreaties to Fluffy to come out. Like most men, I considered such incidents, with their leitmotif of J.Lo-like entitlement, a powerful disincentive to owning a cat. Then my girlfriend brought home a pair of Burmese, and I have had to make an agonizing reappraisal. The Burmese is a cat a man can love because the Burmese is more dog than cat. You can teach them to fetch and roll over. They actually like people. They do just about everything dogs do except snarl at the FedEx guy and force you to walk them in the rain with a hangover. And you want smart? Clambering over my computer, one of them hit the right sequence of keys, creating his own folder, and named it. Let's see your weimaraner pull that off.

read here and see pictures of what i mean from a fellow owner. it's all true.

he follows me from room to room and is constantly by my side. that includes the bathroom. it seems i cannot be let out of his sight ... well, at least for any length of time. he loves to talk and expresses his opinions about everything and even loves to be held like a baby. i call him my "crouching tiger, yowling dragon" because he does the typical burmese crouch next to me for incredibly long periods of time and can let out a yowl when he wants something. puts a siamese to shame, i tell you. he is also fearless and would think nothing about leaving the house to go on city-wide exploration. this is not one fraidy-cat. even the vacuum and coffee grinder doesn't scare him! he also fetches and plays hide and seek. what more could i ask for?

my 'baby', {pink rabies shot collar}, a few months back with his brother
his brother lives in the united states

burmese cats are normally quite long-lived. there are stories of cats living 20 years and longer. my friend's burmese is now 18 years old.

i look forward to many long years with my little guy.

special thanks to the house of the (mostly) black cats for hosting of WCB #77.

.... and seeing as he is related to the siamese, i could not resist adding some bad cat video. i am sure a lot of people remember the following scene from a famous disney movie.


tapenade aux olives vertes ou noires


its name, derived from the provençal word for capers — tapéno, is synonymous with good times with friends and sipping wine on a warm summer's evening. tapenade really is one of the tastiest spreads for a crusty, fresh loaf of french bread.

this olive paste which originates from france, is often and most commonly used for hors d'oeuvres. it can be made from either green or black olives and fortified with other ingredients which are optional. capers are typically a main ingredient but as you will see with patricia wells' recipe, there isn't a caper to be found. her version, from ma cuisine en provence, includes tuna.

if you can read french or just like to look at pictures, here is an article about "la récolte" or harvesting of olives in france.

here are some olives which are specific to israel and here is a very nice display of a myriad of different types in general.

feeling the need to cure your own with lye or to read more? and with enough links to make one's head spin, here you'll find everything olive-related.

the basic elements of a tapenade, often called and likened to as "caviar" are:

pitted black olives [salt-cured]
anchovy fillets
capers
a mild extra-virgin olive oil
Salt and pepper, to one's taste

the preparation is pretty forgiving however the formula for tapenade is always more olives than capers. it can be prepared in a food processor, chopped by hand or done in a large mortar.


basic kalamata tapenade
(only black olives)

ingredients:

25 pitted kalamata olives, coarsely chopped
1 tbsp chopped capers, more or less
1 tsp lemon juice
2 tsp olive oil
1/2 - 3/4 tsp anchovy paste [optional]
cracked black pepper

method:

choose your way of preparing the ingredients in either a processor, a mortar or by hand.


provençal version of tapenade
(only black olives)

ingredients:

1 1/2 cup olives [kalamata or other cured black ones]
2 garlic cloves
2 1/2 oz anchovy fillets
1/2 cup capers
1/2 cup olive oil
Fresh black pepper

method:

coarsely chop and mix.


patricia wells' green olive tapenade

ingredients:

1 170g can of tuna in oil
60 g soft butter
150 g green olives, pitted and drained & chopped
lemon zest
2 tbsp lemon juice
1 tbsp dried basil or 4 tbsp fresh chopped

method:

with a fork, break up the tuna in the can and then put all of it including the oil either in a bowl or a processor. add the rest of the ingredients and process or mix well.


for another green olive tapenade recipe with a gorgeous picture, click here.


figs stuffed with tapenade

Cooking to Beat the Clock Sam Gugino

ingredients:

15 oil-cured black olives, pitted
2 teaspoons capers
1 anchovy fillet
1 teaspoon fresh thyme, 1/4 teaspoon dried
2 teaspoons olive oil
12 ripe, small mission figs

method:

puree olives, capers, anchovy, and thyme together in a food processor or chop by hand.

make a slit in the side of each fig and spoon about 1/2 teaspoon of tapenade into the fig. pinch opening closed. allow 3 figs per person.

yield: 4 servings

if you want to know how to make 4 different kinds of marinated olives, look at this from videojug.com, a site that i like a lot:


Thursday, November 23, 2006

simple everyday coleslaw

this coleslaw is easy to make and tastes fantastic. it can be easily doubled and lasts for a good week or so in the fridge, getting better the next day or two after it is made. this one does not involve mayonnaise and is made from a simple sweet & sour dressing with plain old vinegar, sugar and oil.

from wikipedia:
Coleslaw was probably consumed in its earliest form in the times of the ancient Romans. However, modern coleslaw could not have arisen until the 18th century as mayonnaise was not yet invented. The term "cole slaw" arose in the 18th century as a partial translation from the Dutch term "koolsla", a shortening of "kool salade", which means "cabbage salad". It was commonly called cold slaw in England until the 1860s when "cole" meaning cabbage was revived. "Cole" originates from the Latin colis meaning "cabbage", and is the origin of the Dutch word as well. In addition to calling it "coleslaw," U.S. Southerners also refer to it as "slaw." Because of this separation of the two syllables and the establishment of "slaw" as its own word, various other kinds of "slaw" are now known, including broccoli slaw or carrot slaw.

and before starting, a note from yiddishe mama — a ukranian jewish food blogger:

To make any coleslaw really delicious, mix cabbage and some salt first and using fingers crumble together for [a] couple minutes. Please adjust amount of salt after this.


everyday coleslaw

1/2 c white vinegar
4 - 5 tbsp white sugar
6 - 7 tbsp vegetable oil
1/2 - 1 tsp salt
1/4 tsp onion powder
1/8 tsp pepper, or more

1 [one pound] bag cabbage slaw mix
1 small clove of garlic, chopped

or make your own mix:

1 small cabbage, finely shredded
[to equal 1 lb/500 g]
2 carrots, shredded coarsely
1/2 small onion, finely sliced
1 clove garlic minced

notes before starting:
  • i like to salt the shredded cabbage beforehand and let it drain for about 2 hrs to lose some of its excess water/moisture.
  • if using the mix that comes in a bag, red cabbage will colour the mixture pink. not my first choice but all that was available for me.

place the sugar and vinegar in a microwavable bowl or a saucepan. microwave or heat on medium heat so that the sugar dissolves and the vinegar is very hot. add the salt and onion powder and stir to dissolve. add the oil and pepper and stir well.

if using the raw vegetables, prepare them so they are finely sliced. place the vegetables in a medium bowl and pour the dressing over it. let it marinate for one hour, stirring every 15 minutes.

let this marinate overnight and serve the next day.

Wednesday, November 22, 2006

fig, strawberry and goat's cheese tart

photo: the figs of israel [check out the different kinds]

i was excited when i found the following recipe since it included some of my favourite things {i hear a song, somewhere} — figs, strawberries & chèvre. we make quite a bit of goat cheese in quebec and here is a link to l'association laitière de la chèvre du québec. it has lots of information and recipes but it is only in french. here is an english link. this is something further about goat's cheese from foodtv here in canada and an article from canadianliving, our national food & homekeeping magazine which always has incredibly good recipes.


this tart recipe is something i have in the works, so no picture yet. that will be included soon. i found this a few years back and have been meaning to make it for a long time now. sounds good, doesn't it?

Fig, Strawberry and Goat's Cheese Tart

from Chef Robert Jutras at Culinary Conspiracy in Ottawa


Ingredients:
  • 10 oz chevre
  • 2 oz sugar
  • 4 eggs, separated
  • 2 tsp flour
  • 4 oz 35% cream
  • 1 orange, juice & zest
  • 2-3 figs, cut in sixths
  • 1/2 cup strawberries, chopped
  • 1/2 tsp vanilla
  • pinch nutmeg
Method:

Soak strawberries in juice squeezed from the orange.

Line a 10" flan pan with sweet pastry* and prebake for 5 minutes and then cool

Cream chevre and sugar

Add egg yolks one at a time.

Add flour and 35% cream, beat in.

Add vanilla, nutmeg and orange zest.

Drain the strawberries from orange juice and add

Beat egg whites until soft peak stage and then fold one tablespoon into the above mixture

Fold in remaining whites and pour mixture into prepared shell.

Place the cut figs, interior side up, attractively over the surface, gently pushing them down a bit into the batter.

Bake at 350 for 10 minutes and then reduce heat to 325 and continue to bake for another 20-25 minutes.Cool.

Enjoy!


Short Pastry (Pate Brisée)

Ingredients:
  • 1 1/3 cups all purpose flour
  • 1 1/2 tsp granulated sugar
  • 3/4 tsp salt
  • 1/2 cup butter
  • 1 egg, beaten
  • 2 1/4 tsp milk

Method:


Mix the flour, sugar and salt together in a bowl and make a well in the centre.

Put the butter and the beaten egg into the well and then mix all the ingredients together quickly with the finger tips until crumbly.

Gather the dough together and knead gently on the table just until the ingredients are relatively smooth (do not overwork).

Form the dough into a ball, cover with a cloth or wrap in plastic wrap and let rest for at least an hour. Roll out the dough on a floured surface, line the pan and leave in a cool spot for one hour before baking.

The pie shells can be prepared 24 hours before baking and filling.

crazy dreams & shakedowns in town

wow, i must have been real tired because i had the weirdest dreams about being chased by bananas with legs and other fruit last night. completely bizarre but obviously blog-related.

this should teach me not to post entries before bed!

go to the dreams foundation — a very well-done canadian site dedicated to everything dream-related. i never remember mine anyway.

excitement here locally is that earlier this week (or was it last?) a russian spy was arrested!

in addition, today i heard there is a HUGE bust on the italian mafia in montreal. they have arrested scores of people, and sent out more than 700 police officers on this one. apparently, some of them were for suspects working at the airport and the canada - usa border not far from here and also arrested was the 82 yr old father of one of the ringleaders!

what next?

tropical fruit

first of all, let me start by saying i have always had a love/hate relationship with certain foods mostly due to several food allergies. lately, things have gotten a bit better. some of my allergies have now changed & shifted and miraculously, some seem to have even disappeared.

like a lot of people, i am also partial to texture of food. anything slimy like okra or natto makes me recoil. i recently threw out a dish i made which, for some strange reason, ended up having a glutinous and stringy consistency. funny, there are people who love this.

photo: wax jambu from malaysia

this leads me to the subject of tropical fruit, something i have always tried to like but can't get around it. memories of gasoliney smelling papaya and ripe, gooey mango — amongst other more "boring" north american type fruit — being prepared by my mother to feed her zoo of parrots and tropical birds will always be with me. though many a time i tried to force myself to like these fruits, i just can't. i know it's strange, especially when i get questioning looks as to how i could NOT like these things. i didn't say ALL tropical fruit, pass me litchis, mangosteen or rambutan any day — i won't say no.

interestingly enough, i learned through the painful experience of my friend's brother, that the mango tree is related to those potentially deadly peanuts. the sap of the tree is highly irritating and touching it caused severe hives with a trip to the emergency ward.

all this to say that while i am not a fan of certain tropical fruit, i still find them amazingly exotic and beautiful to look at. trips to chinatown and indian shops make me stop and inspect them, wishing my aversion to them would disappear. even their names, custardapple [cherimoya], sapodilla and guava sound appealing.

here is an amazing link to a great site where you can get a view of a myriad of tropical fruit [and some regular ones we know but with an amazing variety shown], some of them you may never even ever have heard of before. there is also a section on bananas and mangoes — of every imaginable variety. take a look at the "praying hands bananas" in the section on bananas and then make sure check out the sections at the bottom for the links about caterpillars, the obscenely pornographic pseudobombax ellipticum and one amazingly good looking baby. very cute, i must say. this is the author's (other) photograhy site, with several recipes.

this is another link for a vast variety of tropical fruit to look at.

Monday, November 20, 2006

breakfast sausages of a different sort

i am always looking for different ways to cut certain unhealthy things out of my diet or adding new interesting and tasty alternatives [to meat]. while i still enjoy eating meat here and there and savour it when i do, i tend to eat a lot less than i used to.

these breakfast type "sausage" patties are a neat alternative to the regular meat ones and have the added benefits of being made from grains, are compelety vegetarian, and are healthy — apart from tasting great.

note that when you make these, there are different kinds of bulgur wheat grinds — basically, coarse, medium and fine. each grind has a specific use. here we are using a medium grind, or the number 2 one. also, you need vital wheat gluten flour which is necessary to hold the mixture together and give it a chewy texture. alone, it would not hold up without it. sage is also essential for the flavouring, so don't hold out on it.

remember, any recipes i post here are open to interpretation and none of them are really going to be exactly the same as the real mccoys however i want to post things that are almost the same as the real thing. i was quite happy with the results of these and always have a batch in my freezer for when i am in the mood for them.

vegetarian style breakfast sausages

ingredients:

1 c. bulgur wheat [no. 2 type (important)]
1 c. boiling water

1/2 tsp allspice
1 tsp ground black pepper
1 tsp onion powder
1 tsp ground sage
1 tsp (or ground up cube) vegetarian beef flavouring
1 tsp salt

2 1/2 tbsp olive oil
1 clove garlic, finely chopped
1/4 c. vital wheat gluten flour

1 egg white

method:

in a bowl, combine the bulgur with the spices and the hot (boiling) water. let the hot water get absorbed by the bulgur by covering the bowl so the steam does not escape about 20 to 30 minutes.

stir in the oil, garlic and vital wheat gluten flour and mix well with a wooden spoon. add the egg white and mix again. let rest 10 minutes.

prepare a cookie sheet and heat oven to 350 F.

take a 1/4 c. measuring cup and fill it about half way. compact this well by pressing down. make sure it is well pressed. carefully remove the patty by turning it over and whacking it down on the cookie sheet. fix it by using your hands to press things back together.

do this will all the mixture. bake for about 10 to 12 minutes until it is firm and somewhat browned. you may turn them and cook another 2 to 3 minutes if you like but it is not necessary. take them out of the oven and let them cool a bit before handling.

use right away or freeze. you can also fry these later along with your morning eggs in the same pan.

Sunday, November 19, 2006

a soup any bunny would love

a recent abundance of carrots has led me to make several dishes involving my ex-foe daucus carota. i used to be very allergic to raw carrots until recently and found out from my allergist that many people who, like myself suffer from severe hayfever, are allergic to raw carrots & celery. funny enough, when cooked, the chemical structure of the carrots (and celery) is altered and pose no problems in that state. getting back to cooking ....

one of these dishes, which i sometimes make, is a purée of carrot soup. while this was tremendously popular at certain times, visions of the '80s return, this is a simple soup which can easily be altered to suit your taste. what i am offering here is one version and a sort of framework for the base of the soup; go ahead and put whatever spices & seasonings which suit your fancy. the use of the almonds is optional but is part of this specific recipe. this soup needs to be thinned and can be altered to meet your desires for whatever texture you prefer, using milk or cream or even a nondairy liquid such as almond milk or soy milk.

somehow this recipe seems best when made in a cocotte. what's that? see the recipe below. wouldn't you like one of those babies?!


potage crème de carottes

ingredients:

3 tbsp mild olive oil or vegetable oil or butter
2 medium onions, chopped
1 - 2 cloves garlic, chopped
6 medium/large carrots
10 - 12 blanched almonds
2 tsp salt [less if your stock is salted]
1/4 tsp black pepper
1 1/2 tsp ground cumin
3/4 tsp ground caraway
1/8 - 1/4 tsp cinnamon
2 tsp sugar
2 - 3 tsp pomegranate molasses, optional
4 c stock or water, your choice
cilantro or italian parsley
milk or cream or non dairy milk {almond or soy, etc.}

method:

chop onions and garlic. either cut carrot into small chunks or put through a processor to coarsely grate. this will allow the soup to cook more quickly though here it's not really necessary.

in a cocotte [dutch oven or soup pot], add the oil and heat over a medium low fire. place the onions and garlic and blanched almonds in the pot and sauté until lightly browned. add the carrots and cook stirring for 10 minutes. add the spices and seasonings and cook another 5 minutes. add your stock and then cook on a low heat, covered, for about 40 minutes. give a stir every once in a while.

here you may use a hand immersion blender directly in the pot, or as i do, place everything once it has cooled a bit to avoid burns, in a blender and purée it completely. it can also be done through a food mill.

return this to your cocotte and add what you want to use to thin the soup in whatever proportions you choose. i would start out with small amounts and test along the way. adjust your seasonings and spices too.

garnish with chopped cilantro or parsley. you may add toasted slivered almonds on top or crunchy, toasted croutons.

enjoy!

Saturday, November 18, 2006

rappin' pilgrim

american thanksgiving has kind of always been an oddity of sorts for me and other canadians. while our southern neighbours are roasting turkeys and snow is supposedly falling here [less of late due to our much changed climate over recent years], our thanksgiving took place way back at the beginning of october! for some reason, the end of november seems too late for this holiday. must be the idea of falling snow and not falling leaves that confuses me and the fact that the bigger holidays are just a mere few weeks after that.

there is such an amazing build-up and hoopla to it that we do not experience here. perhaps that is just the canadian way and the difference between our two mentalities and countries. everything is blown up in america, it seems — and that's not a negative comment. we canadians are just more quiet.

in any event, thanksgiving is on its way next weekend down there! martha stewart has gone mental with her daily broadcasts and countdown. i imagine turkeys everywhere are cowering and running for dear life.

all this aside, check out this link to watch what i thought was the funniest e-card ever. forewarning: this isn't the kind of card you send ole granny! perhaps, my sense of humour is just strange but i found it amusing in that it is more a sign of the times in which we live in: the music we hear and the messages conveyed.

i dunno ..... gotta love the get-up he's wearing, especially that hat.

Friday, November 17, 2006

chez chaton culinaire WCB #76


Weekend Cat Blogging no. 76


.... this weekend's blurb was typed pawed in by my cat(ten) —

finding a good recipe for something i can eat in these bipedal primate cookbooks can be a difficult, if not impossible, job — especially ones that involve crunchy bones and warm viscera.

seeing as i am getting to used a dietary switchover [*carbohydrates in my original vet & breeder approved "premium" food were making me very ill (i shall spare you the dirty details)], finding new foods i like and that are good for me involve trips to specialty pet food stores. the ones i love right now and that don't make me sick are fromm's & wysong [woohoo, pheasant!]. discovering treats without unknown ground processed body parts, flour and grains in them isn't too easy. i did find a few like this and this. fish and beef liver — yum! click here to get free sample and enter for a chance to win a case from benny bully's.

[*see my links list for information about feeding your cats a proper & appropriate diet].

i love these too. well, at least now i do since i figured out only a few months back it's not just a toy. i was a dumb silly kitten at the time. click on this to have a free sample sent to you. it even comes in the mail with your cat name on it.

something smells good ( =^..^=) and it's not just the turkey


not being allowed to eat my carbs really blows :-( i love my goodies made from that stuff!! for now, i shall have to continue to dream about eating bread. [though the other night i ate the crust off a newly baked fresh loaf when he wasn't looking! boy, WAS he mad ... hehehe >o.o<]

mmmm, souris en brioche ..... zzzzz


and now, a recipe or two for your own 4-legged friends from my kittenchen:

Cat Cookies [Fur-ociously Good]

if your cat is not allergic and can tolerate carbs, these sound good.

1 c Whole wheat flour
1/4 c Soy flour
1 ts catnip*
1 Egg
1/3 c Milk
2 tb Wheat germ
1/3 c Powdered milk
1 tb unsulfured molasses
2 tb Butter or vegetable oil

*Catnip's strong scent pleases cats. Add to toys, or just sprinkle for them to roll and play in, and even eat. Catnip aids digestion.

Preheat oven to 350F. Mix dry ingredients together. Add molasses, egg, oil and milk. Roll out flat onto oiled cookie sheet and cut into small, cat bite-sized pieces. Bake for 20 minutes. Let cool and store in tightly sealed container.

recipe from Massachusetts SPCA from Best Friends March 1995


Potatoes Au Feline or Canine

Yield: 6 Servings

3 c Boiled sliced potatoes
2 tb Grated vegetables [no onions!!]
1/2 c Creamed cottage cheese
1 tb Nutritional yeast
2 tb Grated carrots
1/4 c Whole milk
1/4 c Grated cheese

Layer the first 5 ingredients into a casserole dish. Then pour the milk on top of all; sprinkle with cheese. Bake about 15 minutes at 350F until cheese melts and slightly browns. Serve cool.

As a potato substitute, you can use 3 cups of cooked oatmeal or 3 cups cooked brown rice.

Source: Deborah Lawson, Knight News Service, Watertown Daily Times

nota bene: i have not tried these recipes so do so at your own (cat's) risk.

:o~ :o~ :o~ :o~ :o~ :o~

and since you took the time to look at this blog page,
you can't leave empy-handed —


here is the human recipe for edible rodents
and where i got the above image.

hope you have fun making mice!


=^..^= a special thanks & "meeeow-out" to amar chaudhary of catsynth.com for the hosting of this weekend's event.

who knew ... and with prizes, too!

it's called NaBloPoMo .... which translates into
National Blog Posting Month

check here to read more about it
okay, so it's already mid-november ... i'm a little late

ok, a lot late. i'm new at this. sigh. i missed the boat.

there were even prizes to be had!

vegetarian "meat" cabbage rolls

this is a great recipe for those days you do not want to eat meat or cannot eat it. it is also appropriate for vegetarians & those following a vegan diet. though it was designed as a vegetarian option, it can certainly be converted for use with meat.

it is almost exactly like those cabbage rolls which are filled with whatever meat you normally use. i have managed to fool quite a few people over the years with these. as this is a recipe of my own doing, at the moment i can only vouch for using the yves brand groundround product. i am sure a similar product would produce the same results. i love using the dried sweetened cranberries from ocean spray (see ingredients in the recipe) instead of the traditional raisins.

the recipe can be doubled and the rolls frozen for later use. if you do not or cannot use soy "meat" products, then you can most definitely replace it with real ground beef or turkey. i would add an egg to the mixture also, in that case. do not cook the meat beforehand either — just mix it together as you would for regular rolls. i will experiment at a later date with tvp & extra firm crumbled tofu to see if it measures up for a non-meat substitute.

this time i used a savoy cabbage in place of the standard cabbage we see at the market. you can either separate and boil the leaves or boil the whole cabbage itself for several minutes. i did the former in this instance.

the standard measure for filling is about 2 tbsp per leaf however you should decrease it to 1 tbsp when filling the smaller inner leaves, should you be using a smaller savoy cabbage. you can, of course, use a regular cabbage too.

vegetarian "meat" cabbage rolls

makes approximately 12 - 15

filling ingredients:

1 pkg yves ground round or similar product [340 g pkg]
scant 1/3 c [jasmine] rice
4 tbsp [fresh] finely ground bread crumbs
1 tsp salt
1 tsp onion powder
1 tsp garlic powder
1/8 - 1/4 tsp cinnamon
1 - 2 tsp sugar
1 tbsp ketchup

1 large onion
3 cloves garlic

1 savoy cabbage

sauce ingredients:

1 1/2 c tomato sauce [2 small cans hunts]
1/4 c ketchup
1/2 - 3/4 c apple sauce
1/2 c water
1 1/2 - 2 tbsp brown sugar
1/8 tsp black pepper
1/8 tsp cinnamon
1/2 tsp garlic powder
1/2 tsp onion powder
3 tbsp craisins, or golden raisins or chopped dried apricots

dice the onion and garlic and fry in 1 - 2 tbsp olive oil until soft and very lightly browned. set aside 3 tbsp of this mixture for the filling.

make the sauce by combining all the ingredients along with the onion-garlic mixture in a saucepan. bring to a boil and simmer for approximately 5 to 10 minutes.

make filling by adding all ingredients together and the reserved onion-garlic mixture in a bowl. it will stick together nicely though it looks loose in this photo. if using meat, add one egg. it will take about 3/4 lb of meat.


separate the leaves of the cabbage and put them in a pot of boiling water for about 3 to 4 minutes. remove and let cool. when cool, take a paring knife and horizontally (parallel) remove part of the thick central vein to make it more flexible for rolling. don't skip this step.


depending on the size of the leaf, place 2 heaping tablespoons of mixture on it — use less filling for a smaller leaf. put it near the base and roll up, tucking in each side as your roll. place these, seam side down, in a large pyrex or container that will contain them. add 3/4 cup of water and put these in 325 degree oven for 1 hour, covered. this is too cook the raw rice and steam the leaves further.


after the hour is up, remove the pan from the oven and remove the cover. there should be little water left. [remember if you are using meat there may be excess liquid due to the meat releasing its juices; if there is too much you can discard some of it]. carefully put the sauce over the rolls making sure to cover all of them.


reduce the temperature to 275. cover the pyrex or (roasting) pan again and place back in the oven for another 1 1/2 hours. remove the pyrex and take the cover off and return the rolls to the oven for another 15 - 20 minutes.

take the pyrex out and let the rolls cool down before serving. these taste even better the next day.


enjoy!

Thursday, November 16, 2006

peanut butter cookies

ok, so this isn't such an original thing to blog about, but .... the idea that a great peanut butter cookie could be made without flour in it was something i had to try. i found this recipe several years ago on the back of a kraft container of peanut butter and have been making it ever since.

3 ingredient peanut butter cookies

ingredients:

1 c smooth peanut butter [258 g]
1/2 c white granulated sugar [100 g]
1 egg

yup, that's it.


method:

preheat oven to 325 F.

mix everything together well and form 24 balls with a heaping teaspoon.


place evenly on an ungreased cookie sheet and then press each ball down with a fork before putting in the oven.


bake for exactly 15 minutes, no longer. remove from oven and let cool enough to transfer to a baking rack to cool.


Wednesday, November 15, 2006

cauliflower stuffed bread [paratha]

this stuffed bread is quite easy to make and not as labour intensive as it may initially appear — especially if the filling or bread dough is made ahead of time. cauliflower is a much loved and used vegetable in india and is often seen in many other dishes. it is also one of my favourite vegetables.

the dough for this bread is one used for standard indian bread. is made from atta flour, a finely ground durum variety. the brand i use is called golden temple and is made here in canada, one of the world's wheat producing capitals by the fort garry milling company.

for those unfamiliar with it, it is not the same as whole wheat flour as there are no flecks of bran in the flour. if you do not have this, you can make an approximation with equal amounts of whole wheat and regular AP flour. this does work. as you can see, it is not as dark as a whole wheat flour. atta flour also has a soft and silky feeling to it.

as i was trying out different recipes lately, i ended up using a different version for the cauliflower stuffing than i usually do. this one from madhur jaffrey's book — world vegetarian. while it was fine, i prefer the version i usually use which i will add as option *2.

the following is jaffrey's recipe.


cauliflower stuffed paratha
gobi ka paratha


paratha dough

2 c chapati flour [or 1/2 whole wheat & 1/2 AP]
1/2 tsp salt
1 tbsp oil

1 c warm water

method for dough:

place flour and salt into a bowl and mix together. add the oil and with your hands rub this into the flour. rub your hands as though you were washing the flour. do not skip this step as this is the proper way to make sure all the flour has its share of oil. this further helps for a successful final product.


add the warm water and make a dough.


knead the dough for a few minutes to make sure it is elastic and smooth. if it needs more flour or water, adjust. it should be fine. set this aside, covered.


it can also be refrigerated at this point for a few days in a ziploc bag which has a light coating of oil inside to prevent it sticking. it will work perfectly even after several days. just let it come back to room temperature.

stuffing ingredients:


1 tbsp oil
2 tsp finely chopped ginger
1/2 to 1 hot green chili, finely chopped
2 c raw grated califlower
4 tbsp chopped coriander
1/2 tsp salt
1/8 tsp cayenne pepper
1/8 tsp black pepper

i added cumin & coriander also


method for filling:

grate cauliflower coarsely to get 2 cups or 6 oz. put this in a bowl and measure out the rest of the needed ingredients.

heat oil and add ginger, stir and add the all the spices, except the cilantro.


fry this for about 30 seconds or so. add the cauliflower and cook for another minute. cover the pan and let cook for about 4 or 5 minutes. the mixture should be fairly dry. set aside to cool and adjust flavouring if needed.


method for making & cooking the stuffed paratha:

separate the dough and the filling into 5 portions.

take one of the balls of dough and roll it out to a 5 inch diameter on a floured board.


place one portion of the filling in the center of the dough.

then carefully pull up one half of the dough to the center and continue to do this all the way around to pleat it. refer to my picture. it is very simple and quick to do. make sure there is no open gap in the center.


at this point, you can continue to do this to the rest of the portions and set them aside. do not stack them. cover the paratha with a tea towel to prevent drying.

heat your fry pan over medium heat; cast iron is best. you do not need to oil it. dust the board and the top of the paratha with a little flour and then roll out the paratha until it is approximately 7 inches, pleated side down.


place the paratha in the fry pan and let it cook until the bottom is speckled with brown spots. this should take from 45 seconds to 1 1/2 minutes. turn it over and then add 1 tsp oil around the edges of the paratha and let it cook until it is speckled and brown on that side. flip it over again and continue to cook it for about 15 seconds per side until it is golden. it should take about 3 1/2 to 4 minutes.


continue with the rest of them in this way. you can stack them and cover them with foil until ready to eat.

they can be refrigerated and reheated later in an oven or microwave. obviously, they are best when freshly made.

* * * * *

the following is the stuffing i like better than the one used above. it does make more than called for however you won't regret making it or eating the rest.

*my preferred filling [option 2]:

1 med cauliflower
3 tbsp oil
1 1/2 tsp ground cumin
1 tbsp ground coriander
1/2 tsp turmeric
1 tbsp minced ginger
1/4 tsp chili powder
1 tsp salt
4 oz water
1 tsp amchoor or 1 tbsp lemon juice [optional]

clean and cut the cauliflower into very small florets. make sure it is drained and dry when you fry it. put it on a clean teatowel to dry if you like for 30 minutes.

heat oil on high heat and add the dry cauliflower. stirfry for one minute and then add the cumin coriander, turmeric, chili powder, amchoor, salt and ginger. if using lemon juice, add it at the end of the recipe when it finishes cooking.

saute this for about 3 minutes, turning to make sure the cauliflower is coated. add the water and cover the pan. reduce the heat to low and let cook for about 10 minutes. uncover the pan, turn up the heat to medium and stirfry again until the moisture evaporates.

*use about 2 c of this mixture to fill the parathas and eat the rest.

Tuesday, November 14, 2006

turkish coffee cake

this particular coffee cake is one which i have many memories of from the time when i was little. it really is a coffee "coffee cake".

i remember in grade 3 going to my best friend's house and having a piece of coffee cake his mom had made that day and, in my child's mind, not understanding why there was no coffee in it! i also learned through my best friend's mother on that particular day of discovery that a coffee cake, à la north american, is one which is served with coffee and doesn't necessarily include it. what did i know? i was only 8 and interested in riding my bike & playing hide and seek with my gang of friends, after all!

the results of this recipe are interesting in that it gives you 3 different textures in one cake. the top layer is crumbly and sandy with toasted nuts, the middle has more of a spongy, pudding-like consistency due to the ingredients used to make that layer, and the bottom, a nice crunchy sweet base upon which the whole cake rests. it seems to taste even better the next day after a little rest — i remember this being made the night before. my favourite part was always the crunchy, sugary bottom layer.


to make this cake you really need turkish or greek coffee, finely ground to a powder. it may work with espresso; i have never tried it that way. it does not work with instant coffee. perhaps any strong coffee like a french roast can be substituted if it is prepared using the turkish grind wherever you have your coffee ground — ask for the finest grind [think powder].

this cake is different in that the wet and dry ingredients are not mixed together before baking to make a cake batter. instead, the wet is nestled in between the sandy dry mixture. note [caveat emptor] that the spongy layer may taste "funny" to you texturally at first as the cake is not mixed in the conventional way we imagine cakes to be made. rest assured, the cake all together as a whole really is great. please use parchment paper to make the job easy — the best part, no greasing involved with this great silicone paper!

turkish coffee cake

ingredients:

1/4 c + 1 tbsp butter or margarine, cut up
1/4 tsp salt [omit if using (semi) salted butter]
1 c flour
1 c white caster sugar
1 heaping tbsp turkish coffee
1/2 tsp cinnamon

1/2 c sour cream [not low fat!]
1/2 tsp baking soda
1 egg

1/2 c pecans or almonds, broken up

method:

preheat oven to 35oF. cut 2 strips of parchment paper to line a small loaf pan and set aside. i cut one strip for the length of the pan and another for the width and layer one over the other. this is the easiest way to get the cake out of the pan without destroying it.

measure dry ingredients and place in a bowl. mix well. add the butter or margarine and with a pastry fork or tool, cut the butter into the dry ingredients until it is sandy. do not leave chunks of butter.

mix the egg with the sour cream in another small bowl. add the baking soda and mix again.

place half of the sandy flour mixture in the loaf pan. carefully spoon the sour cream mixture over this layer and then place the rest of the flour mixture over the sourcream, distributing it evenly. do not mix it together.


scatter the pecans over the top.

bake 45 minutes.


carefully remove from pan by the tabs of the parchment paper after letting cool in pan 10 - 15 minutes to set. enjoy with, what else? turkish coffee!

mystery item revealed

for any of you who were wondering just what in the world those crazy retro green "bathtubs" with holes in them were in my post on nov 9th [..... and thanks to those who answered!]

they are actually silicone egg poachers!

photo: www.eggs.org.au

truly bizarre, if you ask me.

Monday, November 13, 2006

cool tool

this is something i recently ordered to take the hassle out of converting weights and measures, both wet and dry. you can also calculate for smaller portions [measures] of a recipe which is helpful when you are not just dividing by half.


if you go to calculated.com, you can see the product in full description. it offers a tutorial showing you all of its functions and features. pretty good for what it's worth.

the cheapest place i have found it is at target. if you look there you can also see the specs for it.

a good hannukah or christmas gift for either yourself or whoever is cooking for you!


this site is helpful for quick conversions [click the button]:

Weights and Measures, Metric Conversions

conchiglioni ripieni di ricotta

ricotta filled pasta shells


ingredients:

24 jumbo pasta shells

1 454 g container ricotta, full fat
1 pkg frozen spinach [10 oz — 280g]
1/3 c. grated parmesan
1 tsp salt
1/8 - 1/4 tsp pepper
1/8 tsp nutmeg [optional]
1 egg

[700 g] tomato sauce, such as the one i suggest here or here.


method:

cook the pasta shells for only 10 minutes in boiling salted water. drain carefully and run cold water over shells. set aside to finish draining completely. cover so they do not dry out.


while the pasta is cooking, cook the spinach according to the directions and drain extremely well. chopped the spinach further if needed. often it is stringy when using frozen. you can use fresh also and cook it but the frozen is more convenient.

in a large bowl, combine the ricotta with the egg and seasonings. add the parmesan and the spinach and mix well. you can also add 1/2 c. grated mozzarella to the ricotta mix as i sometimes do.


in a large pyrex, add a layer of the sauce to cover the bottom of the baking dish.

separate the filling into equal portions [or just stuff as you go] and fill the shells. it should be about a heaping tablespoon of ricotta mix per shell.


place these in the pyrex on top of the sauce and then cover the shells with more sauce & extra parmesan [or a little mozzarella]. the shells should not be swimming in the sauce, however. don't go crazy adding too much!


bake this without covering at 350 F for ~ 30 minutes.

serve with grated cheese such as asiago or more parmesan.

Sunday, November 12, 2006

a multipurpose tomato sauce & good health

i generally do not like buying prepared food. for the most part, it is filled with chemicals or excessive amounts of fats and sugars & salt and processed in ways which have been shown to be harmful to our bodies.

finding a good multipurpose tomato sauce which i liked and would eat hasn't been too easy. most always seem to have some sort of cheese in them or vegetables which do not appeal to me or work with what i am making. i therefore always make my own. it is cheaper and can be whipped up in a few minutes without much work on my part.

this one is not long and involved like those that seem to take hours to cook.

according to many a report, cooked tomatoes are rich in lycopene and extremely beneficial to our good health.

take a look at the famous san marzano, the type used in premium tomato sauces, and a few other varieties of italian tomatoes like the pachino and casalino.


& more about il pomodoro san marzano here.


fast & flexible tomato sauce

this is a basic pasta sauce which is not only flexible, it is downright simple and can be made quickly and with few ingredients. it can also be used right away or frozen for future use. it is something i always have on hand and know how it will taste each time i use it. i use it as a base for many recipes and can control both the texture and flavour of it — something i cannot do with a bottled sauce.


ingredients:

1 [28 oz] can diced tomatoes
1 [5.5 oz] can tomato paste
1/2 [28 oz] can water
2 - 4 tbsp good quality olive oil
1 - 2 tsp salt
1 - 3 tbsp sugar

1/2 c red [or white] wine*
1 1/2 tsp garlic powder*
1 1/2 tsp onion powder*
1/4 - 1/2 tsp crushed red chili pepper [flakes]*
1/2 tsp oregano*
1/4 tsp thyme*

*optional but good to include


method:

combine all ingredients* [see below] in a wide pan [to hasten evaporation & cooking] and bring to a boil over medium heat.

let boil gently for 10 minutes.

cover the pan partially so you do not have a tremendous splattering of tomato sauce everywhere.

lower heat to very low and simmer for 30 to 45 minutes until thickened. adjust seasonings to suit your taste and use right away or cool and freeze for future use.

*use a potato masher or process the tomatoes with either a food mill or food processor or blender slightly before adding if you do not want thick chunks of tomatoes [depending on the texture of your canned sauce].

notes:

* you can sauté onions and/or garlic and mushrooms to add to sauce if you like
* precooked ground beef can be put in the sauce or meatballs
* any vegetable cut in small dice can be added to fortify & personalize the sauce
* white wine can be used
* sugar is added to balance the acidity [i do not like acidic and rough sauces]
* olive oil is added to give depth to the sauce, you may omit it
* you can use a can of crushed tomatoes but the sauce will be thicker. add more liquid.

to use this as a pizza sauce, place in either a blender, food mill or processor and purée if you have not done so earlier.

basic marinara sauce

this is the basic, no-frills, tomato sauce which is a staple in any italian kitchen and often used as a building block for many dishes. it is said to have originated in naples [napoli] and was the sauce which was fed to the marinari, or sailors upon their returns. the following recipe is for a marinara in its simplest form.


image: coins

marinara sauce

ingredients:

1/4 c olive oil
4 cloves garlic, thinly sliced

1 [28 oz] can diced tomatoes
1/2 can water
6 large leaves of basil
1/2 tsp oregano
1 - 2 tsp salt
1/4 tsp black pepper

method:

in a pot, heat oil and cook sliced garlic til very, very lightly browned and oil is fragrant.

carefully add the can of tomatoes and crush them a bit with a spoon or a potato masher. add the water and stir.

rip the basil into shreds and add it along with the seasonings and spices.

cook the sauce, uncovered, for about 40 minutes, stirring on and off until reduced to the texture you prefer.

Saturday, November 11, 2006

eleven


In Flanders Fields

    In Flanders fields the poppies blow
    Between the crosses, row on row,
    That mark our place; and in the sky
    The larks, still bravely singing, fly
    Scarce heard amid the guns below.

    We are the Dead. Short days ago
    We lived, felt dawn, saw sunset glow,
    Loved and were loved, and now we lie,
    In Flanders fields.

    Take up our quarrel with the foe:
    To you from failing hands we throw
    The torch; be yours to hold it high.
    If ye break faith with us who die
    We shall not sleep, though poppies grow
    In Flanders fields.


at the eleventh hour, on the eleventh day of the eleventh month canadians will remember for two minutes those fallen during war [ww I].

death toll of ww I: approximately 10 million, followed by a similar number only 20 some odd years later.

lieutenant col. john mccrae wrote the poem in memorium of a friend; this poem has come to symbolize the horrors of war and and the valor of soldiers who fought for freedom. it is learned by school children during their elementary years.

oddly & sadly, nov 11 is not considered a recognized "holiday" [cessation of work] in my home province of quebec.

the museum in belgium at flanders.


. . . . . . . . . .

seeing as poppies are the theme for this post, check out:


poppyseed.org

for everything poppy, especially edible

or

AAArecipes for more

. . . . . . . . . .

from mccormick's:
Poppy seed has been cultivated for over 3,000 years. The tiny poppy seed actually comes from the plant that produces opium. The botanical name for the poppy flower means "sleep bearing." Poppies were even used in the Wizard of Oz to put Dorothy to sleep. The seed does not have this effect. Poppy seed was used as a condiment as early as the first century A.D. The red poppy flower has been the symbol of fallen warriors throughout history and was adopted as the emblem to commemorate Veterans Day in the United States.

Friday, November 10, 2006

the new enemy in the house WCB #75

Weekend Cat Blogging no. 75

meet catten's newest archenemy — bobblemouse.

one of the cheapest cat toys i have ever bought, "bobblemouse" cost a whopping 1 dollar at our dollar store! i bought two just innnnnn case my little devil cat destroys him in one of his latenight battles with this little rodent on a spring.

notice the loving look on his face as he eyes his new friend.


after a fierce battle {and some growling & hissing for sound effects},

stop moving!!

it is just a tale of two tails .....


until the next time .....


thanks to skeezix's scratching post for hosting!

raisins or no raisins, runny or firm?


butter tarts .... oh, butter & sugar baked into a perfect pastry shell, what could be better?

this little tart is probably one of the most canadian things i can think of when i think of canadian pastries. it should be noted it is an english canadian item where as la tarte au sucre is the french version, equally as delicious if not addictive. it is something i can say i truly love — but, BIG but, i think they are best without raisins [which in my opinion seem to pollute many a recipe for this little delicacy].

the buttertart shell is unique itself. it is ruffled and somewhat thick but always flaky & buttery.

here is an example of it, taken from wikipedia.


the cbc [our national radio station] did a radio interview with food writer marion kane, artist charles pachter and writer max burnes about this uniquely canadian pastry. if you click on the link you can hear the very interesting short interview & discussion about its culinary origin and history and its significance in english canadian history.

* * * * *

et voici, a variety of recipes for these little tarts for you to try your hand at. you won't regret it.

here is a recipe for maple pecan butter tarts with a sweet pastry dough.

or

maple butter tarts with currants from food tv [recipe & photo]


even more decadent [don't faint] is the one for caramel butter tarts. i NEED to make these {minus the currants; anna olson's recipes are always fantastic}! make sure you look!!

an additional beautiful recipe is available here


check out vixxxen's recipe box for more canadian goodies.

Thursday, November 09, 2006

we remember

tonight & tomorrow is a sad time.

picture: aish article

we remember the destruction which took place in germany & austria during world war II called kristallnacht.

may history never repeat itself.

what could these be?

when i saw these, i laughed.

i also had no clue what they were at first.


do you?

dukkah

After a tiring day travelling with camel, Arabs would gather around a small fire roasting spices, nuts and seeds, and finally crushing them into a coarse powder. They would then take hunks of bread, dipping them first into olive oil, and then into the dukkah to satisfy their hunger. Today dukkah may be enjoyed from Egyptian street vendors.

A small paper cone is filled with dukkah and given to the customer along with strips of pita bread, which are dipped into the vendors bowl of olive oil and then into the dukkah in the traditional way. Each vendor has a unique dukkah recipe and is fiercely proud of his own combination of traditional and regional flavours.

[quote from seasoned pioneers]

the first time i had this was years ago late at night sitting around a table talking, and of course eating a latenight snack, with my schoolfriend zina & her parents who were originally from cairo. this condiment used traditionally to dip into fresh pieces of pita as noted in the above quotation, is also common in other middle eastern countries besides egypt [gulf states for example] and is popular with [egyptian] middle eastern jews. Fayza Hassan wrote a short newspaper article in al-ahram about duqqa and her memories associated with it.


duqqa can be spelled in a variety of ways and can have different grinds, from quite coarse to very fine. you will see it as dooka, dookah, douka, doukah, dukkah, etc. i have also found it called du'a. whatever way you spell it, it's all basically the same with minor variations on the same theme. what is common to this mix is the use of nuts & spices and an herb of some sort.

chef and author magda el-mehdawy wrote a book called my egyptian grandmother's kitchen which became a best seller in egypt. the epicurious.com site has an article about her and she gives magda's recipe for her version of duqqa which uses small chickpeas [channa [desi] dal] & za'atar. read about the author and see some of her other recipes.

dukkah is also popular in australia. my adventurous & intrepid friends brought back a package on their last trip and talked about its popularity there. the ingredients are a bit different and sound like they would be incredibly good together. check out how popular it is with all these variations, if you don't believe me.

here are various ideas for using duqqa and if you don't want to make it yourself, buying it from the hotchick spice company.

from the food network here in canada, this is a alternative version using turmeric & almonds or this one using macadamias, sunflower seeds & coconut.

i also found a recipe for duqqa croutons here. they could even be cut up into small crouton cubes and used in a salad.

whether you use it to adorn your pita, garnish your hoummus or sprinkle it atop grilled fish, it is something not to be missed. give it a try.

read a fun article about ancient egyptian bread-making where sand ultimately became part of the recipe.

Wednesday, November 08, 2006

a few fun things


listen to a short interview with madhur jaffrey about her book called climbing the mango trees which chronicles her upbringing in india on KCRW goodfood [it begins about halfway through the recording, @ 11:25 to be exact]. fascinating interview. following that is a primer on indian food.

here is a great excerpt from the book if you'd like to get a feel for her writing.


another interesting project from out of montreal is called librivox. it is a project which provides free audiobooks from the public domain. while there is not a huge selection at the moment, it is free to download. librivox is also looking for volunteers to read for their audiobooks, so if you have a good voice ... why not?


yahoo recently released yahoo food which looks interesting. head on over for a visit to see what they offer. there are recipes, information about everything culinary & videos to choose from.

crazy food facts:

* ketchup was sold in the 1830's as medicine
* coca-cola was originally green
* consuming chocolate was once considered a sin during the 16th and 17th century
* every year you eat approximately 4 bugs in your sleep
*
the first bar code was used on wrigleys gum

.... and back to my wanting a pygmy hedgehog for a pet [see my previous post], i guess i will have to settle for one of these for now. at least i can eat you, my little hedgehog!

look here to find the recipe for these funny little guys called austrian igels from one of my favourite bakers, flo braker.

recipe & photo from leite's culinaria.

Tuesday, November 07, 2006

spicy "sweet & salty" sesame noodles

this recipe is more of a north american deli-type invention and uses either spaghetti noodles or thin linguine. while not authentically asian due to the type of noodles involved, it is convenient in that many homes always have these on hand. while some pasta salad and noodle recipes typically lose their taste upon sitting for any length of time, the flavour of these noodles is not dulled upon refrigeration or storage — even after several days. hopefully they won't be sitting around that long in your fridge!

notes for this recipe before starting:

* do not use salted water to cook the noodles; enough salt is provided in the soy sauce;
* a dark soy sauce is the one to use; light ones or japanese style do not have the same depth of flavour;
* do not use less oil than called for; it is there for a reason and does not make the noodles "oily";
* the sesame seeds & sesame oil are optional. omit if you do not like the the texture/flavour they add to the noodles;
* orange zest is also optional;
* intensity of chili heat is your choice, anywhere from none to smokin' hot;
* i sometimes make these noodles without the sesame seeds & orange zest and it is just as good. my preference is often for making them plain & simple.

spicy sweet & salty sesame noodles


1/2 small pkg spaghetti or linguine noodles [~ 250 g; 1/2 lb]
1 - 3 tbsp sesame seeds
3 - 4 tbsp vegetable oil
3 - 4 cloves of garlic
1/2 tsp red chili flakes or sriracha sauce
4 - 5 tbsp dark soy sauce (not japanese or light soy)
3 - 4 tbsp honey
1/2 - 1 tsp dark [toasted] sesame oil
1 - 2 tsp finely grated orange zest or,
1 tbsp thinly julienned orange peel (no white part)

thinly sliced green onions for garnishing

peel garlic cloves and slice thinly. set aside. grate or julienne orange zest and set aside [cover it so it doesn't dry out].

measure out the noodles and break in half and set aside.

put up water to boil the noodles. while that is happening, place sesame seeds — if using — in a dry fry pan over medium heat and brown them. remove and set aside. in the same pan, add the oil [not the sesame] over medium low heat and add the sliced garlic. cook until softened, not browned. add the chili flakes during the last 30 seconds to cook a bit.

place this in a large mixing bowl and add the orange zest to release some of its oils. add the sesame oil and the seeds along with the soy sauce and honey.

when water is ready, boil the noodles until al dente and strain. drain well, you don't want any water added to the recipe. place the noodles in a large bowl and cover the bowl.

add drained noodles to the sauce ingredients and mix well with tongs. let the noodles absorb the sauce for an hour or two before eating. adjust seasonings to your liking.

these can be successfully refrigerated and enjoyed later. they absorb the flavours nicely.

this ain't no monkey business

sunday night, i turned on the tv to watch some of the shows i routinely watch that night. one of them is called nature and is an excellent pbs show which showcases, well, .... you guessed it — nature and the current issues surrounding the topic at hand. sometimes it can be exciting and fun to watch, others sad or thought-provoking. this sunday's show was the latter.

sunday night's show was, for me, painful to watch and left me feeling quite moved and shocked. it was about one of my favourite animals, the chimpanzee. this animal has fascinated me for a long time. sharing so much of the same dna as we do and being the sentient and highly intelligent social animal that it is, this primate is the closest living relative to humans that we know of. for some reason, i always feel i am looking into a part of ourselves when i look into the eyes of these wonderful creatures. i think this fact made it all the harder for me to watch the show.

long has [irresponsible] science felt that an animal is just an animal and does not "feel" the same way we humans do with regard to emotions and pain. this has sometimes provided license for all kinds of horrid experiments which, in the end, leave such animals to live out a miserable existence until the time of their demise.

this week's nature episode was called chimpanzees: an unnatural history. the hour long show outlined how chimps have been used for all types of scientific research and how the results of this experimentation have led to their current plight. now, don't get me wrong. i understand the issue of using animals for scientific research and am not vehemently opposed if it can save scores of people from dying horrible deaths. to sacrfice an animal in order to find a cure is not what i take issue with. i find it incomprehensible and unconscionable that animals such as chimpanzees which are in danger of becoming extinct in the wild have been used in such great numbers to be infected with diseases such as hiv and hepatitis and then left to live out their lives in a prison, essentially and literally, behind bars in a space that is unnatural and inhumane. this is cruelty. in a certain experiment they talk about in northern new york state, the chimps were infected and then the experiment was cancelled leaving these animals hiv positive for no good reason.


a few days ago i posted a video which was, in a way, a foreshadowing of this topic. it is a satirical short video [see 2nd video of vegan madness] of how humans are basically monkeys.

on the positive front, i was happy to learn that in my country and in fact, my own provice not far from me, is a woman [gloria grow] and her husband [dr. richard allen] who have dedicated their lives to helping these animals. can you imagine such a job as your life's work? their site is called the fauna foundation. they have also set up another [co-] foundation to help fund their efforts where you can actually "adopt" one of these animals, called... what else? adopt a chimp.

there are some very short videos on the pbs site about the documentary. it is very moving and provides you with the background behind the making of the this show.

having had the chance to listen to jane goodall and actually meet her and have her sign the book i purchased when she gave a lecture here, i feel people like her and all those others who are making efforts to protect the disappearing primates we share so much with should be mentioned. once these animals are gone, they are gone forever. visit her site [see previous link] for lots of information, videos and free screensavers such as the picture below.

how can you say no to helping a face like this?


Monday, November 06, 2006

fantans

at first sight, these rolls are both somewhat dramatic and unusual. they also add a much more refined look to the average small individual bread offering at a dinner party or even an everyday meal. they pull apart easily into nice little sections, perfect for scooping up that last bit of food and luscious sauce that you can't bear to go to waist waste.

fantans are said to be american but i have also read they are french. who knows. all i know is that they taste great and look fan-tan-tastic. they can be made with 5 or 7 sections but i prefer the 5 sectioned one as it is less bulky and more upscale looking.

they are easily made with your favourite roll recipe or the following:

1950's american classic breadroll recipe

this recipe is from an era when bread rolls were de rigueur at the supper table. G-d forbid they weren't there! {june cleaver??}. you may halve this recipe as it makes alot. you may also form the rolls and then freeze them right away that way you can later pull them out to pop in the oven when you want fresh rolls. perfect for when you either don't have the time or inclination to bake. make sure you have space in your freezer!

1 1/2 c milk, scalded

pour this into a large bowl. then add,

1/4 c sugar
2 tsp salt
1/4 c shortening (or butter)

cool this to lukewarm. then in a small bowl add,

1 pkg active dry yeast (2 1/4 tsp)
1/2 c. warm water & 1 tsp sugar

let this prove until foamy, 10 - 15 minutes and then add to the first mixture and mix well.

add,

1 well beaten egg & 3 c AP flour and mix well.

add another,

2 to 2 1/2 c more flour and work it in well.

remove the dough and work it for a good 5 minutes, adding more flour if necessary. shape this into a ball and cover in a greased bowl and let rest until doubled, approx. 1 1/2 hrs.

gentle deflate the dough and then divide it into 4 and make balls. let this rest 10 minutes before reworking it.

roll out one of the balls with a rolling pin into a rectangle. brush with some melted butter.

cut long strips about 2 1/2 inches wide. try to make a rectangle with is approximately 1/4 inch thick. cut the strips into approx. 3 inch lengths. it is your decision how big or small you make these.

take 5 pieces and stack them neatly. with your fingers, pinch only the bottoms to attach them.

put these into a muffin tin and open up the sections a bit. make sure all are buttered to encourage browning and depth of flavour.

cover with plastic wrap and let rise again til almost doubled. about 30 minutes. during this time, preheat your oven to 375 F and bake for about 20 minutes or until golden. remove and let cool slightly.


*best enjoyed the day they are baked or freeze before baking (see above note after recipe title).

*the ones i made here are thicker and larger than what the recipe called for. i also used a "texas style" muffin tin to bake them in order to accomodate their larger than standard size.

*if you want these as a parve dinner roll, i would suggest perhaps using water or soy milk and margarine to replace the dairy content.


diana at dianasdesserts.com provides a different fantan recipe which uses potato flour & dried milk. it has a bit of a different look to it, also.

this is another recipe for something called french fantans; also available are a few other roll recipes.

Sunday, November 05, 2006

oh no! this wasn't supposed to happen!! WCB #74

Weekend Cat Blogging — no. 74

my burmese kitten is addicted to diet pepsi.

for some odd reason he starts to go crazy when he sees or smells it. if i do not hide it, he will go after the can or as you can see, stick his head right in the glass to get at it. at the time of this picture, i had gone into another room and forgotten to move the glass. when i had returned, he had drank about 1/3 of what was left in the glass but regretted it because he got his head stuck deep down. it was far enough in the glass for enough time for me to grab my camera sitting next to me to snap this shot.


unfortunately, i didn't get the picture when he lifted his head up and tried to pretend he was a horse! i think he was a bit shocked that his head was lodged in this little vacuum he created. curiosity and the desire for all things tasty will get you in trouble all the time.

bad boy.


thanks to lali of lali et cie on the famous côte d'azur in france for hosting. ''catten" <--(half cat/half kitten at this point) should be proud his debut was announced in such an exotic locale!

Saturday, November 04, 2006

rubus chamaemorus


recently while shopping, i was looking various jams and jellies and was reminded of a fruit uniquely found in certain parts of my country, as well as other northern european climes such as scandinavia, russia & greenland. it is an arctic and subarctic fruit with a distinctive taste of its own. i was always happy getting my small stash of these when someone i knew returned from trips to the areas where these grow wild here in quebec.

called bake apple here in canada, it is also known by its whimsical and more common name — cloudberry. it is sometimes called a salmonberry however this is incorrect. this little golden fruit really is evocative of a little fluffly cloud with a taste which is really hard to accurately describe without one trying it. it is sour and tangy with a certain degree of sweetness added to it. personally, i love it but have found it is a hit or miss kind of flavour with many people here who have never had it before.

why bake apple, you ask? it is really just the anglicized version of "baie qu'appelle", from the french. the bake apple is a member of the rose family. its fruit is at first red when unripe, changing to a bright orange upon maturity. in quebec it is known as chicouté and amongst the native innu & montagnais people of our region it is called chicotai.

this little fruit is costly as it is hard to come by unless you are living in places where it grows; it is also highly perishable in its fresh state. though not as popular here as it is in, let's say finland or sweden, it is well known amongst maritimers of newfoundland & labrador and those living in arctic tundra areas of the northwest territories and yukon where vegetation still grows. this fruit also grows in northern ontario.

cloudberries thrive in the cool and grow in peat & bog areas. the male & female plants require the cross pollination facilitated by insect pollinators such as flower flies & other critters in order to produce their plump little fruit. it requires the acidic environment of the peat bog to survive.

according to www.tidespoint.com:

The Bakeapple (Rubus Chamaemorus, also known as Cloudberry) is a part of the rose family and closely related to blackberries and raspberries. Its fruit is generally larger than that of either related group. It is a cloudy golden to orange color when ripe, boasting a unique flavor.

In the Labrador Straits area, blooming occurs immediately after the peatland thaws and aerial shoots are sent up. These shoots rarely grow over three centimeters and bear five white pedals. The actual fruiting of the berry occurs in July and ripens during the Labrador summer days. Wild bakeapples are plentiful in Labrador, where they are harvested by local pickers in mid August and used for countless recipes and dessert toppings.

The cloudberry grows in damp peatland type areas which are characteristically acidic. Cloudberry has separately sexed plants, the male and female plants appear to prefer slightly different microclimates, concentrating in different portions of the same bog. Large patches found on many of the bogs in the area are often descendants or "rhyzome clones" of the original parent plant in the patch. This means, with the help of insects and wind the entire patch is pollinated from one set of parents.

if you are scientifically oriented/interested, or even not, a very interesting and recent video [2005] about the cloudberry can be downloaded here. called berries: gold of the north, it is 25 minutes long and produced by the university of kuopio & the northern periphery programme but really worth watching and well done [it's a slow-ish download so be patient]. it describes how the fruit grows in finland [+ the arctic areas of europe] and discusses their attempts to improve its growth and how to protect it. they also talk about its use within the food industry.


when i asked my "newfie" friend about recipes, he gave me the standard bakeapple jam recipe they use [which can also be found on the internet]. so here it is:

bake apple jam

ingredients:

1 lb bakeapples
1 3/4 lb sugar

method:

put sugar on berries and let stand overnight.

next day put on to cook, bringing the jam slowly to a boil.

boil 20-30 minutes. pour immediately into sterilized hot jars and seal.