kitchen essentials — roasting an eggplant; the direct heat method
many months ago, i posted an entry on how to roast eggplants on the stovetop. that method, in my opinion, is (still) the best way to do it. unfortunately, not everyone has a grill type pan which elevates the food one is cooking off the direct heat. this, however, isn't really a problem; you'll see from this new post that you CAN roast directly on a heat source albeit with a minor modification. the reason i prefer the grill pan, and recommend buying one, is the heat the cast iron generates and smoked/grilled flavour it imparts on the foods one cooks on it. there definitely is a difference.
the following way to roast eggplants involves nothing but eggplants, tin (aluminum) foil and 60 minutes of your time. it also does the same job as using a grill pan but saves on the clean up as you will just throw out the tin foil once the eggplants are cooked. i will admit, there is a less of a pronounced smoked flavour with this method, as compared with the other one, but it is still decent and something which the average home cook can do with no problem. the bonus to this method is that you can actually roast up to 4 eggplants at a time, provided you have 4 burners.
what about the oven method, you say? the answer for me on that one is: NO! i've tried it on more than one occasion and it does not yield the same results. the flavour you are left with is quite insipid. the oven method also uses much more energy than when done on stovetop and heats up your kitchen tremendously.

the "direct heat" method for roasting eggplants
ingredients/items needed:
eggplant(s) - make sure they are not bent or curved
tin foil - try to use the heavy duty kind (like for bbq'ing)
electric (or gas) stove top element
tongs to turn the eggplant or use two soup spoons
method:
wash your eggplant(s) and pierce them in several spots all around with the tip of a knife. set aside.
 take a piece of tin foil that will be long enough to wrap over the eggplant and completely cover it. this is important as you don't want any messes with liquid dripping out.
turn on the heat of the cooking element to medium high while you wrap the eggplant. make sure there is nothing around the element that may catch fire or anyone whose fingers may touch it!
place the eggplant on the foil as shown below.
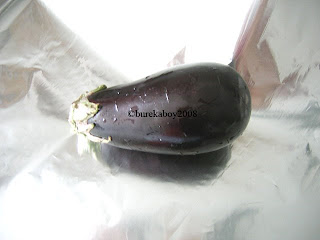 fold one side over.
 fold the next side over.
 use the rest of the foil to cover the eggplant so it is enveloped.
 if using regular tin foil, REPEAT again. if using the heavy duty kind, once should be enough but just make sure it is completely wrapped with no holes or openings.
 set the eggplant on the heat and let it cook for 12 minutes (i advise setting a time to remind you or mark down the time on a piece of paper). no, it won't burn! just make sure you don't have the heat up too high.
 after 12 minutes, turn the eggplant a quarter turn and let it cook for another 12 minutes. REPEAT this until you have roasted all 4 sides.
once all 4 sides have roasted, take the eggplant and sit it upright and let it roast now for 10 minutes only.
 carefully place the unwrapped eggplant on a baking sheet and let it cool for about 15 minutes.
open up the the tin foil to reveal your roasted eggplant.

and, if you don't know already.......
how to prepare your roasted eggplant
make an "I" shaped incision along its length. make the cross cuts (top and bottom of the "I" at the blossom and stem ends.

 open up the eggplant from each side.
 using a spoon, remove the seed pods. these are considered to make the flavour of the eggplant bitter. they also affect the texture and make your final dish "gritty" if they are kept in.
 once all the seeds have been removed, take the spoon and remove the flesh from the eggplant and place it in a dish. don't forget to scrape close to the skin as a lot of the (smoked) flavour is located there.
 use as directed by your recipe.
the following way to roast eggplants involves nothing but eggplants, tin (aluminum) foil and 60 minutes of your time. it also does the same job as using a grill pan but saves on the clean up as you will just throw out the tin foil once the eggplants are cooked. i will admit, there is a less of a pronounced smoked flavour with this method, as compared with the other one, but it is still decent and something which the average home cook can do with no problem. the bonus to this method is that you can actually roast up to 4 eggplants at a time, provided you have 4 burners.
what about the oven method, you say? the answer for me on that one is: NO! i've tried it on more than one occasion and it does not yield the same results. the flavour you are left with is quite insipid. the oven method also uses much more energy than when done on stovetop and heats up your kitchen tremendously.

the "direct heat" method for roasting eggplants
ingredients/items needed:
eggplant(s) - make sure they are not bent or curved
tin foil - try to use the heavy duty kind (like for bbq'ing)
electric (or gas) stove top element
tongs to turn the eggplant or use two soup spoons
method:
wash your eggplant(s) and pierce them in several spots all around with the tip of a knife. set aside.
 take a piece of tin foil that will be long enough to wrap over the eggplant and completely cover it. this is important as you don't want any messes with liquid dripping out.
turn on the heat of the cooking element to medium high while you wrap the eggplant. make sure there is nothing around the element that may catch fire or anyone whose fingers may touch it!
place the eggplant on the foil as shown below.
 fold one side over.
 fold the next side over.
 use the rest of the foil to cover the eggplant so it is enveloped.
 if using regular tin foil, REPEAT again. if using the heavy duty kind, once should be enough but just make sure it is completely wrapped with no holes or openings.
 set the eggplant on the heat and let it cook for 12 minutes (i advise setting a time to remind you or mark down the time on a piece of paper). no, it won't burn! just make sure you don't have the heat up too high.
 after 12 minutes, turn the eggplant a quarter turn and let it cook for another 12 minutes. REPEAT this until you have roasted all 4 sides.
once all 4 sides have roasted, take the eggplant and sit it upright and let it roast now for 10 minutes only.
 carefully place the unwrapped eggplant on a baking sheet and let it cool for about 15 minutes.
open up the the tin foil to reveal your roasted eggplant.

and, if you don't know already.......
how to prepare your roasted eggplant
make an "I" shaped incision along its length. make the cross cuts (top and bottom of the "I" at the blossom and stem ends.

 open up the eggplant from each side.
 using a spoon, remove the seed pods. these are considered to make the flavour of the eggplant bitter. they also affect the texture and make your final dish "gritty" if they are kept in.
 once all the seeds have been removed, take the spoon and remove the flesh from the eggplant and place it in a dish. don't forget to scrape close to the skin as a lot of the (smoked) flavour is located there.
 use as directed by your recipe.
enjoy!

Bookmark this post:


Labels:
eggplant,
instructional,
parve,
roasted vegetables,
vegan,
vegetables,
vegetarian