Showing posts with label candy. Show all posts

Thursday, November 22, 2007

no nuts about it .....

once upon a time, it seems, nobody was allergic to peanuts. at least, no one i knew...... peanut butter and jelly/jam sandwiches were the standard for school lunches and those "any-time-you-were-hungry" snacks. now, for some reason, it has become a common (and rampant) allergen, often with potentially deadly outcomes. scary stuff, indeed. i still thank the heavens that i can enjoy this favourite item of mine. mostly, though, i only indulge within the confines of my home or at a restaurant.

photo: source wiki

with that aside, peanuts — or groundnuts — are not nuts at all but rather legumes (Arachis hypogaea) originally native to the hotter climes of the americas. as with many other crops, explorers introduced these to other cultures who quickly adopted them. they are now found around the world, much being grown in africa, india and china.

from their 'greens' to their shells (see the above link for all the info), peanuts are used in a variety of ways and nothing goes to waste. while many people in north america are only familiar with one type — the cooked/roasted ones from a bottle, jar or package — other cultures know them in their more unprocessed or raw state.

cooked in a variety of ways, everything from savoury soups, stews, seasonings to sweet confections and baked goods, they are usually dry roasted first to extract their best flavour. i don't imagine they are very palatable or digestible in their raw state either....

one of my favourite ways to eat peanuts is in that most sinful concoction called peanut brittle. with only a few ingredients, this amazing confection can be made in under 15 minutes. it couldn't be easier to make, however, since the way i am showing here is done in a microwave versus the conventional stove top way.

making candy [with a thermometer] isn't exactly the easiest thing for most everyday cooks who are often inexperienced with it. it can also be a challenging thing as it is a bit more difficult, in general, than simple baking. besides that, i am assuming a number of people do not own candy thermometers!

so, if you like candy and are a peanut lover, then opt for this super simple method. this is really only a recipe to be made by adults, keeping pets and children out of the way as any slip up can result in burns. remember, you are dealing with hot sugar syrups here.

don't let that deter you, however! it's a super simple recipe and anyone can make it with fantastic results.

if you like sweet and spicy things, try adding a 1/2 tsp of dried chili flakes at the time you add the vanilla. that'll for sure get your attention and taste buds stimulated! :))


microwave method peanut brittle

whether you are making this for yourself or as a gift to give away, this peanut brittle is always a winner. it is also a much simpler and faster way to make it than the stove-top way, done with a candy thermometer — something not everyone owns. you may want to make more than one batch but only make it one recipe at a time as there is much 'upfoaming' and you are dealing with a scorching hot sugar syrup.

makes 1 batch (about 10 to 12 pcs)

ingredients:

1 c white sugar
1/2 c corn syrup

1 1/4 c peanuts, plain roasted or salted

1 tsp vanilla
1 tsp butter or parve margarine

1/2 tsp red chili flakes, optional

1 tsp baking SODA (not powder!)

method:

before starting, you MUST:
  • have all ingredients ready;
  • have a baking sheet lined with parchment or buttered ready;
  • follow the directions exactly;
  • make sure to use heat proof utensils and oven mitts to transfer.
in a large bowl, place the sugar and corn syrup. you can use either dark or light. i use dark corn syrup. MAKE SURE to use a large bowl as it will bubble up. i doubt you want to scrub a hardened sugar mixture out of your microwave, now do you?!

mix the two together.

stir until it is well mix and use another spoon to get the sugar mix all into the bowl.

microwave this mix for exactly 3 minutes on HIGH heat.

remove carefully the bowl to the counter and add the peanuts only and stir.

place the bowl back in the microwave and heat it again on HIGH heat for 4 minutes.

remove the bowl again and add the vanilla, butter and chili flakes if using. stir.

cook again for exactly 1 minute on HIGH.

you need to work fast (but extremely cautiously) now:

remove the bowl to your counter top and add the baking SODA and stir with a wooden spoon quickly but thoroughly.

it will thicken and turn creamy coloured.

pour this all out on your prepared baking sheet and smooth it over. you may end up with a little left in the bowl but don't fret over it.

quickly spread out the mixture a little and let it harden for 1 hour. it should be the size of a large dinner plate.

once completely cooled, break into smaller serving pieces.

enjoy!

Saturday, January 27, 2007

a most american confection


the following confection is called buckeyes because it resembles the fruit of the ohio state buckeye tree of the united states. they are quite easy to prepare and depending on how many you want to make, you can easily adjust the recipe. they can be made with or without the flour addition but the flour, i find, adds a bit more stability to the fats from the peanut butter and the shortening or butter.

these are a great candy, or "bonbon" for those times when you need a sugar hit.

enough said.


buckeyes

a very american candy, these are hard to resist if you love peanut butter and chocolate. the recipe can be doubled and the fruits of your labour frozen, to be enjoyed over the next few weeks.

ingredients:

2/3 c smooth peanut butter [you may need a bit more]
3 1/2 tbsp shortening or margarine {or butter}
1/3 c AP flour [optional]
1.5 tsp vanilla extract
icing sugar, at least 500 gm [1 lb]

1 pkg chocolate chips or enough couvreture chocolate to equal that amount
1 tbsp vegetable oil

method:

with an electric mixer, blend together the peanut butter, shortening or margarine {or butter} and vanilla.

when smooth, add the flour and blend.

add icing sugar by the HALF CUP and blend. add enough sugar until you get a mass which is thick like clay and from which you can make a ball which holds together nicely. it is hard to say how much icing sugar as i never really measure the amount; i just add enough until it is the right consistency. the picture below is only about at the half way point and needs more sugar to make a stiffer dough. it will also firm up some upon refrigeration.

when you have a mixture that is quite firm, test one to see if you need more sugar is needed. make a one inch ball and put it in the freezer for 15 to 20 minutes [refrigerate the dough while you wait]. if it is still squishy once it's well chilled, then you need to add some more icing sugar.

if the ball tests okay and you don't need more sugar, let it sit in the fridge for a good hour or two for it to firm up. make balls by rolling them into 1 inch sizes with your hands. they will not be sticky but feel oily from the peanut butter. place them on a cookie sheet or plate and then return them to the fridge.

note that the dough should have the consistency of modeling clay and will be a light beige [buff] colour. if you added too much icing sugar, you can add some more peanut butter to lighten it up. it is very forgiving.

prepare a cookie sheet to put the chocolate coated balls on.

melt your chocolate carefully and add 1 tbsp vegetable oil. mix well. this is to add a sheen to the chocolate.

skewer each ball with a sturdy tooth pick or some other implement and dip each ball only partially into the chocolate. approximately 1/2 to 2/3 of each bonbon should be covered. place the balls on a cookie sheet and return them to the fridge to solidify.

these can be frozen for longer keeping.


enjoy!

Thursday, December 28, 2006

it has what in it??

this is a candy that i make maybe once every year or two. it is terribly sweet and only good when eaten in small amounts. you can keep it well wrapped in the freezer to take out every now and again when you get the urge. the best part of all is that it is basically a no-cook recipe.

it contains potato, of all things, and is remniscent of a very old type of confection which is rolled with peanut butter in the center like a sort of pinwheel and then sliced. this is popular in some places here in quebec and is a type of old world candy. the version i am showing here however is a more modernized one and quite different.

i also make this at passover when we are limited to very few baking ingredients due to the many restrictions of the holiday. luckily, there is now a passover version of icing sugar available with contains potato starch instead of cornstarch [which we cannot use].

note that i doubled the recipe and used vanilla [the person i made it for doesn't like peppermint!] at the time i made and photographed this. the recipe below is for the regular smaller amount.

peppermint & lime coconut fudge

ingredients:

1/4 c cold mashed potato
1 1/2 c or more icing sugar
1/2 - 3/4 tsp peppermint extract
1 - 1 1/2 c unsweetened dried coconut shreds
1 tbsp lime zest

1/2 of a 300g bag chocolate chips
1 tbsp vegetable oil

you will need a large loaf pan. pyrex is preferable.

method:

boil small potato and mash it well while warm and let cool. do not use a food processor.

using a fine meshed strainer, push the potato through it. you do not want little chunks of potato.

put it in a medium bowl and add the peppermint extract and the lime zest.

now add 1/2 c of the icing sugar. it will turn liquidy. as you add more it will turn white.

add the rest (or enough) of the icing sugar until you get a very thick fondant like mixture.

add the coconut and stir well until it is well mixed.

you should get a ball. if it does not form a ball either add a bit more coconut or icing sugar. it should be hard to stir which is what you want.

press this into a large loaf pan to get an even layer. and put this in the refrigerator.

in the microwave on medium low to medium heat, melt the chocolate chips in a microwaveable bowl. be careful to do it in 30 second intervals. mix with a spatula until all is melted. make sure absolutely no water comes in contact with the chocolate or it will seize and you can say goodbye to it. mix in the oil and stir well.

remove the pan from the fridge and pour on the melted chocolate. make an even layer and return it to the fridge.

carefully cut the candy into small pieces. it is much easier to cut successfully when cold. actually, let me correct myself by saying that you should score it into which serving sizes you want when cold and then after it has sat out for a bit and softened, then cut it. use a very sharp knife.

these can also be shaped into balls and dipped in the melted chocolate and placed on parchment to set. use double the amount of chocolate to coat them.

here is another recipe for a similar version making these into small small candies.

check out tschoerda's success with the recipe in her blog, dinner for one. glad you now found a way to simulate your favourite treat, tschoerda!

enjoy in small amounts and then call the dentist :-)

Wednesday, December 20, 2006

more hanukkah sweets & treats

hanukkah is, and has been, celebrated worldwide for many centuries by all those practising the faith. the only exception would be that of the jews with ethiopian backgrounds. having settled in, or inhabited, all parts of the globe, save for a few places, a tremendous variety of food and recipes from everywhere jews have lived, has been integrated into both their everyday and ceremonial cuisine. from siberia to south africa and new york to shanghai, jews have been adept at adapting and adopting local flavours, provided they could be eaten. many an item has been reworked with respect to the dietary laws and has led to the tremendous variety and diversity of what today is called jewish cuisine.

in food terms, most of what we eat for this holiday involves the frying items in oil to honour the miracle of the oil which burned for 8 days when it was supposed to last one day. this can become tedious after a few days and is not the healthiest of things to do for eight days straight, not to mention causing tremendous lingering smells of oil in one's home. from what i know, i will add here that frying so many things in oil is more of an ashkenazi tradition than a sephardic one. some of the foods served during this time such as bimuelos are fried however. some [sephardic] people will also eat dairy foods depending on which customs they follow. in the end, all these dishes, fried or not, taste wonderful.

the item for today's post is sweets. it is sephardic in origin, is not complicated and does not involve any oil. in fact, it is pretty much straightforward and something which is enjoyed by many people all over the world.


sesame candy — סוכריות סומסום


this treat is eaten at hanukkah and is very good if you like sesame seeds. as i cannot find my recipe for it at the moment, i am giving you another from gloria kaufer greene which works nicely. i will post mine when i lay my hands on it! obviously, this candy is not limited to just the middle east, look here, here and here for examples. whichever way you make it, it's great.

ingredients:

vegetable oil

2 c sesame seeds (12 oz)
1/2 c honey
1/2 c brown sugar
1/2 tsp cinnamon
1/4 tsp ginger (powder)

method:

take a 9 in square cake pan or pyrex and coat it with oil.

in an ungreased fry pan place the sesame seeds and dry fry them for 5 to 10 minutes over medium heat until they are toasted. do not overbrown them. place them in a bowl to cool and wipe out the fry pan so it is completely clean.

add the honey, sugar and spices to the skillet and mix. bring it to a boil over medium heat. keep stirring until it comes to a rolling boil and cook this stirring for another two minutes. it must be boiling. do not exceed 2 minutes of full boiling. immediately remove from heat and add the sesame seeds. do not delay. stir until well mixed. transfer this quickly to your cake pan and press down with a spatula that has been dipped in water. make sure the spatula is heat resistant.

press this into an even layer. cool it for 15 minutes or until solid but lukewarm. run the spatula along the sides to loosen the candy and then turn the whole thing carefully onto a flat surface and with a sharp knife cut into fingers or squares. you can also make little squares or diamonds.

let these cool completely and store at room temperature. like all candy, this is best made when your kitchen is dry.


enjoy!


Friday, November 03, 2006

candy apples


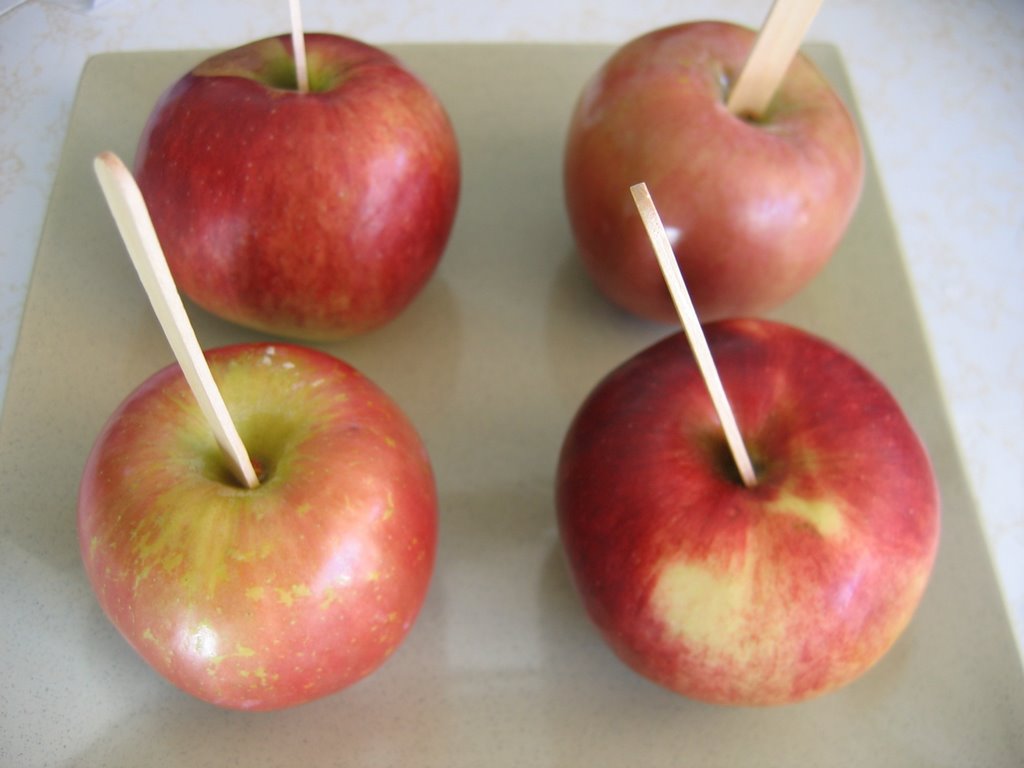
this fun confection is usually seen around the time of hallowe'en here in north america. i fondly remember our neighbour making tons of them and being excited that i was going to be the recipient of one of these beautiful, shiny red candy apples.

these apples are also called toffee apples in britain, which is what our neighbour used to call them. you will often also see these at fairs and amusement parks lined up, some plain and some elaborately decorated with all sorts of little candies or nuts. it is funny as i have known very few kids to be able to finish a whole one to themselves. once the apple is bitten into, it's usually a done-deal. you can't exactly save it for later, especially since the juices of the apple soon degrade the sugary coating. it is always fun to watch a kid at a fairground trying to make the first bite through the hard coating.

candy apples can be made in two ways. one is with a simple sugar syrup dyed red and the other way with caramel[s].

i usually make these around rosh hashanah when it is traditional to have apples dipped in honey and all things sweet. why not, since i don't really celebrate hallowe'en. whenever i make these however, they are always given away. it's not the kind of thing you are going to eat more than one of yourself.

one thing i have learned in my experiences making these apples is that using a smaller apple is best. often with a large apple it eventually get thrown away only half-eaten. another thing is that the apples must be completely blemish & bruise free as well as being completely dry. any water and it may ruin the whole process. humidity in the kitchen is a big no-no, too. make sure the day you make these that your kitchen is dry.

things to note before starting:

• keep a bowl of ice water near you when you work with molten sugar;
• keep them in a very dry place to store; will keep for about 2 days if necessary;
• decorate immediately;
• use apples that are small and good for eating, i.e. sweet & very crisp;
• obviously best eaten the day they are made; you can wrap these in clear cellophane.


so without further ado, here is the recipe. note that i only make half the recipe so if you want more, you need to double the ingredients.

{please note that for some odd reason when photographing the finished apples, the lighting somehow managed to add what looks like odd triangular gaps on the apples in the first photo. don't worry, the apples were perfect as will be yours!}

red candy apples

ingredients


4 - 5 small crisp eating apples
sticks, such as popsicle

candy thermometer

1 1/2 c granulated sugar
1/4 c white corn syrup
several drops red food dye, or as much as you want
1/2 c water

decorations or chopped nuts, optional

method

wash apples and dry thoroughly. carefully insert sticks into apples and set aside. clean any apple juices that ooze out from the insertion point with a kleenex before dipping.


either grease a cookie sheet with margarine or butter or place a silpat mat or parchment paper on on a cookie sheet.

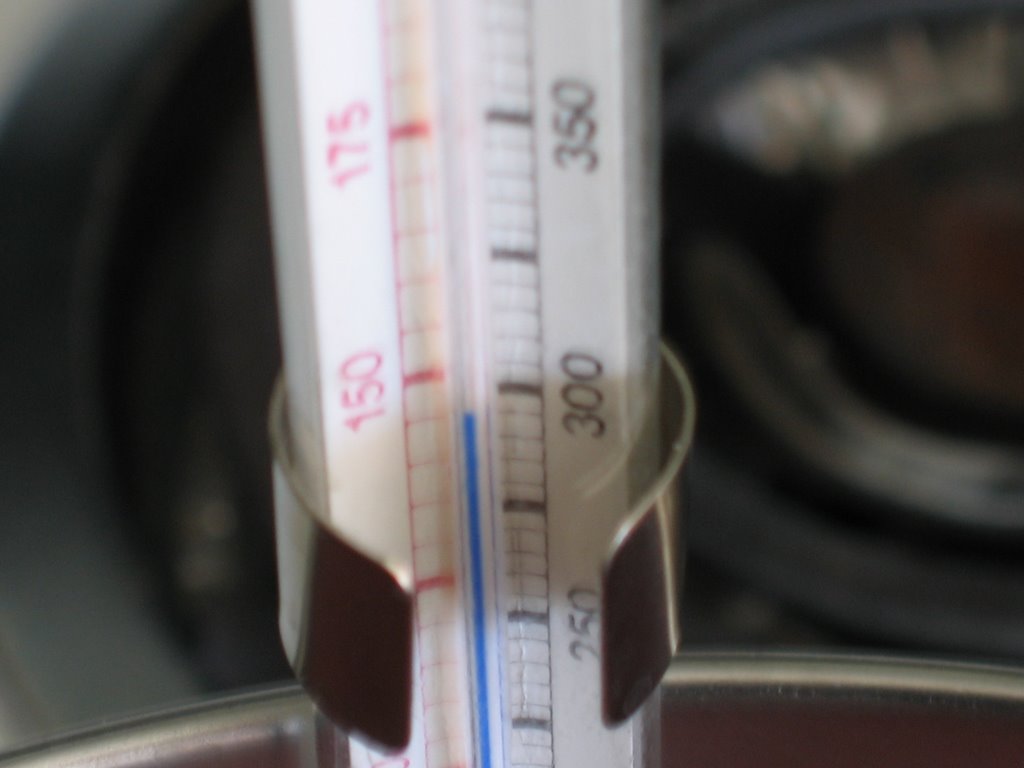
place all of the remaining ingredients in a tall sided pot over medium heat with the thermometer attached to the side of the pot. stir the sugar ingredients until dissolved. scrape the sides of the pot so no sugar is on the sides. this is important. once the sugar has melted let this boil until it reaches 300 F. DO NOT STIR or you will seed it and it will be ruined.

with the bowl of ice water beside you in case you need to plunge a hand or finger in, take one of the apples by the stick and plunge it in and swirl to coat the apple all over. make sure it is well coated. let it drip briefly to lose excess sugar. place this on the cookie sheet or plunge into your decorations and then on sheet. repeat with others.

if the sugar starts to get too thick to dip, place it back on the stove on low heat.

as i hate waste [G-d forbid sugar!], you can pour the rest of the syrup on a parchment and let it dry and then break it into pieces to either eat or use in some other way. another idea would be to use little molds to make bright red lollipops.


enjoy!

here are some other links to read more and find some different recipes:

here


and if you want two more recipes for caramel apples, here you go.

Friday, October 27, 2006

and on a related topic ....

this just came to mind a propos to my brigadeiros post:

while jimmies are "safe", did you know that those silver dragees used to decorate cookies and confections are very controversial?

this subject may be a little old {by a few years} but it is still interesting nonetheless. i have been eating these things since i was a kid and i NEVER suffered any ill effects, as have none of my friends or anyone else i know, for that matter.

to hear about this controversy, listen to this npr broadcast, entitled toxic cookie decorations. fun & informative.

you can also read about the controversy a bit as it relates to their use in indian sweets.

apparently you can still find them at sur la table. i will continue to buy mine and use them.

if you ever wondered what exactly is in a dragee, according to sprinkle king it consists of:
Sugar75.6742%
Corn Starch24.1001%
Gelatin0.1454%
Silver0.0803%

So...if you ate a 25 g package (which has hundreds of individual dragées), you'd ingest about 20 mg of silver. The amount of silver in a bunch of cookies would be more in the range of tenths of mgs.

info taken from here
gelatin?? not in the ones i ate.

my RIP should only read:

died as a result of eating silver dragees.
what a way to go.


don't forget to set your clocks back this weekend
after 2 am saturday night!!


yay, an extra hour of silver dragee eating!

brigadeiros

as the days get shorter and it gets darker earlier, one of my friends starts to get depressed that winter is on its way. she longs for her native hot brazil where the sun is always shining and there is no snow.

because my friend has a sweet tooth like i do, i decided to try to cheer her up and made her these sweets she always talks about called brigadeiros.


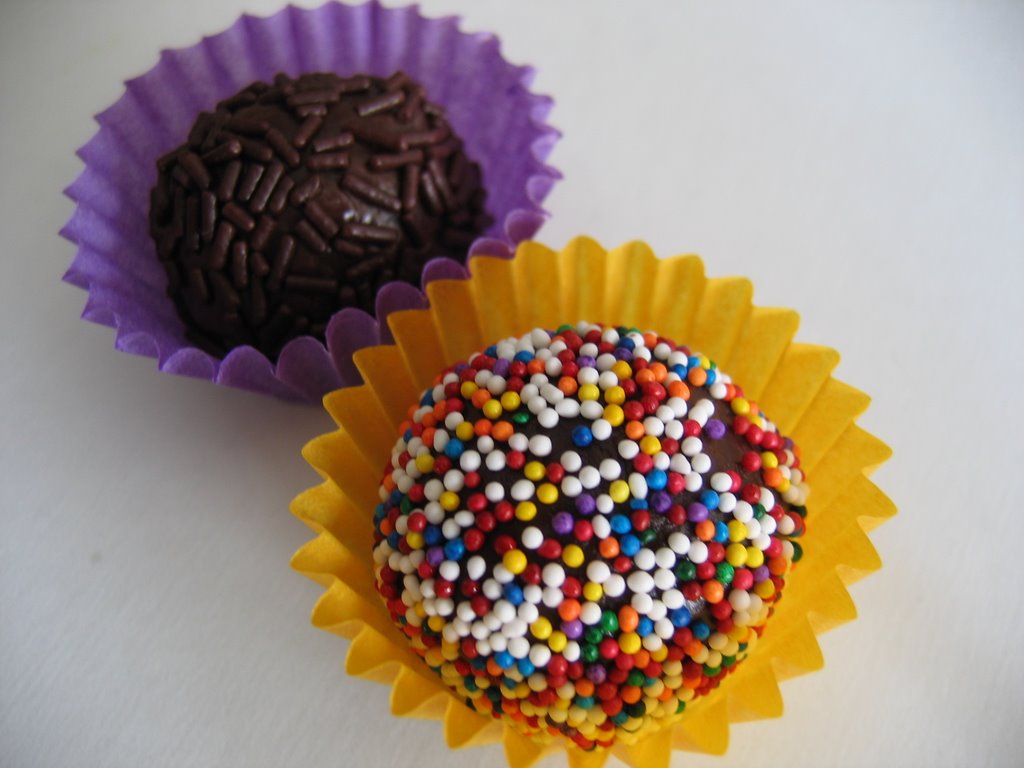
these truffle-shaped balls covered in jimmies are quite popular in brazil and show up often at all kinds of celebrations. they are made from the much loved sweetened condensed milk, with the addition of butter and cocoa.

a very easy recipe to make, they are quite sweet and as colourful as you decide to make them depending on the decorations you choose. these confections have the consistency of a fondant and are chewy. do not expect fudge as we know it [in north america] though they are described that way sometimes. to read about the history of this world war II sweet, look here.

i blundered in that when i made them this time around, i added the cocoa without sifting first as i usually do. do not make this same mistake or you may end up with a granular brigadeiro. mine turned out fine, thankfully. that's what happens when you are doing too many things at once.

the following recipe is as i learned it from my friends. here are some others to look at and/or try: option 1, option 2, or option 3.

brigadeiros
ingredients:

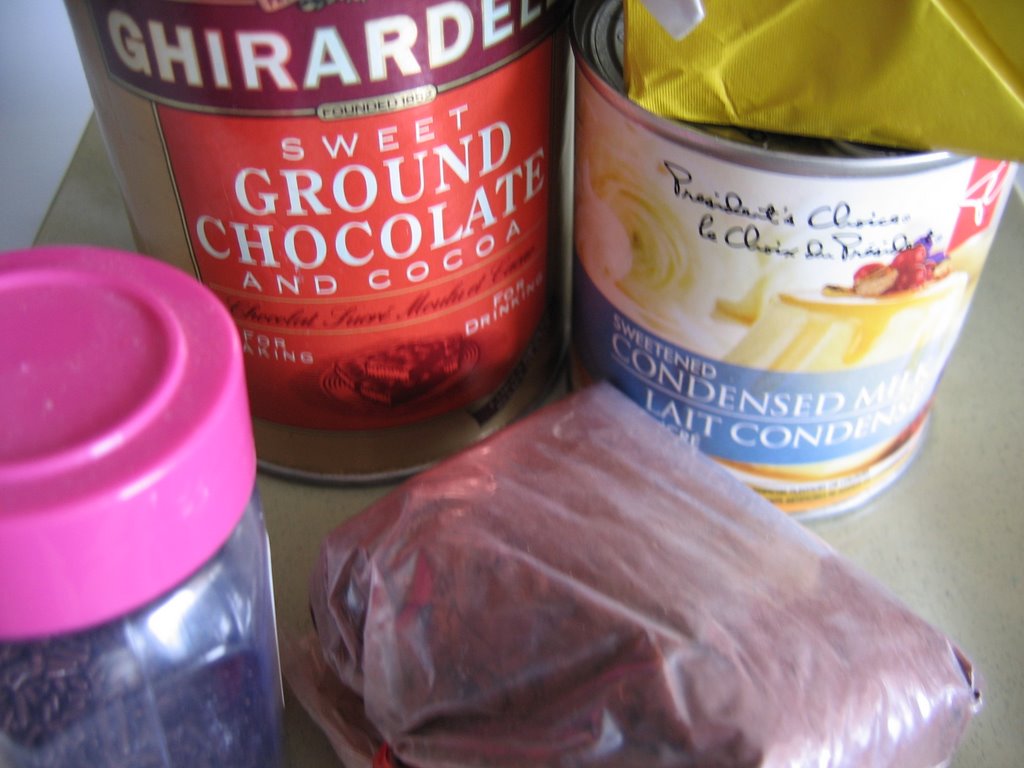
1 can sweetened condensed milk
2 tbsp unsalted butter
2 - 4 tbsp cocoa [i used a mixture of valrhona & ghirardelli]
1 tsp vanilla
1 tsp finely ground instant coffee [optional]
different coloured "jimmies"

small paper confection cups

method:

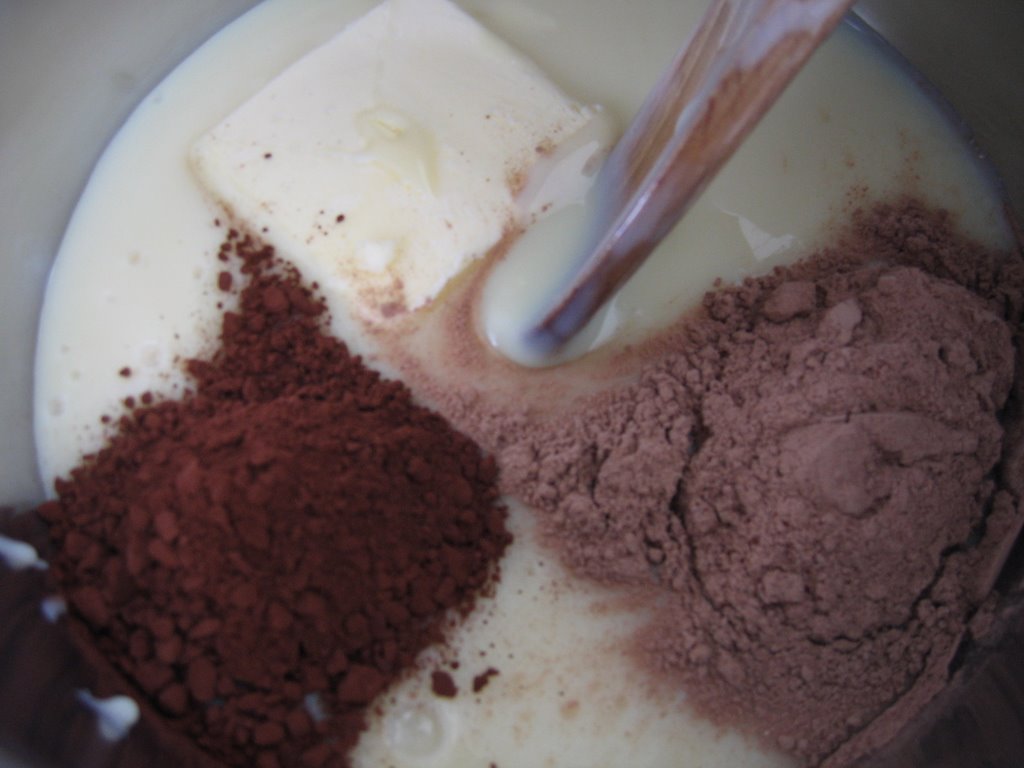
in a pot over medium heat, add all the ingredients and mix well.


keep stirring, without leaving the stove for the next 15 to 20 minutes.


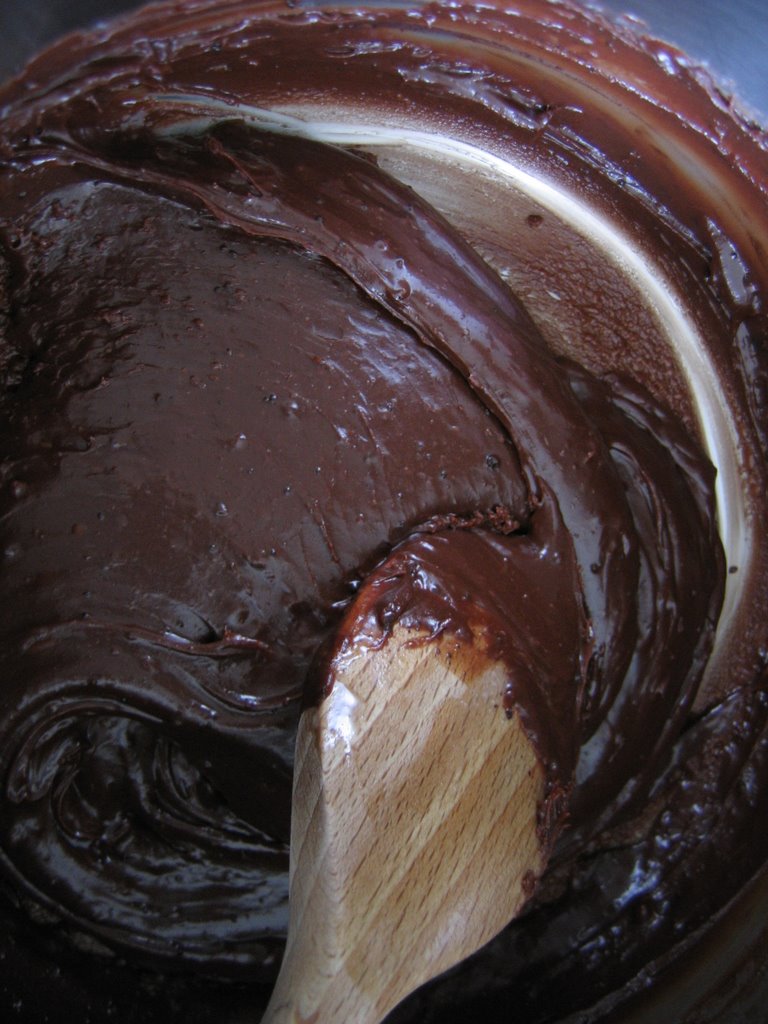
the mixture will come together and will eventually start to darken and bubble.

after a little while, the mixture will thicken considerably and start to leave the bottom and sides of the pan.

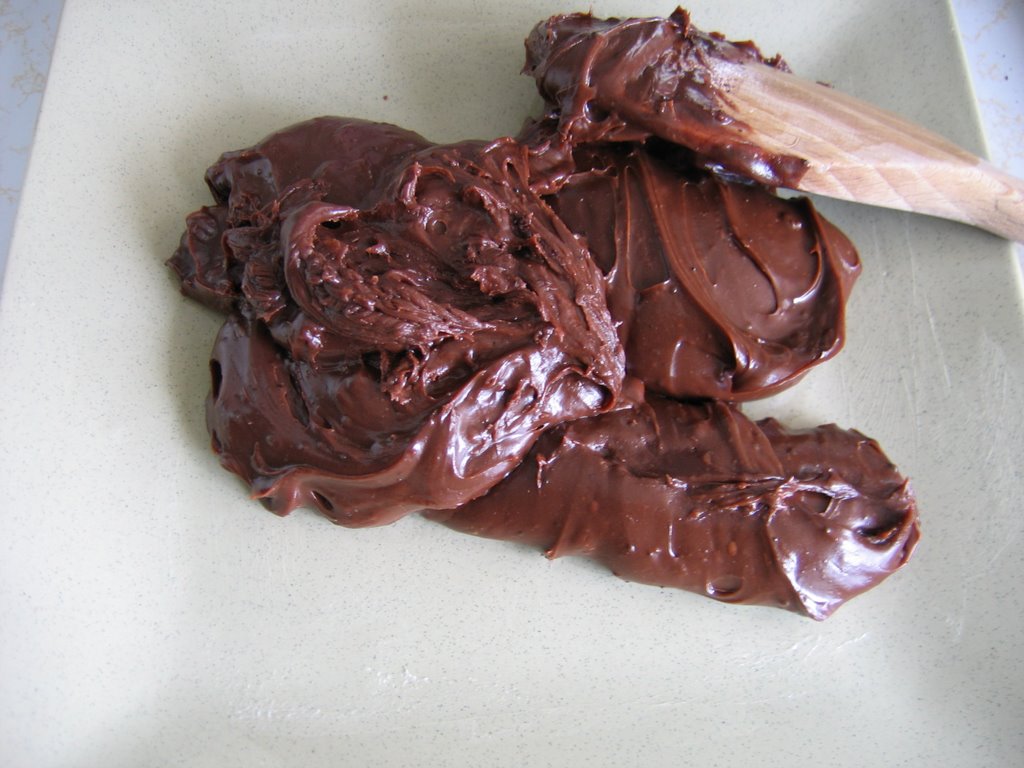
once this happens, place the mixture onto a buttered dish to cool.

when the mixture is cool enough to handle, use a spoon to break off pieces.

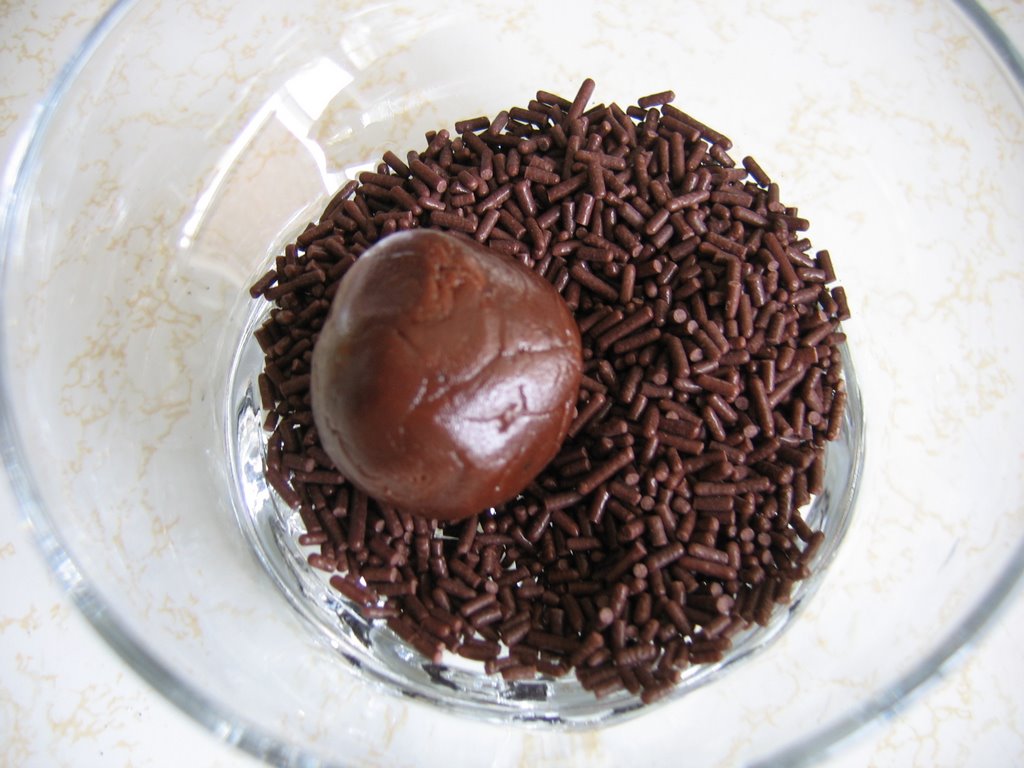
roll these into balls. in another dish filled with your jimmies, roll them well into the jimmies. some will stick better than others. it is a matter of experimentation. i find the little balls stick better than the longer chocolate ones.


place these in small confection papers and refrigerate. let them come to room temperature as they will harden in the fridge. remember these are chewy candies much like fondant.

makes about 20.
hopefully, these little surprises will send my friend's "blues" away!

Wednesday, October 11, 2006

pez

photo: www.retrorepros.com

after a busy afternoon, i was in a café enjoying something to drink and watching this kid play with what looked like a toy. after a minute or two, i figured out it was not only a toy but also the dispenser for the candy i ate so many years ago called pez.

i decided it would make for an interesting entry, so here is some information on pez:

pez was originally a black lozenge created by anti-smoking advocate eduard haas of austria in the late 1920's to mask smoker's breath. its name was derived from its german name, PfeffErminZ.

it wasn't until 1948 that a dispenser was thought up. but one had to wait until 1952 before children got hold of it. the appeal of the dispensers took childrens' and adults' fancies and the rest is history, as they say.

there are whole shops devoted to pez. its dispensers can cost a fortune for collectors, some of which are feverishly sought after.

interesting reads are at pez.com or the official collectors site which looks quite nice, called pez.org and more fluff is available at useless information.

there is even a museum. read the article here or visit the museum.

i should have saved my dispensers.