Showing posts with label lebanese. Show all posts

Tuesday, June 17, 2008

reruns no. 2 — lebanese garlic (mayo) sauce

in following with the theme of revisited recipes, this one is for the popular and much sought after sauce, or condiment, which goes by its arabic name thoum. thoum is really just the word for garlic however. considering the amount of 'hits' my blog gets for it regularly, since the time i originally posted that recipe, i figured it is time to post the other version. the first recipe, posted over 2 years ago, is eggless. it also uses one whole head of garlic! this one includes the yolk of one egg and few cloves of garlic.

before i give the recipe, i will say that some people don't know or 'get it' that the authentic version of this sauce is made without eggs and quite a bit lot of garlic. in essence, it is a mixture of garlic mashed with salt to yield a purée into which oil is slowly added. it is then finished with lemon juice. making it this way has its faults in so much as it is extremely difficult to do, even for those who are experienced. it is an unstable emulsion which is very tempermental and requires the correct measures and perfect touch of hand, whether made traditionally in a large mortar or by modern methods (blender). the eggless version i posted in 2006, was thickened, as many people do it, with a piece of boiled potato, making a garlic sauce which does not separate and reduces the acridity, or harshness, of the garlic. adding either the boiled potato or a piece of moistened bread to it makes it stable (nothing worse than having all your work separate and fall apart before your eyes!).

* * * * *

the other way to make thoum stable is to use an egg yolk, an ingredient which makes a thick unctuous product. this creamy off-white coloured garlic sauce is also the one, i believe, the majority of people are looking for and the one which they are accustomed to finding in (fast food type) lebanese restaurants.

the best way to prepare this condiment is in a blender or with a hand held immersion blender. if you choose the latter route, make sure you have someone helping you to hold the vessel/cup in which you blend the ingredients, as it becomes difficult, even next to impossible, to keep it from wobbling around while blending and trying to add the oil all at the same time.

the most important thing when making this is NOT to rush. if you're one of those people who are impatient, then you are better off getting someone else to make it or just to buy it. while making this sauce is pretty straightforward, it still requires attention to detail and a steady hand.

the sauce is good for 1 to 2 weeks if well refrigerated. only use mild olive oil or a blend of vegetable and olive oil. remember this recipe is more like a mayonnaise (and therefore highly caloric) while
the other has a different texture. that one, i'd say, is more like a sauce than a mayonnaise. it also uses less oil and is more pungent.


lebanese garlic mayonnaise sauce

makes approx. 1 cup

ingredients:


3 large cloves garlic + 1 smaller one
1 large egg yolk
1 1/2 tsp (no more than that!) water*
1/4 tsp salt

1 c (8 oz) regular olive oil or blend of vegetable and olive oil

white vinegar mixed with water to equal 3 tbsp OR,

juice of 1/2 small lemon

*the water is there to help blend things easily. DO NOT omit it.


method:

have your mise-en-place ready first. you don't have time to run around the kitchen grabbing ingredients.

*i am using an immersion blender here; you can use a regular one. do NOT use a food processor.

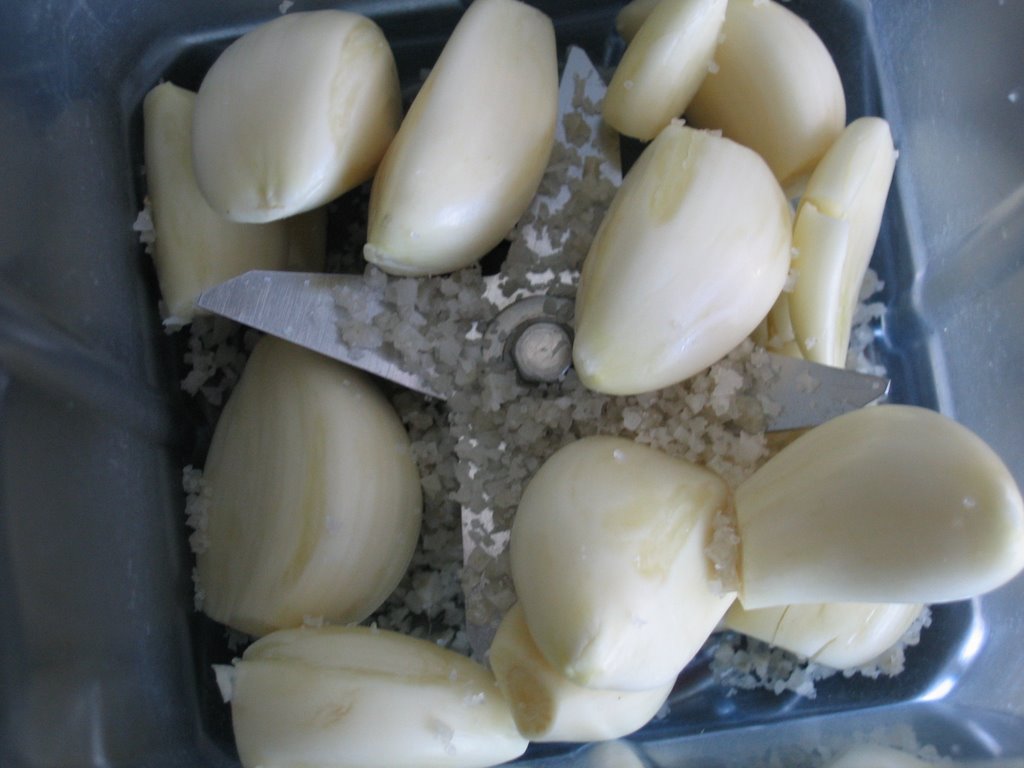
place the garlic and egg yolk in the mixing bowl (or tall sided immersion blender jar). if you don't trust your blades are sharp enough, you can use a mortar and pestle to grind the garlic to a fine purée with the salt and then add it to the blender with the egg yolk and continue from that point.

blend it for a minute just to break up the garlic. it will further break down as you progress.

add the salt and the water and mix it for 2 or 3 minutes (pulsing) until is is broken down and blended.

this part is where you need to keep an eye on things. i can't say exactly how long it will take as it depends upon your ingredients and your method.

add the oil now in DROPS and blend in completely after each one, pulsing as you go.

continue to do this until your mixture looks creamy and emulsified. this is the sign of when to add the rest of the oil, slowly in more of a steady stream.

add the oil, in trickles and keep blending as you go. it will take some time, maybe up to 10 minutes. have someone hold the emulsion jug if that is how you're doing it or to slowly pour the oil as you blend and hold on to the jar.

once all the oil is incorporated, it should look like a whitish very thick mayonnaise.

taste it to see if you need more salt. add a tiny bit if necessary.

now add the lemon juice or vinegar and water mixture in a slow stream until it tastes right to you. you may not need it all, so taste test along the way.

refrigerate and use as wanted.


enjoy!

Monday, September 17, 2007

chicken 1-2-3

this is really one of those 1-2-3 step recipes — cut the chicken, spice it up and then bake. beyond simple to prepare (and cook), this incredible chicken dish can be thrown together in less than 10 minutes and results in flavours which are spectacular. it can be used as an everyday dish for suppers or served on holidays.

if you don't have za'atar, or have never tried it, read here to find out what it is. there is a simple recipe for it included under "make your own" in the recipe. you can also find another one in zainab & meedo's great blog, arabic bites (thanks girls!).

additionally, if you don't like sweet flavours, you can leave out the honey altogether and increase the lemon.


honey za'atar chicken

an extremely flavourful dish, it can be made spicy by using hot paprika (or cayenne) or mild with regular paprika. served alongside rice and a salad, it makes for a nice meal.

serves 4 to 5 people

ingredients:

1 chicken*, cut into serving pieces (~8 pcs)

salt
black pepper
(hot) paprika** or cayenne pepper
onion and garlic powder
za'atar

1/2 lemon
6 - 8 tbsp honey, more or less

*i prefer to leave the skin on for this one but you can make it without. the skin serves to add flavour and keep the meat from drying out too much.

**adding the hot paprika makes a big difference. if you want it non-spicy, then just use regular paprika.

method:

preheat oven to 400F.

cut up chicken, clean it and dry with paper towels. either keep or remove skin (w/ skin tastes better).

in a glass pyrex (8 x 8), arrange the chicken pieces and squeeze the lemon over them. another option is that you can place the chicken in a ziploc and add the lemon juice in the morning or night before, leaving it in the fridge to bake after work around supper time.

now, in this order: salt and pepper each piece. then do the same with the onion powder and garlic powder. next, sprinkle the (hot) paprika over each chicken part and then finish with a good amount of za'atar. don't skimp on this part.

lastly, drizzle the honey (amount is up to you but about 1 tbsp/pc is recommended) over each piece of chicken. do not mix the chicken pieces now.

in a preheated 400F oven, without covering, bake the chicken for 12 minutes.

lower heat to 350F and bake uncovered for about 35 minutes or until browned.

remove the pieces of chicken to a serving plate (cover with foil) and place the sauce in a small pot and boil it down until it thickens. serve with the chicken.

finger-licking-good & always a big hit!

enjoy!


Thursday, June 28, 2007

sweet little squares

popular in all middle eastern countries, this cake is always a favourite amongst adults and children. made from fine semolina, butter and yogurt, it is doused with the typical sugar and water syrup right after baking and left to soak it up, leaving a moist wonderful treat.

depending upon the country in which it is made, or the ethnic group who is making it, these sweet little squares go by different names and sometimes contain ingredients such as shredded coconut and, in the sefardi way, ground nuts and spices. typically, each square is adorned by a single whole blanched almond or a small mound of finely ground pistachio added before serving. this version is a lebanese-type one and is made in thin squares; it goes by the name of nammoura. it can also be called basboussa, tishpishti, revani, gâteau de semoule or hrisa. one of my favourite things about this cake is that tehini (sesame) paste is used to coat the pan instead of butter which gives an amazing final flavour to the cake. of course, you can still use butter but it won't be the same.

the cake is comprised of two components — the att'ar or syrup and the cake itself. the whole cake takes a little forethought as you need to make the syrup first and let it cool to room temperature since the cake uses part of this syrup as the sweetener. once all put together, the cake rests for several hours for the syrup to be fully absorbed and the flavours to mingle.

nammoura can be made either in thick squares or thin ones. this one is thin, my personal preference. if you want them thick, then double the ingredients and follow the same directions. for this version, you'll need a 6 ½ or 7 inch pan, either square or circular. i wouldn't use an 8 inch pan as it will be too large for this amount and result in a cake which is hard and too thin. look at the dollar stores or grocery stores for disposable aluminum smaller ones if you don't have this size baking tin. if you do double the recipe, use an 8 or 9 inch pan for thick squares or the larger 9 by 12 inch pan for thin ones.


nammoura ~ gâteau de semoule
טשפשטי ~ هريسة او نمورة او بسبوسة

sweet little cake squares made from semolina, these are utterly delicious. each square is accented by a nice single almond and the taste of nutty sesame paste. the corner pieces are the best! a must for afternoon snacks or "tea", make sure you start in the morning as it needs to sit for several hours before serving. they will keep, covered, on the counter for only a day or two — if there are any remaining!

makes 16 small squares

ingredients for syrup:

1 2/3 c white sugar
3/4 c water
1 tbsp lemon juice

2 tsp orange flower water, opt

method:

combine sugar, water and lemon juice only and bring to boil. once the sugar is all dissolved, lower the heat to low, or enough heat to maintain bubbling.

cook the syrup for 10 minutes and remove from heat. add the orange flower water if using. the syrup should be a very thin syrup. it will thicken slightly on cooling.

once cooled, start the cake.

ingredients for cake:

1 c fine semolina
2 tbsp ground almonds, opt.
3 tbsp shredded coconut, opt.
1/8 tsp salt
1/2 heaped tsp baking powder

1/4 c butter, softened
1/2 c full fat yogurt

3 oz cooled syrup

tahini sesame paste or butter

blanched whole almonds,
enough to equal number of squares OR
3 tbsp finely ground pistachio*

method:

combine the semolina with the other dry ingredients. the ground almonds and coconut are optional but very good.

add the softened butter and cream it with the dry ingredients. add the yogurt and blend again with mixer.

add the syrup last and blend well.


you can add everything together all at once but you need a big bowl, as it gets messy when you start to blend everything together.

preheat oven to 350F.

take the tehini paste or butter and add enough to coat the pan you are using. make sure to coat the pan well with the tahini. you should be able to see it shmeared on.

place the batter in the pan and spread it evenly.

now take a knife and mark your squares by scoring. you do not want to go all the way through. this is just to mark the squares.

place a single almond in the middle of each square and press it in slightly. *if using finely ground pistachio, skip this step and see end of recipe.

bake the cake for 35 minutes @ 350F.

remove cake from oven. raise the heat to 375 F.

take a knife and cut through all the squares.

return the pan to the oven for another 20 to 25 minutes or until it's golden brown.

remove from oven and while still hot, pour the cold att'ar (syrup) over the squares.

let it sit for several hours to absorb. this is essential! don't eat before!! *if using finely ground pistachio to decorate each square, let the syrup absorb fully and just before serving place about 1/4 heaped teaspoon of it in the middle of each square.

serve with coffee or tea or whatever drink makes you happy.

enjoy!

Wednesday, November 01, 2006

thoum — aïoli's lebanese cousin

update (2008): i have now posted version II for this recipe. the following is more on the traditional side (eggless). read both posts to decide which you want/like!


[this would have come in helpful for fighting vampires last night ....]

thoum is the unctuous concoction of only a few basic ingredients which are pounded together, or in this case blended, to form a zesty sauce used as a condiment for meats, fish, vegetables or dipping in pita, fries or better yet — coating crispy, oven roasted potato wedges.

many mediterranean cultures have variations of this punchy garlic sauce. different versions include the provençal aïoli, the greek scordalia, and the catalonian allioli. there are also subvariations such as the french aillade.

to make this recipe you must have your mise-en-place ready. it can sometimes be a fussy sauce because of the oil & acid amalgamation. it is not the sort of thing you stop to go and ream your lemon and then measure oil.

in terms of preparation techniques, traditionally the thoum is made in a wooden mortar but it can be made the easier and faster way, in a blender or food processor, with the blender being a better choice. the sauce can be made with just garlic, lemon juice, salt and oil but this is an unstable mixture requiring skill at combining the oil with the garlic — a sometimes difficult procedure, especially for beginners. because of this, people will add a thickener like potato, mayonnaise or soaked bread which has been squeezed dry to bind it. i am showing you the easier way here today and will post the other method some time in the future. i suggest reading the whole recipe first before starting to decide how you want to proceed with it.

updated version *II* here.

thoum

ingredients:


1 head of garlic, separated & peeled
1/8 c lemon juice [up to 1/4 c]
1/2 - 1 tsp kosher salt, not regular small grained
1/4 - 1/2 tsp sugar
1/4 c mild olive oil
1/4 c vegetable oil

thickening agents:

1 very small floury potato OR
mayonnaise (LOTS) OR
bread soaked & squeezed dry


method:

choose a small floury potato [not waxy, this is important], peel it and either microwave it or cook it in a small pot of boiling water. you may cut it in 4 pieces to cook faster. let it cool and set aside for use later.

separate all the cloves of the garlic, peel and place aside. measure out your salt, lemon juice and oil. put the oil in a pyrex type vessel that you can pour from.

in a blender, add the salt and garlic and process until very well ground. add your lemon juice. start with 1/8 c to begin with [if you would like it more sour, add another tablespoon or two at this point]. i add 1/4 - 1/2 tsp sugar to balance the lemon.

with the motor running on low, start to very slowly add the oil in a steady stream.

after about 1/4 c has been added, turn up the speed and continue adding the rest until all has been added. blend for about 20 seconds at high speed.


at this point, the thoum is ready to use. it will most likely be quite thin, especially if you used the 1/4 c of lemon. that is fine, it is a matter of taste and how you will use this. in its thin form, it can be used to roast vegetables, like potatoes, in the oven. if you want the restaurant type version continue with the next step. note that many of the restaurant versions are basically mayonnaise which heavily flavoured with garlic and some lemon juice. so, if that is what you are after, use mayonnaise to thicken the thoum. mostly likely you will need lots of mayonnaise to thicken this amount of garlic, oil & lemon juice so you may want to make only half as much as a trial.

it can be thickened two or three ways —

add half of the small potato and blend well about 30 seconds. test the viscosity. if you want it thicker, add the rest.

the other options are to use soaked and squeezed bread in small amounts or mayonnaise. the way we get it here where i live, it is more of a mayonnaise-y sauce which i don't not like. you choose how you like it. if adding mayonnaise, i suggest doing it carefully so as to prevent separation. you may want to blend it in with the garlic sauce by hand.


remember, it's strong!
enjoy in modest amounts.

Wednesday, October 18, 2006

k'dami and the real za'atar

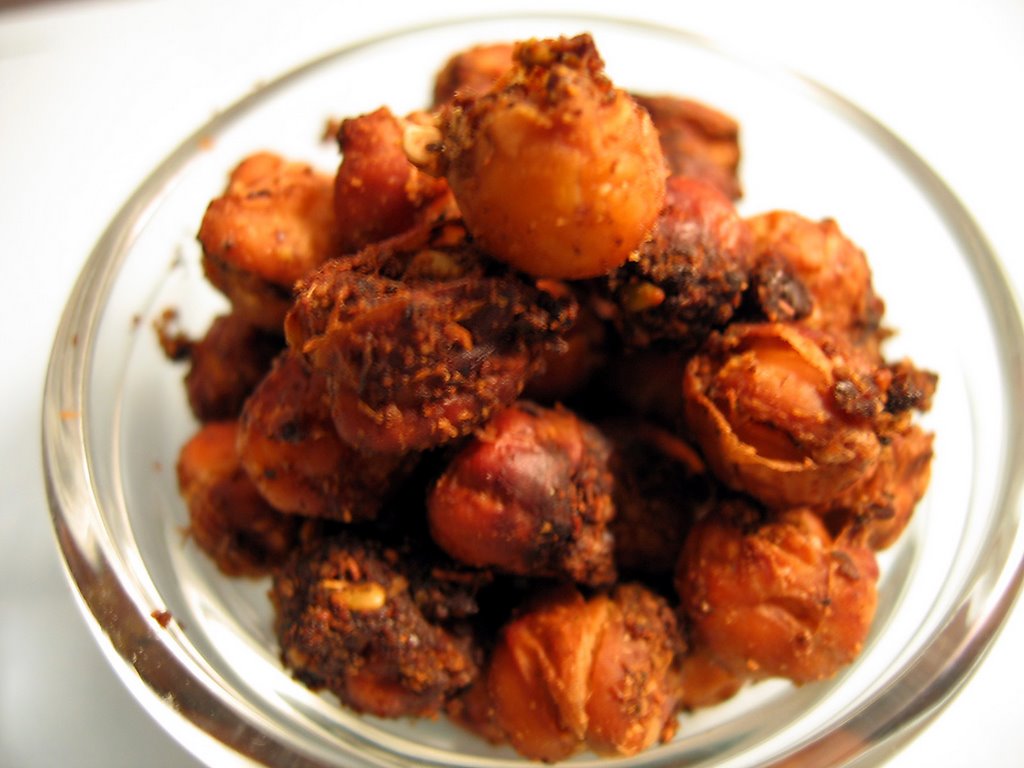
roasted chickpeas are a very common snack food in the middle east amongst the many dried nuts and seeds that are consumed. i know it simply as k'dami. it may also be common in india, in some similar form i would imagine.

i do not keep very many "snacky" type foods in my house but had a hankering for something savoury. i decided to make my own [as i often do]. why buy when you can easily make some yourself and control what you put in it? save money and make your own, you won't regret it.

* * * * *

a snack so easy and so deliciously addictive, these are savoury, slightly sour due to the sumac in the za'atar, spicy and a mildly hot. increase or decrease the heat as you like with the spices below. what's also great is that you can control the finalized texture yourself by how long you bake these, as everyone's tastes differ when it comes to both flavours & textures. i like mine very dry and crunchy.


spicy oven-roasted chickpeas {k'dami}
ingredients:

1 can [19 oz] chickpeas, drained and rinsed

1 tbsp * za'atar
[if you don't have any, you can make your own]
1 - 2 tsp very finely chopped almonds [optional]
1 heaping tsp kosher salt
1/4 tsp black pepper
1/2 - 3/4 tsp sugar
1/2 tsp onion powder or more
1/2 tsp garlic powder or more
1/4 tsp paprika
1/4 - 1/2 tsp hot paprika or chilli powder

1 1/2 tbsp olive oil

method:

drain and rinse the beans and let them dry a bit — you don't want wet chickpeas.

preheat the oven to 400 F.

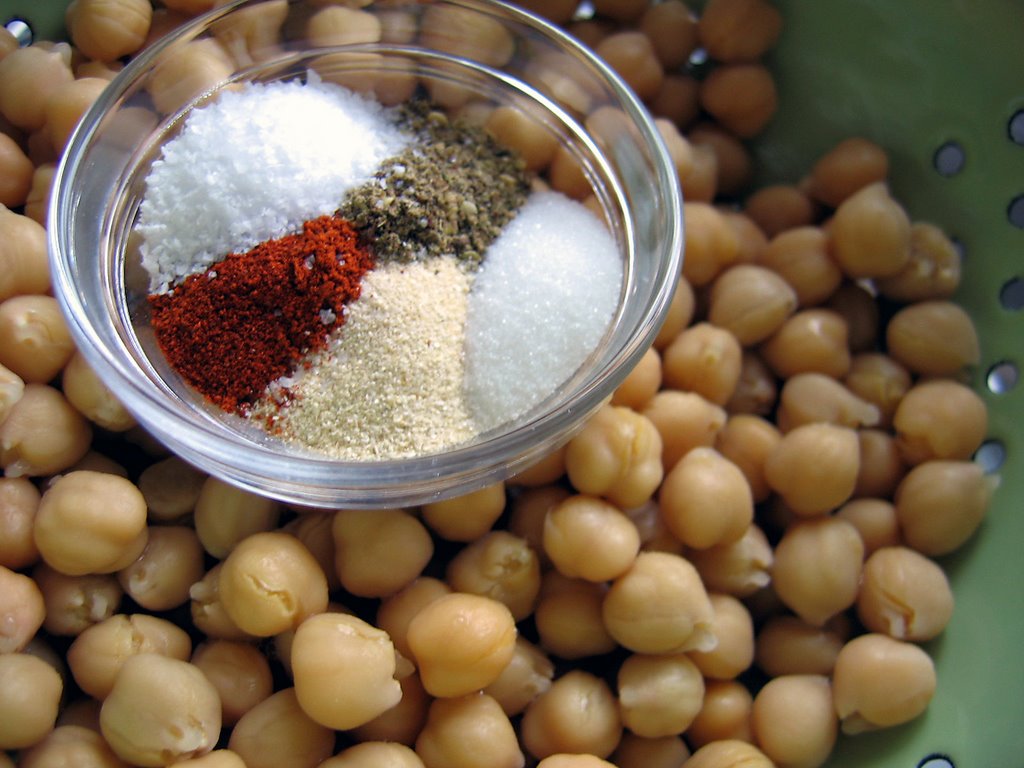
in the meantime, mix the spices together in a small bowl.

in a larger bowl, add the drained chickpeas and the olive oil [extra virgin is best] and mix well carefully so as not to break the whole beans. add the spices and mix again. taste and see if it needs adjusting.

transfer the mixture to a lined baking sheet. use a spatula to get all of the spice and oil mixture out of the bowl. i use parchment paper or a silpat mat.

put in oven for 15 - 20 minutes and remove and redistribute. repeat 2 to 3 more times and then lower heat to 325 and cook another 30 to 45 minutes or so, or until the chickpeas are crispy but not burned. remember these are only approximate times and if they burn they will be bitter.

you may even lower the temperature to 250 and perhaps cook a little longer to dry them. in any event, test one or two to see [let it cool first to firm up]. you may need more or less time in the oven. experiment with your oven, as not all are calibrated properly. when finished, they should be almost dried all the way through and not soft and mushy in the centers.

let cool and serve as a snack. i would not suggest eating all of them in one sitting as they may cause umm... alimentary canal irritation. unless, of course, you have a system which is tolerant of all things leguminosae.

notes: you may change the spices to whatever combinations and quantities you fancy. the one i am suggesting here has a middle eastern flavour. you may do it indian style, greek, italian or whatever you like. how about using wasabi powder or shichimi togarashi? [click each word, 2 links]. anything is possible.

za'atar is also a jewish group which performs the oriental music of the jews of middle eastern countries.

did you know that in ancient mesopotamia 24 chickpeas were equal to 1 shekel? trying paying with chickpeas in israel today! ha!

* * * * *
as an aside, jews make a dish called nahit. it is basically very humble salted and peppered chickpeas which have [sometimes] been dried in an oven to form an outer "skin" or other times, seasoned and served as is, without any ado. they are equally as tasty as k'dami however they do not have the same shelf life or texture. this recipe for honeyed nahit looked interesting, as well as one which replaces the chickpeas with indian chana dal. another sweet chickpea and rice dish which looked good is a 1950s one from jennie grossinger, a famous catskills, new york cook.

for a very interesting read on the etymology of the yiddish word for the chickpea — arbes — read this. you may be surprised to learn it's roots are both russian & turkish.

* * * * *

za'atar is a term which describes both a plant and the seed/herb mixture which i have used in the above recipe. this seed & herb mixture can be both green or red, the latter being red because of the sumac in it.

the original biblical za'atar, or hyssop was called eyzov in hebrew [עזוב] and played and important role amongst jews, arabs & christians many centuries ago.

Origanum syriacum is the real za'atar and is actually a protected plant today. people who are caught picking it [in quantity i imagine] are given hefty fines to pay due to the fact it has been overharvested and is scarce. i remember hearing this from both israeli and lebanese friends. za'atar is still an important spice and has long been believed to be good for one's mind and body. for a little synopsis, try reading this article.

a picture of the real eyzob can be seen in a recent post at this wonderful wordpress site about the flowers of israel. another great picture can be seen here.

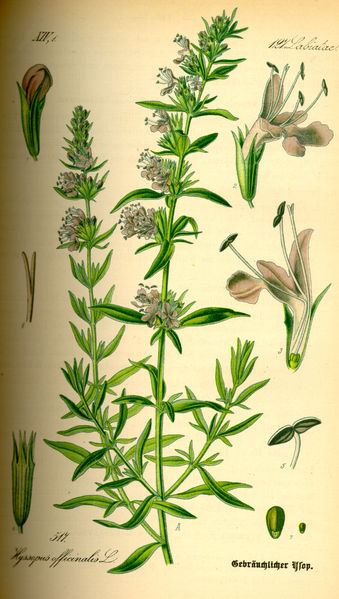
i have found the variety of hyssop pictured below here in canada at one of our large middle eastern markets catering the lebanese community. it is the standard hyssop plant. while not the real mccoy, it smelled and tasted wonderful when i made za'atar from it.

one of my favourite snacks is pita baked with olive oil & this herb called mana'ish [khoubz bil za'atar]. it is a common breakfast or anytime of the day snack and can be made the fast way with already baked pita or you can make your own bread and spread and bake with za'atar and olive oil. there is also a cheese manaish which is equally as delicious.

now, i'm hungry. ;p