Sunday, October 05, 2008

kitchen essentials — roasting an eggplant; the direct heat method

many months ago, i posted an entry on how to roast eggplants on the stovetop. that method, in my opinion, is (still) the best way to do it. unfortunately, not everyone has a grill type pan which elevates the food one is cooking off the direct heat. this, however, isn't really a problem; you'll see from this new post that you CAN roast directly on a heat source albeit with a minor modification. the reason i prefer the grill pan, and recommend buying one, is the heat the cast iron generates and smoked/grilled flavour it imparts on the foods one cooks on it. there definitely is a difference.

the following way to roast eggplants involves nothing but eggplants, tin (aluminum) foil and 60 minutes of your time. it also does the same job as using a grill pan but saves on the clean up as you will just throw out the tin foil once the eggplants are cooked. i will admit, there is a less of a pronounced smoked flavour with this method, as compared with the other one, but it is still decent and something which the average home cook can do with no problem. the bonus to this method is that you can actually roast up to 4 eggplants at a time, provided you have 4 burners.

what about the oven method, you say? the answer for me on that one is: NO! i've tried it on more than one occasion and it does not yield the same results. the flavour you are left with is quite insipid. the oven method also uses much more energy than when done on stovetop and heats up your kitchen tremendously.


the "direct heat" method for roasting eggplants

ingredients/items needed:

eggplant(s) - make sure they are not bent or curved
tin foil - try to use the heavy duty kind (like for bbq'ing)

electric (or gas) stove top element
tongs to turn the eggplant or use two soup spoons

method:

wash your eggplant(s) and pierce them in several spots all around with the tip of a knife. set aside.

take a piece of tin foil that will be long enough to wrap over the eggplant and completely cover it. this is important as you don't want any messes with liquid dripping out.

turn on the heat of the cooking element to medium high while you wrap the eggplant. make sure there is nothing around the element that may catch fire or anyone whose fingers may touch it!

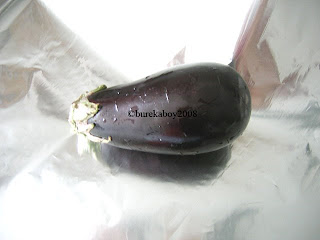
place the eggplant on the foil as shown below.
fold one side over.

fold the next side over.

use the rest of the foil to cover the eggplant so it is enveloped.

if using regular tin foil, REPEAT again. if using the heavy duty kind, once should be enough but just make sure it is completely wrapped with no holes or openings.

set the eggplant on the heat and let it cook for 12 minutes (i advise setting a time to remind you or mark down the time on a piece of paper). no, it won't burn! just make sure you don't have the heat up too high.

after 12 minutes, turn the eggplant a quarter turn and let it cook for another 12 minutes. REPEAT this until you have roasted all 4 sides.

once all 4 sides have roasted, take the eggplant and sit it upright and let it roast now for 10 minutes only.

carefully place the unwrapped eggplant on a baking sheet and let it cool for about 15 minutes.

open up the the tin foil to reveal your roasted eggplant.


and, if you don't know already.......

how to prepare your roasted eggplant


make an "I" shaped incision along its length. make the cross cuts (top and bottom of the "I" at the blossom and stem ends.

open up the eggplant from each side.

using a spoon, remove the seed pods. these are considered to make the flavour of the eggplant bitter. they also affect the texture and make your final dish "gritty" if they are kept in.

once all the seeds have been removed, take the spoon and remove the flesh from the eggplant and place it in a dish. don't forget to scrape close to the skin as a lot of the (smoked) flavour is located there.

use as directed by your recipe.
enjoy!


Friday, September 26, 2008

applicious

i had an aunt who was always in a rush, busy doing "things". who had time to waste, she would ask rhetorically when questioned why she was incessantly racing around. the joke was she was a disaster in the kitchen: she figured the higher the heat, the faster whatever she was making would cook. her quest to be uber-efficient led to many a burnt dish. of course, it wasn't her fault because "something must be wrong with the recipe" she'd utter (LOL). in her defense, however, there were a few things she made very well and what i am posting here was one of them.

this is a version of an apple cake she made during the holiday period which is now quickly coming upon us. everyone always loved it, especially while it was slightly warm. this rosh hashanah (or any day) cake is really ridiculously simple to make and requires one bowl and a pyrex (8 x 8 in) baking dish.

the texture of the cake batter — once baked — is airy soft. underneath it, and baked into the cake, is a layer of apples perfumed by cinnamon and flavoured with dollops of tart apricot jam and a spattering of brown sugar. as it bakes, you'll want to grab it from the oven and eat it right away .... guaranteed or your money back! :)

not much more to say than simple, quick and delicious for this one. the recipe can be doubled also and baked in a larger pan.

oops, forgot to add — for a sephardi version of this cake, you can do as we did and use fresh figs, stems trimmed and cut in half, instead of the apples. you will probably need between 12 to 15 figs, depending on the size of them. add 1 tbsp orange flower water instead of the vanilla.


gâteau express aux pommes

makes approx 9 servings

ingredients:

1/2 c oil
1 egg
1 c sugar
juice of a large orange
1/8 tsp salt
1 tsp baking powder
1 c flour
1/2 tsp vanilla extract or seeds of 1/2 vanilla pod

5 large apples, appropriate kind for baking*
1 tsp cinnamon
2 1/2 tbsp brown sugar
2 tbsp apricot jam, slightly heaped**

*replace the apples with fresh figs, cut in half; enough to cover the bottom of the pyrex;
**you can use a sour cherry jam or a plum one.

method:

preheat your oven to 350F and grease your pyrex and set it aside.

place all the batter ingredients in a medium sized bowl.

stir or whisk the batter for about 45 seconds until it is blended.

make sure there are no lumps and set it aside to continue the recipe. it should be pourable.

take the apples and peel them. core and slice each apple thinly and place them in the pyrex.

dust about 1 tsp of cinnamon over the apples evenly.

place the brown sugar over the apples, distributing as you go, and then place dollops of the jam over the brown sugar.

stir the batter once more and pour it over the apples. make sure to get all the batter out of the bowl! you will see pieces of apple peaking through - that is how it is supposed to look.

bake the cake for 50 to 60 minutes until it is fully golden brown. as it bakes you should see little areas where the juices from the apples, the brown sugar and jam are bubbling through.

it can be served warm or at room temperature.

enjoy!


Thursday, September 25, 2008

the lighter & heavier side of the honey cake

in most jewish homes, especially ashkenazi, come rosh hashanah, tradition is to serve slices of honey cake to welcome the new year. this means there are a million and one recipes for this particular cake, with every family usually having that one special recipe that is baked year after year, a recipe which has been passed down over the generations. often however, people also try out a new recipe every year — in addition to what they traditionally make.

honey cake can be one of those things that people either love or hate, usually for one or two reasons. it's no secret that some can be as heavy as lead and dried out, usually the sign of a bad recipe or something having gone wrong along the way. i mean, really, who would want to eat that every year?!

honey cakes are traditionally a denser type of cake; in other words, they typically have some heft to them. this is mostly due to the ratio of ingredients and the method of baking. of course, there are different variations of the same theme which give rise to honey cakes of the lighter side. these are usually achieved by beating the eggs whites and incorporating them into the cake to make an airier texture.

another issue comes down to spices. not everyone is a spice lover, especially in cakes. children sometimes avoid eating honey cake, lamenting that "it's too spicy!". as a child, i have to admit, i didn't much like it either! invariably there is often an adult guest at rosh hashana who won't touch it either for that same reason.

so, to that end, i bring you the best of both worlds....

the first recipe in this post is for a honey cake which is amazingly good — in fact, excellent — one which involves zero spices, is incredibly light in texture and deep in flavour. the best part is that it honestly improves over the days you keep it. the top of the cake, once baked, is somewhat sticky and caramel-y tasting. the best thing though is how easily & fast it can be thrown together: it's called chiffon style for good reason. no beating of the egg whites with the benefit of a really light texture. the only caveat to the recipe is that you need a large loaf pan,
9 x 5 x 3 inches (don't use the smaller one or you'll have the cake overflow in the oven). since it needs to slowly bake and rise, the cake pan is not greased. you will therefore need to cut out a rectangle of parchment paper to fit the bottom of the pan. not following this step will result in you never being able to get the cake out of the pan. after all this said, it's really worth a try! believe it or not, without a single spice in it, it still tastes like a honey cake ;)

the second version — the antithesis of the first — is for that heftier type of cake. this one is equally as good but has spices and requires the egg whites to be beaten and incorporated. the pan, in this case, is greased. you can use a tube pan or a large bundt type one. the recipe makes a very large cake (for a crowd!) but it freezes well for the month of the upcoming holidays.

for several more honey cakes i've posted, look here. check this, too.

have a sweet new year!


chiffon style honey cake

makes 1 loaf (10 - 12 slices) - double the ingredients for a large cake but use a tube pan with removable insert or angelfood cake pan.

use: 23 x 13 x 8 cm [1.9 liters] - 9 x 5 x 3 inches loaf pan UNGREASED.

ingredients:

2 eggs
1/2 c brown sugar (packed) or reg white sugar
1/2 c oil
3/4 c honey
1/2 c strong coffee (or tea)

1 1/2 c flour
1 1/2 tsp baking powder
1/4 tsp baking soda
1/8 tsp salt

method:

if using a loaf pan (you need the standard large one), cut a piece of parchment paper to fit the bottom of the pan. DO NOT grease the pan -- very important.

if you're doubling the recipe, use an angelfood cake pan with a removable insert, you don't need the parchment paper AND don't grease the pan either).
do NOT use a bundt pan as it will not release from it.

preheat the over to 350 F.

mix dry ingredients together in a bowl and set aside.

beat eggs with sugar -- add the rest of the wet ingredients.

add the flour in 3 parts to the wet ingredients.

pour the batter into the pan and bake at 350F for 15 minutes. lower the oven to 300F and bake for about 1 more hour. test the cake with a toothpick -- it may need longer or you can raise the temp to 325F. to finish it. don't open the oven before 1 hour or it can fall.

* * * * * * *


rosh hashanah spiced honey cake

makes a LARGE cake (18 to 20 slices) - recipe can be halved

ingredients:

3 tbsp shortening*
2 tbsp vegetable oil
4 egg yolks, 4 egg whites
1 c brown sugar, packed
2 c honey
3 tbsp whiskey or brandy**
zest of 1 orange & its juice
3/4 c warm very strong coffee (or strong tea)
3 1/4 c flour
1 tsp baking powder
1 tsp baking soda
1/2 tsp salt
1/2 tsp each: cloves, allspice, cinnamon & ginger***

*can use (parve) margarine also
**you can omit this and replace with more coffee or o.j.
***or you can use 1 tsp cinnamon alone

method:

1. large bundt pan or angel food cake pan -->well greased and floured - preheat oven to 325 F.

2. mix all the dry ingredients together in a large bowl; do NOT include the brown sugar in it.

3. beat the egg whites until stiff.

4. blend all the wet ingredients together with the brown sugar in another bowl or mixer until well combined.

5. mix the wet mixture into the dry one until well blended.

6. carefully add the egg whites in several additions to the mixed batter to keep the volume.

7. put the cake batter in the cake pan and bake for about 1 hour or longer -- maybe ~ 1 hr 15 min. test it with a toothpick to make sure the center is cooked. don't open the oven before 50 minutes or so or it will fall.

8. remove from the oven and let cool for approximately 15 minutes. if you are using the angel food cake pan, do not turn the cake over to cool because it will fall out!

9. after initial cooling, remove and let cool completely.

enjoy!


Wednesday, September 24, 2008

move over, gefilte fish

maybe it's a jewish thing, but pickled salmon prepared in this manner — poached in a sweet and sour mixture with onions and pickling spices, then served cold — is extremely popular as an appetizer or alternative to the traditional gefilte fish. since not everyone is a gefilte fish lover, this is an alternative to the "same old, same old".

this version is very good since it doesn't require much work, especially if you get the fish already in fillets (i.e. skinned and boned). another very good thing about this is that it keeps well in the refrigerator and can be frozen, if prepared ahead of time. of course, if you're strict about following the customs about not cooking with lemon or vinegar on rosh hashanah, then skip this one for now.

seeing as i am running late with everything these days, pictures will follow shortly.


easy yomtov pickled salmon

enough for 10 people - recipe can be cut in half easily

ingredients:

4 lbs fillets of salmon, no skin or bones

1 3/4 c ketchup
3/4 c sugar
1 1/2 c lemon juice
1 1/2 c water

1 large onion
1 - 2 tbsp pickling spices*

method:

preheat the oven to 325 F.

wash salmon pieces and dry them with paper towel. cut them into individual serving pieces and set aside.

*you can add the pickling spices to the sauce wrapped in a cloth if you don't want them all over the place (as i prefer) or add them loosely later on in the recipe.

cut the onion in rings about 1/8" thick.

place sugar, lemon juice, ketchup and water in pot and bring it to boil. if using the pickling spices in a cloth, add them now. cook until sugar is dissolved. simmer the sauce for about 2 minutes.

in a large pyrex, place half the onion rings on the bottom.

place the salmon on top in one layer only. if using the pickling spices loose, then sprinkle them over the fish now.

pour the hot mixture over the salmon evenly.

place salmon in oven and cook about 20 minutes. don't cover the pyrex.

take the salmon out and place the remaining onion over the salmon.

let the salmon cool completely and cover well with tin foil. place in the fridge to marinate for at least 48 hours.

can be made ahead and frozen.

enjoy!

Monday, September 22, 2008

peach butter crust tarte

okay, i'm a bit late with this post. however, seeing as peach season is just behind us, there still must be a few still readily available at reasonable prices. i'm sure it can be made with drained canned peaches, too, if fresh ones aren't available or are prohibitively costly. better yet, use frozen sliced ones which are available at some supermarkets in the freezer section.

the filling for this tarte consists of nothing much more than peaches, some sugar and flour. that's it, besides a sprinkling of cinnamon and splash of amaretto or peach schnapps liqueur if you like. using the dough recipe in my previous post, the pastry can be made in the morning and refrigerated, with the rest of the recipe finished later on. the most tedious part, though very simple, is removing the skin from the peaches.

this tarte is, in my opinion, at its best once it's been refrigerated. the delay seems to improve the flavour and texture of this easy-to-make dessert.
hope you like it.....


peach butter crust tarte

serves 6 to 8

ingredients:

1 pastry recipe

6 to 8 good sized peaches, skinned & sliced thinly (see this post)
3 tbsp flour
8 tbsp sugar
1 - 1 1/2 tbsp amaretto or peach schnapps (optional)

cinnamon

crushed amaretti cookies, optional

method:

preheat your oven to 375F.

skin and slice your peaches (approx 1/4" thick). place them in a medium sized bowl.

add the sugar and flour to the peaches. add the amaretto or peach schnapps, if using.

stir well. they will look thickly coated at first.

wait 10 minutes or until you see the juices develop.

place the peaches carefully into the chilled pastry in the tarte pan.

place the tarte on a lined baking sheet in order to avoid any possible spillage during baking.

sprinkle with cinnamon if desired and crushed amaretti (almond) cookies.

bake for about 35 to 40 minutes or until the crust is golden brown.

remove from oven and let cool completely.

refrigerate and serve.


enjoy!

no roll pastry dough for tart(e)s

not everyone is so adept in the kitchen. a close friend of mine, for example, shouldn't be allowed into any kitchen let alone her own; she is simply a baking disaster. though she tries, pastry is not her forte. i've witnessed it and it's not pretty. while i try not to laugh, it's impossible. as she stares at me with this "what did i do wrong now" look on her face, i just roll my eyes and say, "move over, lemme do it {....again}. i then whisper in her ear, "next time buy it at the store and pretend you made it." she isn't amused and flings pastry dough at me that is stuck to her fingers like mortar.

this pastry is one even she can't screw up. let me rephrase that: yes, she can but it's much harder to do since all is done in a food processor and the dough is patted into the pastry and not rolled out. it's simple and fast and pretty much idiot proof provided you measure correctly, don't over process and FOLLOW DIRECTIONS {my friend always thinks she can do it "her way" LOL}.

one important thing about pastry dough - especially those for tart(e)s & pies. chilling your finished — rolled & fitted — pastry for a good 1/2 - 1 hr before baking usually retards the process of shrinkage once in the oven. just an extra tip....

no roll (butter) pastry dough

makes enough for 1 9-inch tart(e)

this can be made with the addition of ground almonds and almond extract or with vanilla beans and a bit of vanilla extract. adjust it according to your filling. the pastry can also be made without any flavourings at all. while it is made with butter, margarine can be used instead but it must be the kind which comes in blocks or rectangles and is solid.
ingredients:

1 1/4 c all purpose flour
1/4 c ground almonds or the beans on 1 vanilla pod*
1/3 c sugar
1/4 tsp salt
1/2 tsp almond extract or vanilla extract*
1/2 c butter or margarine (cold)
1 egg yolk

*optional — you can omit these items and make a plain crust.

method:

place the flour, ground almonds or vanilla beans if using, salt & sugar and extract in the food processor and pulse until blended. this can be done in a bowl, by hand, also if you don't have a processor.

add the butter which you have cut in small pieces. make sure it is still cold.

process by pulsing, or use a pastry cutter if doing it by hand, until it is incorporated and is sandy. don't overprocess.

add your yolk and pulse only until you get a ball of dough. do the same by hand but with a wooden spoon.

chill the dough for 15 minutes.

place the chilled dough in an ungreased tarte pan with a removable bottom.

press it in with your fingers and make sure to go up the sides of the tarte tin.

fill with the filling you like and bake at 375F. see here for an example.


Friday, September 19, 2008

sweet memories

growing up with my european parents often meant eating foods or dishes that you would never see on the tables of my canadian friends whose families were more or less north-americanized by at least 2 generations. i knew my friends thought we were weird from the faces they made when, on occasion, they would stay for supper. no, the food wasn't bad at all — it just wasn't the "meat and potatoes" they were used to. how embarrassed i was, thinking my friend was probably sorry s/he accepted the invitation and would never talk to me again ;) hamburgers and hotdogs didn't often grace our table. no, i got things like a green salad with escarole/frisée and arugula alongside this kind of sweet-sourish fresh apricot custardy tart .... and that wasn't part of dessert but rather what went with the salad for part of a summer meal. as i child, i just didn't appreciate it.

one thing my parents
, like many europeans, were big on when it came to baking was hazelnuts. with their very distinctive flavour, they showed up in many a thing from chocolate confections to cakes & breads/pastries and cookies.

hazelnuts, unless you buy them already skinned can be a real pain to prepare; i still have vivid memories of my mother roasting and then rubbing these little almost dried chickpea looking nuts with a tea towel -- sometimes pounds of them before the holidays -- to remove their dark brown papery skins. what work it was for something to be gobbled up in a fraction of the time it took to remove their outer coatings.

a while ago, i happened across a recipe for a cookie from one of my favourite {french} foodstylists-now-baker, florence edelmann, which is exactly the same as i remember eating on special occasions. they are sugary, crispy and full of hazelnut flavour. to be honest, all you need is just one or two of them to feel satisfied.

in the end, all i have to say is -- sugar fiends -- these are a definite "must try" if sweet things are up your alley & you like the taste of hazelnuts! not only are the following croquants aux noisettes terribly simple to make, they taste incredibly good, look like you spent a lot of money on them and store for a very long time without any deterioration to their texture or flavour. all this from very few ingredients!


croquants aux noisettes
sugary crispy hazelnut cookies

makes 18 cookies

ingredients:

1/2 c hazelnuts (whole) [70g]
6 tbsp flour [40 g]
1/2 c + 1/3 c minus 1 tbsp sugar [160 g]
1 pkg vanilla sugar - NOT vanilla extract
1 egg white

method:

preheat the oven to 400 F (200C) and line TWO baking sheet with parchment paper. you must use two sheets or bake one batch and then the next as the cookies need space on the baking sheet. they will spread out as they bake.

divide the hazelnuts equally. grind 1/4 c with 1 tbsp of the sugar until it is fine (i.e. almost powdery). be careful not to overprocess the nuts or they will become oily.


chop, by hand, the other 1/4 c. do not chop the nuts finely - you want a coarse texture.

place the nuts and sugars in a medium sized bowl.

stir to blend and add the egg white.

mix it until it is blended.

add the flour and stir to combine until you have a type of (sand-like) dough. don't overmix.

divide it into 18 equal portions.

using a tablespoon, place the cookie dough on the baking sheet - 9 per baking sheet, WELL spread out.

bake the cookies for 8 to 10 minutes - they should be lightly golden brown.

the undersides should be golden.

very important: let them cool several minutes on the baking sheet so they do not fall apart. they will be fragile at first but firm later. move them to a cooling rack after ~ 10 min.

these cookies stay crisp and store very well — umm, if you have any left later, that is!


enjoy!!
